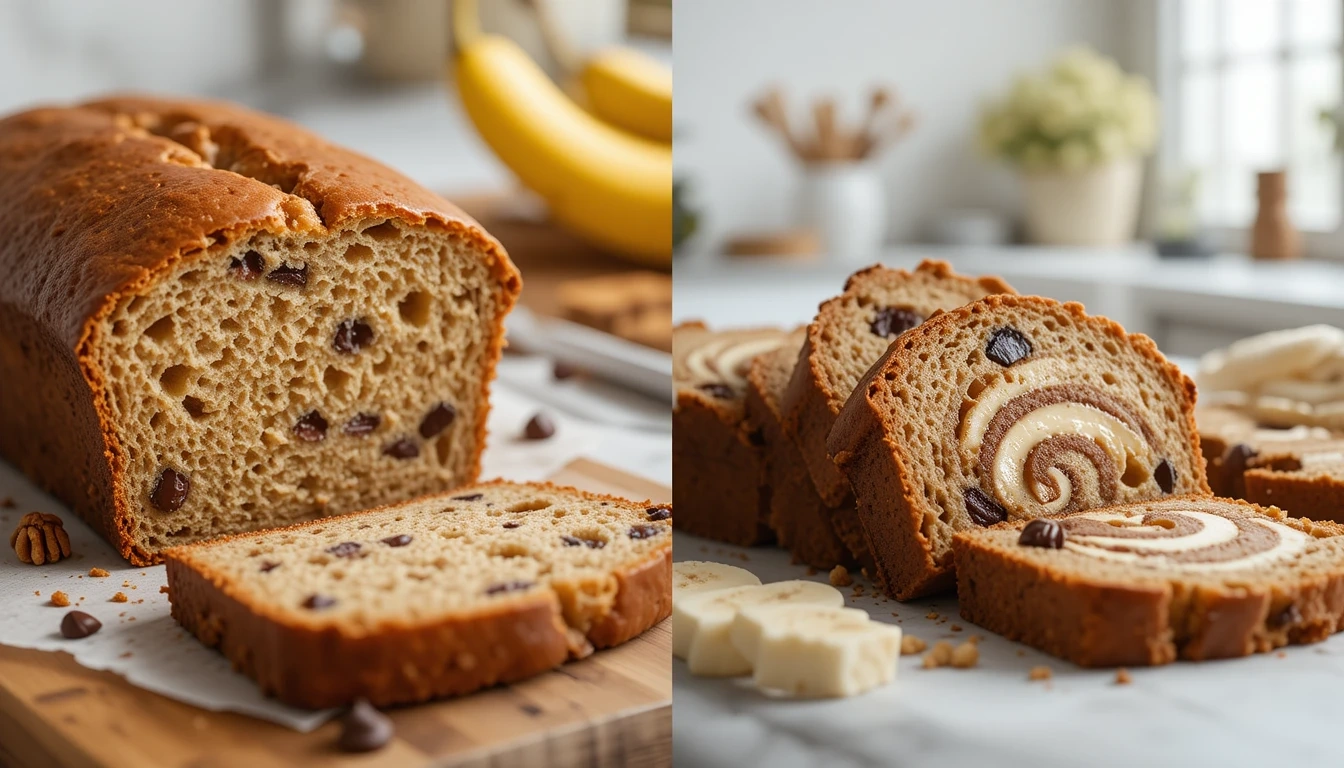
Who doesn’t love a warm, moist slice of banana bread fresh out of the oven? This banana bread recipe with 2 bananas is the perfect solution for those times when you’ve got a couple of ripe bananas sitting on your counter, just waiting to be turned into something delicious. It’s quick, easy, and requires simple ingredients you probably already have in your kitchen!
Whether you’re craving a sweet breakfast treat, a midday snack, or a cozy dessert, this small-batch banana bread hits the spot every time. Plus, it’s a great way to avoid food waste while whipping up something everyone will love. So, grab those overripe bananas, and let’s get baking!
Table of Contents
Why This 2-Banana Banana Bread Recipe is Perfect
This simple and delicious banana bread recipe is the perfect way to use up ripe bananas. It requires just two bananas, making it ideal for those times when you want a quick baking project without too many ingredients. Learn more about making banana bread with 2 bananas here!

Quick and Easy
This banana bread recipe with 2 bananas is as simple as it gets—perfect for beginner bakers or anyone short on time. With just a few basic steps, you can create a loaf that’s moist, flavorful, and totally satisfying. The best part? You don’t need fancy equipment or hard-to-find ingredients.
Here’s why it’s so quick and easy:
- Minimal Prep Time: Mashing two bananas, mixing a handful of pantry staples, and pouring the batter into a loaf pan takes just 10 minutes! It’s a hassle-free recipe that lets you spend more time enjoying the results.
- No Mixer Required: All you need is a mixing bowl, a whisk, and a spatula to combine the ingredients. No need to dig out that heavy stand mixer or struggle with complex gadgets.
- Fewer Ingredients: By using only two bananas, this recipe keeps things simple and light while still delivering rich flavor. It’s perfect for those days when you don’t have a big bunch of bananas but still want to bake.
Small Batch Recipe
This banana bread recipe with 2 bananas is perfect for those moments when you want a smaller portion without the fuss of scaling down a larger recipe. Whether you’re baking for yourself, a small family, or just don’t want leftovers lingering around, this recipe fits the bill perfectly.
Here’s why a small-batch recipe is a game-changer:
- Perfect for Two or Three People: With just two bananas, this recipe makes a loaf that’s just the right size for a few servings—enough to enjoy without feeling overwhelmed by leftovers. It’s ideal for a cozy breakfast, a midday snack, or a light dessert after dinner.
- Great for Reducing Waste: If you’ve only got two ripe bananas sitting on your counter, there’s no need to wait for more to overripe or throw them away. This recipe ensures those bananas get put to good use in a delicious and practical way.
- Smaller Baking Commitment: Baking a smaller loaf means less time in the kitchen and less cleanup afterward. It’s quick, efficient, and lets you satisfy your banana bread cravings without the extra work.
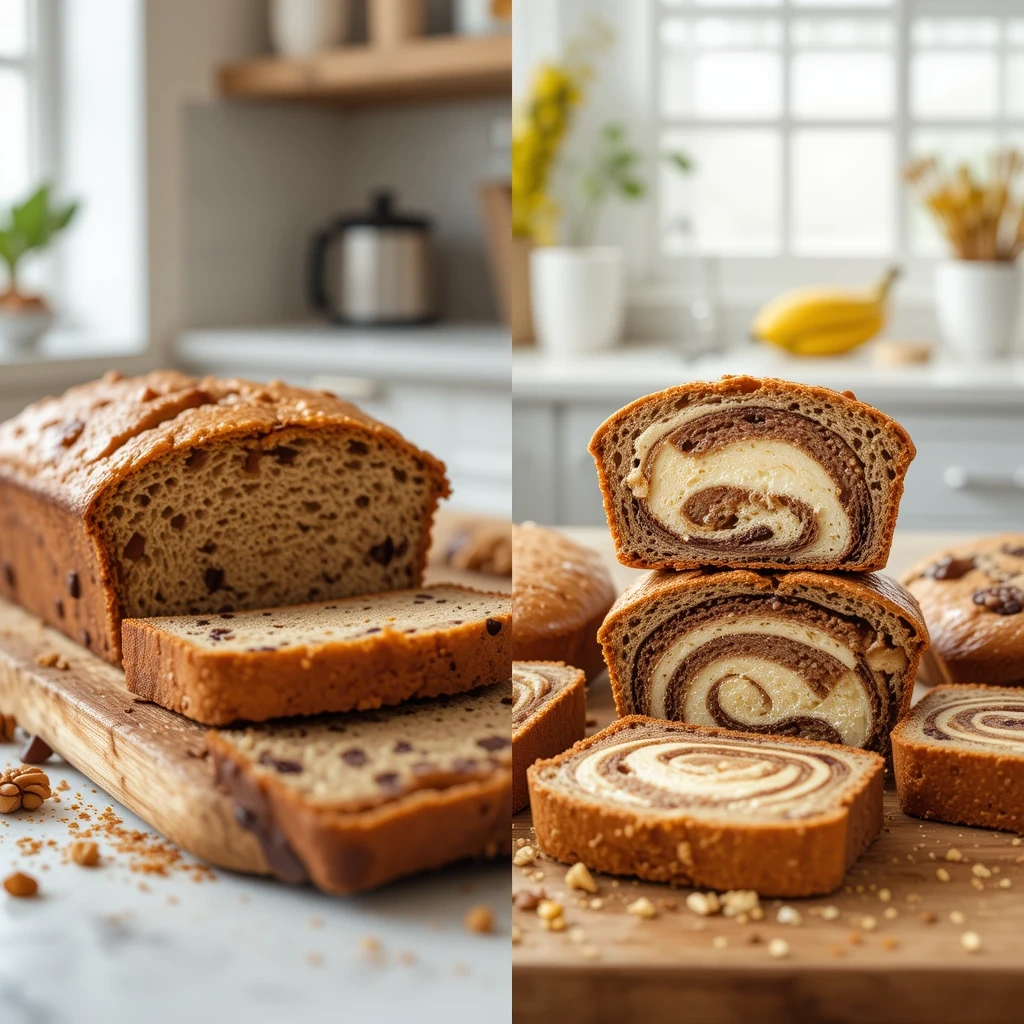
- Customizable Add-Ins: Because the loaf is smaller, it’s easy to experiment with flavors without wasting ingredients. Try dividing the batter and adding chocolate chips to one half and nuts to the other for a fun twist!
This small-batch banana bread recipe is also great for testing out baking techniques or tweaking flavors without the pressure of making a large loaf. It’s the perfect solution for single households, couples, or anyone who loves fresh banana bread without a lot of extras!
Moist and Delicious
The magic of this banana bread recipe with 2 bananas lies in its soft, moist texture and irresistible flavor. There’s nothing worse than a dry banana bread, and this recipe ensures every slice is tender and full of flavor, thanks to the perfect balance of ingredients.
Here’s why this banana bread turns out so moist and delicious every time:
- Ripe Bananas Are the Star: Using two ripe or overripe bananas is key to achieving that natural sweetness and rich banana flavor. The extra moisture from the bananas seeps into every bite, keeping the bread moist without being overly dense.
- The Perfect Ratio of Ingredients: This recipe combines just the right amounts of butter (or oil) and eggs to create a soft, luscious crumb. No dry edges or overly heavy texture here—just light, moist perfection!
- A Touch of Vanilla: Adding vanilla extract enhances the natural sweetness of the bananas while bringing a warm, comforting aroma to the bread. It’s the kind of flavor that makes you want to go back for seconds.
- Flexible Add-Ins for Extra Texture: You can easily elevate the moisture and flavor by folding in ingredients like chocolate chips, shredded coconut, or chopped nuts. These add-ins complement the soft texture while making every bite exciting.
Every slice of this banana bread is like a warm hug—soft, flavorful, and just sweet enough to make your taste buds dance. Pair it with a pat of butter, cream cheese, or even a drizzle of honey for an extra indulgent treat. Whether fresh out of the oven or enjoyed the next day, this banana bread stays deliciously moist and satisfying!
Ingredients You’ll Need for 2-Banana Banana Bread
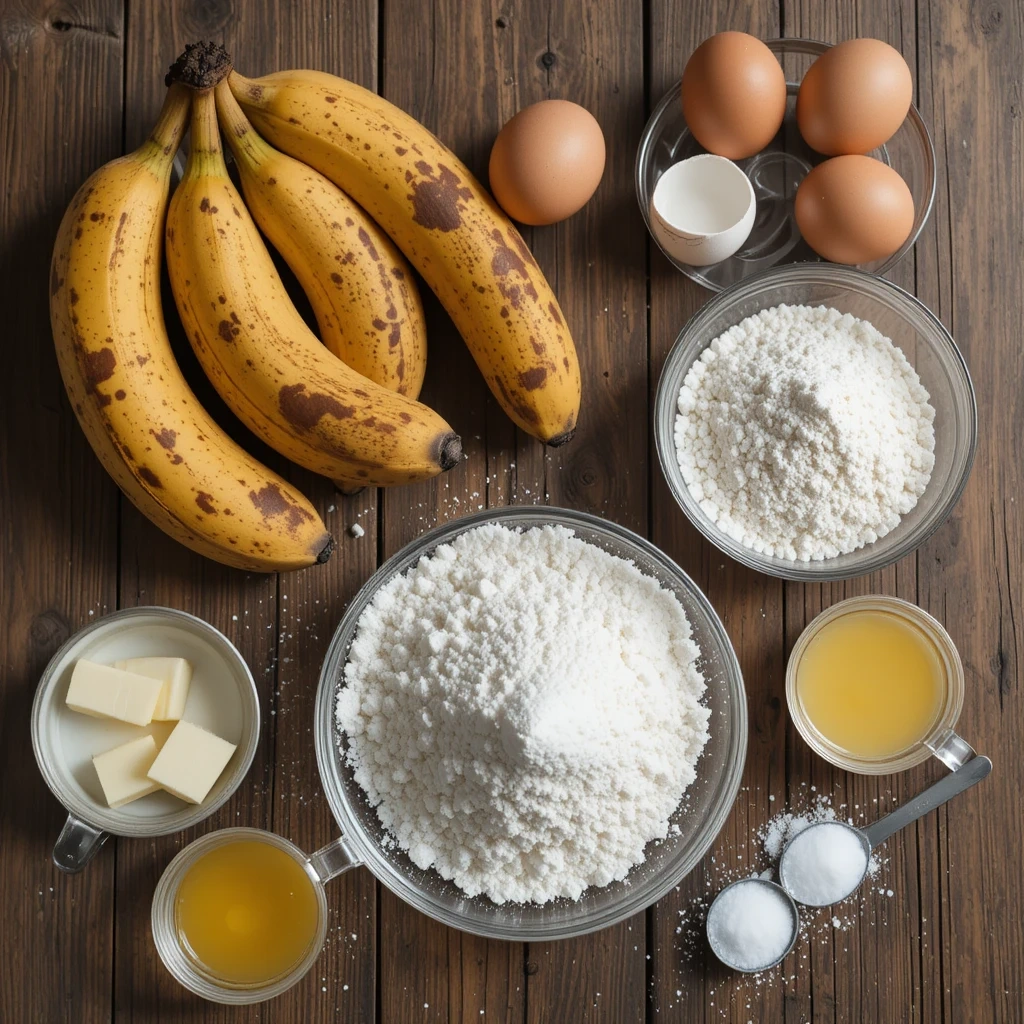
To make this easy banana bread, you’ll only need a few basic ingredients. Grab your ripe bananas and the rest of these simple pantry staples to get started. Find more about banana bread ingredients and tips here!

Main Ingredients
The beauty of this banana bread recipe with 2 bananas lies in its simplicity. You only need a handful of common ingredients to create a flavorful, moist, and satisfying loaf. Let’s take a closer look at the star players of this recipe and how each contributes to its deliciousness:
- Ripe Bananas (2):
The foundation of this recipe! Using two ripe or overripe bananas is essential for flavor and texture. Overripe bananas are naturally sweeter and softer, making them easy to mash and mix into the batter. They’re also the key to that rich banana flavor you love in every bite. - Flour (All-Purpose):
The structure of your banana bread comes from flour. All-purpose flour works best here, striking the perfect balance between a tender crumb and a sturdy loaf. If you’re looking for a healthier twist, you can substitute part of it with whole wheat flour. - Sugar:
Granulated sugar adds sweetness and helps create that beautiful golden-brown crust. If you prefer a deeper flavor, you can use brown sugar or a mix of both. Want a healthier option? Swap it with honey, maple syrup, or a natural sugar substitute. - Butter or Oil:
Melted butter or oil adds richness and moisture to the bread. Butter gives it a slightly richer flavor, while oil keeps it ultra-moist and soft. Both options work beautifully, so feel free to use what you have on hand. - Egg:
The egg acts as a binder and provides structure to the bread. It helps create that soft, fluffy texture while adding a bit of richness. If you’re looking for an egg-free version, you can substitute it with a flax egg or applesauce. - Baking Soda:
This simple leavening agent helps the bread rise beautifully in the oven. It creates those delightful air pockets that give the bread its light, tender crumb. Make sure your baking soda is fresh for the best results. - Vanilla Extract:
Just a teaspoon of vanilla extract goes a long way in enhancing the flavor of the bananas and adding warmth to the overall taste. - Optional Add-Ins:
While the core ingredients create a delicious loaf on their own, you can get creative with extras like chocolate chips, chopped nuts, shredded coconut, or even a dash of cinnamon. These add-ins elevate the flavor and make the recipe your own.
Optional Add-Ins
One of the best things about this banana bread recipe with 2 bananas is how versatile it is. While the basic recipe is delicious on its own, adding a few extra ingredients can take your loaf to the next level. These optional add-ins allow you to customize the bread to suit your tastes or use up ingredients you already have in your pantry. Here are some creative and flavorful ideas to inspire you:
Chocolate Chips
- Why Add Them: Chocolate chips are a classic addition that transforms a simple banana bread into a decadent treat. The melty pockets of chocolate add bursts of sweetness that pair perfectly with the banana flavor.
- How to Use Them: Stir in about ½ to ¾ cup of semisweet, dark, or milk chocolate chips into the batter before baking. For extra flair, sprinkle a handful on top before putting the loaf in the oven.
Nuts
- Why Add Them: Chopped nuts like walnuts, pecans, or almonds add a delightful crunch to every bite, balancing the soft, moist texture of the bread. They also bring a subtle nutty flavor that complements the bananas.
- How to Use Them: Fold in ½ cup of your favorite nuts. You can toast them lightly beforehand for even more flavor.
Cinnamon or Spices
- Why Add Them: A dash of cinnamon, nutmeg, or pumpkin spice mix adds warmth and depth to the banana bread, making it even more comforting and aromatic.
- How to Use Them: Mix 1 teaspoon of cinnamon or a combination of your favorite spices into the dry ingredients before combining with the wet ingredients.
Shredded Coconut
- Why Add It: Shredded coconut introduces a tropical twist to the bread, adding subtle sweetness and a chewy texture.
- How to Use It: Stir in ½ cup of sweetened or unsweetened shredded coconut. You can also sprinkle some on top for a toasty finish.
Dried Fruits
- Why Add Them: Dried fruits like raisins, cranberries, or chopped dates add natural sweetness and bursts of flavor, making the bread even more dynamic.
- How to Use Them: Add ½ cup of your favorite dried fruit to the batter. Soak them in warm water for a few minutes beforehand to make them softer and plumper.
Seeds
- Why Add Them: Chia seeds, flaxseeds, or sunflower seeds add a slight crunch and nutritional boost to your banana bread. They’re perfect for those who like their baked goods on the healthier side.
- How to Use Them: Mix in 1–2 tablespoons of your chosen seeds, or sprinkle some on top of the loaf for added texture.
Citrus Zest
- Why Add It: Lemon or orange zest provides a refreshing, zesty flavor that contrasts beautifully with the sweetness of the bananas.
- How to Use It: Add 1–2 teaspoons of finely grated zest to the wet ingredients for a bright, citrusy aroma.
Swirls and Toppings
- Peanut Butter or Nutella Swirls: Swirl a few tablespoons of peanut butter or Nutella into the batter for a marbled effect.
- Crumble Topping: Combine butter, sugar, flour, and cinnamon to create a crumble topping for extra texture and sweetness.
Kitchen Tools
Making this banana bread recipe with 2 bananas is as simple as it gets, and part of the charm lies in how few tools you need. With just a handful of kitchen essentials, you’ll have everything ready to whip up a moist and delicious loaf. Here’s a breakdown of the tools you’ll need and why they’re essential:
Mixing Bowl
- Why It’s Important: A medium to large mixing bowl is where all the magic happens. This is where you’ll combine your wet and dry ingredients, so having enough room to work without making a mess is key.
- Pro Tip: Choose a bowl with a non-slip base to keep it steady while you mix, or place a damp towel underneath for stability.
Whisk or Fork
- Why It’s Important: You’ll use a whisk or fork to mash the bananas and mix the wet ingredients. It’s quick, easy, and eliminates the need for fancy gadgets like electric mixers.
- Pro Tip: For perfectly mashed bananas, use the back of a fork and press firmly against the bowl until smooth.
Spatula or Wooden Spoon
- Why It’s Important: A spatula or wooden spoon is ideal for folding the wet and dry ingredients together without overmixing the batter. Overmixing can lead to dense bread, so this tool ensures a light, fluffy texture.
- Pro Tip: Use a silicone spatula to scrape every last bit of batter from the bowl. No waste here!
Measuring Cups and Spoons
- Why They’re Important: Accurate measurements are crucial in baking, and these tools ensure you get the right balance of ingredients. From flour to sugar and vanilla extract, you’ll need them all!
- Pro Tip: Use dry measuring cups for solid ingredients (like flour) and a liquid measuring cup for liquids (like melted butter or oil).
Loaf Pan
- Why It’s Important: The loaf pan is the heart of your banana bread. A standard 8×4-inch or 9×5-inch loaf pan works perfectly for this small-batch recipe, giving you a beautifully shaped loaf.
- Pro Tip: Grease the pan thoroughly with butter or non-stick spray, and line it with parchment paper for easy removal and less cleanup.
Baking Sheet (Optional)
- Why It’s Helpful: If you’re worried about spills or want to ensure even heat distribution, place the loaf pan on a baking sheet before putting it in the oven. It’s a handy trick for stress-free baking.
Cooling Rack
- Why It’s Important: Once your banana bread is baked, a cooling rack is essential for allowing air to circulate around the loaf, preventing the bottom from becoming soggy. It also helps the bread cool faster so you can dig in sooner!
- Pro Tip: Let the bread cool in the pan for 10–15 minutes before transferring it to the cooling rack to avoid breaking it.
Knife or Bread Slicer
- Why It’s Important: For clean, even slices, a sharp knife or bread slicer is a must. A serrated knife works best to cut through the soft bread without squishing it.
- Pro Tip: Wait until the bread has cooled completely before slicing to avoid crumbling.
Step-by-Step Instructions to Make Banana Bread

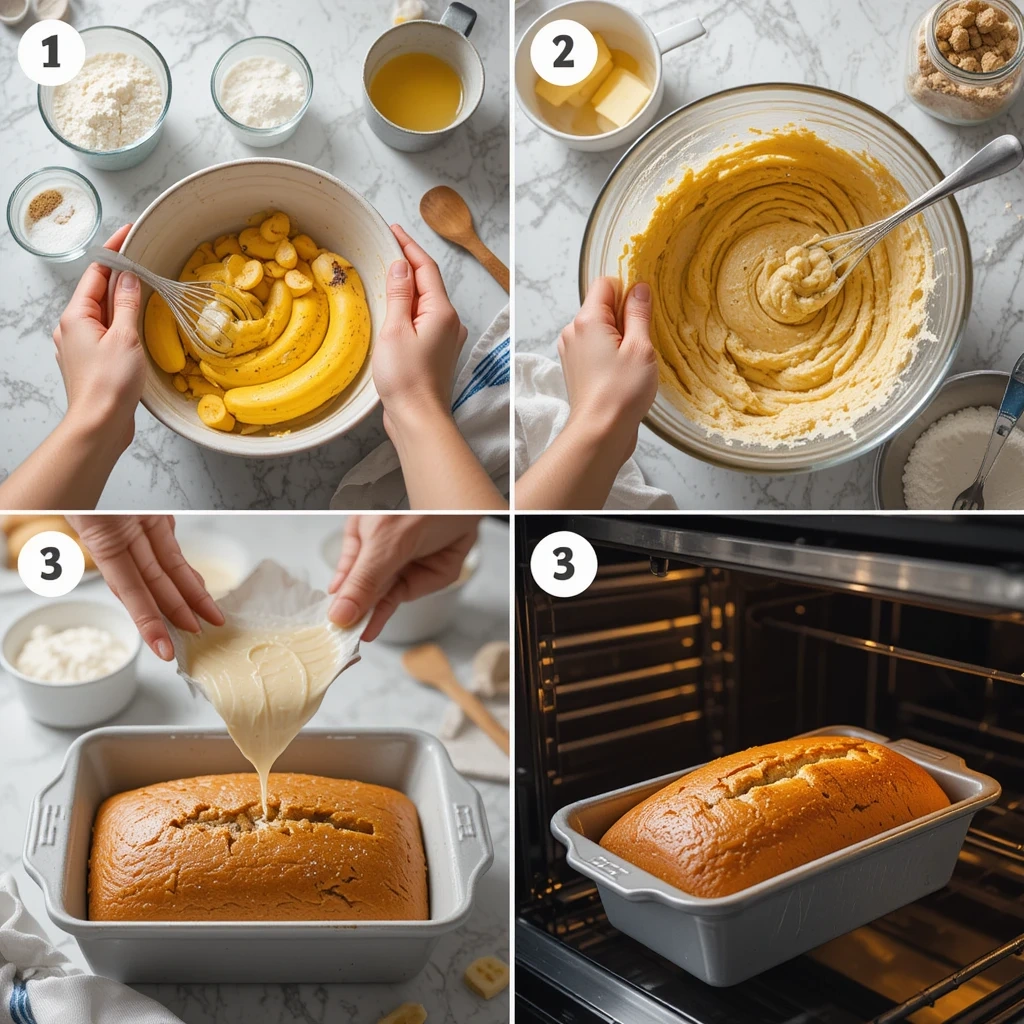
Follow these simple steps to make the perfect banana bread with just two bananas. Each step is easy to follow and guarantees a moist, delicious result. Get more banana bread baking tips here!
Prepare Your Ingredients and Tools
Before you dive into mixing, baking, and enjoying your banana bread recipe with 2 bananas, it’s important to set yourself up for success by preparing your ingredients and tools. Taking a few extra minutes to gather everything you need will streamline the process, ensure you have everything at hand, and make the baking experience more enjoyable. Here’s how to get everything ready before you start:
1. Gather All Ingredients
Start by collecting all the ingredients for the recipe. This will save you from scrambling around the kitchen later and allow you to focus on the fun part—baking! Check your pantry for the following essentials:
- 2 ripe bananas (for optimal flavor and moisture)
- 1 cup of all-purpose flour
- ½ cup of sugar (adjust for sweetness preference)
- ¼ cup of butter (melted) or ¼ cup of oil
- 1 egg
- 1 tsp of vanilla extract
- 1 tsp of baking soda
If you plan on adding any optional ingredients (chocolate chips, nuts, etc.), now’s the time to gather those as well. It’s also a good idea to measure out everything ahead of time using measuring cups and spoons. This “mise en place” technique (everything in its place) makes the process faster and more efficient.
2. Prepare Your Baking Pan
Next, prep your loaf pan to ensure your banana bread slides out easily once it’s done baking. Here’s how to do it:
- Grease the pan: Use butter, oil, or non-stick spray to coat the inside of the loaf pan. This prevents the bread from sticking to the sides.
- Line with parchment paper: For an extra layer of convenience, line the pan with parchment paper. Leave some overhang on the sides so you can easily lift the banana bread out after baking. If you don’t have parchment paper, greasing the pan will still work fine.
3. Preheat the Oven
To ensure your banana bread bakes evenly, preheat your oven to 350°F (175°C). It’s important to get the oven to the right temperature before you start mixing your ingredients so that the bread begins baking right away. Preheating helps create a consistent environment for your banana bread to rise and bake perfectly.
4. Prepare Your Mixing Tools
Now that your ingredients and pan are ready, prepare your mixing tools:
- Mixing bowl: Use a medium or large mixing bowl to combine your ingredients. Make sure it’s big enough to comfortably stir everything together.
- Whisk or fork: You’ll use a whisk or fork to mash the bananas and blend the wet ingredients. A whisk will also help incorporate the baking soda and dry ingredients evenly.
- Spatula or wooden spoon: A spatula or wooden spoon will be necessary to fold the wet and dry ingredients together. Avoid using a hand mixer or stand mixer as this can overwork the batter and lead to a dense loaf.
5. Measure Your Ingredients
While you wait for the oven to preheat, measure your ingredients carefully. Baking is all about precision, and using the correct measurements helps guarantee a consistent outcome every time.
- For dry ingredients (like flour, baking soda, and sugar), use dry measuring cups and level them off with a knife to avoid adding too much.
- For wet ingredients (like melted butter or oil), use a liquid measuring cup for accurate amounts.
6. Peel and Mash the Bananas
Now, it’s time to prepare the bananas. Peel the two ripe bananas and place them in your mixing bowl. Use a fork to mash them until smooth, with just a few small chunks remaining for texture. The riper the bananas, the easier they are to mash, and the sweeter they’ll be, adding to the overall flavor of the bread. If you like, you can even use a potato masher for a smoother consistency.
Mix Wet and Dry Ingredients Separately
One key to achieving perfectly textured banana bread is the technique of mixing wet and dry ingredients separately before combining them. This step might seem like an extra effort, but it’s essential for achieving a light, fluffy loaf and ensuring that all the ingredients are well incorporated. Here’s how to do it and why it’s important:
Why Separate the Wet and Dry Ingredients?
Mixing wet and dry ingredients separately serves a couple of crucial purposes in baking:
- Even Distribution: By mixing each set of ingredients separately, you ensure that all the dry ingredients (like flour, baking soda, and sugar) are well combined without clumps. Similarly, combining all the wet ingredients together allows for even incorporation of the mashed bananas, egg, melted butter, and vanilla. This guarantees a smooth batter with consistent flavor and texture.
- Prevent Overmixing: Overmixing your banana bread batter can cause the gluten in the flour to develop too much, resulting in a dense, chewy loaf. Mixing dry ingredients separately and then gently folding them into the wet ingredients minimizes the risk of overworking the batter, giving your bread a light, airy crumb.
How to Mix Wet Ingredients
Start by gathering all your wet ingredients: mashed bananas, egg, melted butter (or oil), and vanilla extract. These are typically liquid or semi-liquid ingredients that need to blend together to form a uniform base for your banana bread.
- Mash the Bananas: Begin by mashing your two ripe bananas with a fork or potato masher until they’re smooth, but don’t worry about getting them perfectly smooth—some small chunks add texture and flavor to the bread.
- Combine Wet Ingredients: In a separate bowl, beat the egg and then add it to the mashed bananas along with the melted butter (or oil) and vanilla extract. Stir everything together until the mixture is well combined and smooth.
How to Mix Dry Ingredients
Next, gather your dry ingredients: flour, sugar, baking soda, and any spices (like cinnamon or nutmeg) or optional ingredients (like salt). Mixing these together before adding them to the wet ingredients ensures that all the dry components are evenly distributed, preventing clumping.
- Sift or Whisk Dry Ingredients: If you’re using flour or spices, it’s a good idea to sift them to avoid lumps. Alternatively, you can whisk the dry ingredients together in a bowl to combine them thoroughly. This will help the baking soda or any other leavening agents to evenly spread throughout the batter.
- Double-Check for Clumps: Be sure to break up any clumps of flour or sugar by gently whisking until everything is well incorporated. You want a smooth, uniform dry mix before adding it to the wet ingredients.
Why This Step is Key to a Perfect Loaf
By separating the wet and dry ingredients, you’re essentially allowing the different components to blend more evenly when they come together, reducing the risk of overmixing. It gives you better control over the texture of the batter, which results in a light, fluffy loaf with the perfect crumb. It also ensures that the flavor from the bananas, butter, and vanilla extract is evenly distributed without any dry patches of flour.
When you’re ready, gently fold the dry ingredients into the wet ingredients, stirring just enough to combine everything. Don’t overmix! A few lumps are fine; the goal is to keep the batter light and airy.
Bake to Perfection
Baking your banana bread recipe with 2 bananas to perfection involves more than just setting the oven temperature and waiting for the timer to go off. There are several key factors to ensure that your banana bread comes out perfectly moist, fluffy, and golden-brown every time. Here’s a detailed look at the process and what to watch for when baking to perfection:
1. Preheat the Oven
One of the most important steps in any baking recipe is ensuring your oven is fully preheated. For this banana bread, the ideal temperature is 350°F (175°C). Preheating ensures that the bread begins cooking as soon as it goes in, which promotes even rising and cooking throughout the loaf.
- Tip: Make sure your oven has fully reached the desired temperature before placing the pan inside. An oven thermometer is a great tool to confirm that your oven is calibrated correctly, as many home ovens can run slightly hotter or cooler than the setting indicates.
2. Position the Rack
The best position for baking banana bread is in the center of the oven. This ensures even heat distribution and prevents over-browning on the top or bottom. Avoid placing your loaf too close to the top or bottom heating elements, as this can result in uneven baking.
- Tip: If your oven has hot spots (areas that heat up more intensely than others), you might want to rotate the pan halfway through the baking process for even results.
3. Bake Time
Banana bread typically takes 50 to 60 minutes to bake, depending on your oven, pan size, and the moisture level of the bananas you used. However, rather than relying solely on the clock, it’s important to watch for visual and tactile cues that indicate the bread is done.
- Visual Check: The top of the banana bread should be golden-brown and slightly cracked. If it’s too pale, it may need a little more time to bake.
- Tactile Check: Lightly press down on the top of the bread. If it springs back without leaving an indentation, it’s a sign that the bread is baked through.
- Toothpick Test: To be sure the banana bread is fully cooked, insert a toothpick or cake tester into the center of the loaf. If it comes out clean or with just a few moist crumbs, the bread is ready. If the toothpick comes out with wet batter, return the bread to the oven and continue baking for an additional 5-10 minutes.
4. Avoid Overbaking
While it might be tempting to leave your banana bread in the oven for longer to ensure it’s fully cooked, overbaking can lead to dry bread. Banana bread should be moist and tender, and overbaking will cause it to lose that desired texture.
- Tip: If you notice the top of the bread is browning too quickly while the inside is still not fully baked, you can cover the top loosely with aluminum foil. This will prevent further browning while allowing the bread to finish cooking in the center.
5. Let It Cool
Once your banana bread has finished baking and passed the toothpick test, it’s important to let it cool before slicing. Cooling the bread in the pan for 10–15 minutes allows it to firm up, making it easier to remove from the pan without falling apart.
- Tip: After removing the bread from the oven, place the loaf on a cooling rack to prevent the bottom from becoming soggy. This will allow air to circulate around the loaf and keep the texture intact.
6. Resist the Urge to Slice Too Soon
While it’s tempting to dig into that fresh, warm loaf of banana bread right away, it’s best to let it cool a bit longer before slicing. If you cut into it while it’s still too warm, it may be a little too soft and could crumble or lose its structure. Let it rest for about 30 minutes or so for the best results.
- Tip: If you want to speed up the cooling process, you can slice a small portion of the bread to taste while leaving the rest to cool. Just be sure not to slice the entire loaf too early!
Baking Tip for Perfection:
Banana bread is forgiving, but small adjustments can elevate it to bakery-quality perfection. If you feel like the bread could use an extra boost of flavor, sprinkle a few chocolate chips, walnuts, or cinnamon on top of the batter just before baking. These add-ins will not only enhance the flavor but also make the loaf visually appealing.
Tips for the Best Banana Bread with 2 Bananas
Use Overripe Bananas
When making banana bread, one of the best-kept secrets for achieving a moist, flavorful loaf is using overripe bananas. While perfectly ripe bananas are great for snacking or making smoothies, overripe bananas are your secret weapon for banana bread. Here’s why overripe bananas are crucial for the best banana bread and how to get the most out of them:

Why Overripe Bananas?
As bananas ripen, the starch in the fruit gradually breaks down into sugars, making them sweeter and more flavorful. Overripe bananas are the ideal choice for banana bread because:
- Enhanced Flavor: The longer bananas ripen, the more their flavor deepens and intensifies. Overripe bananas have a natural sweetness that infuses your banana bread with a rich, satisfying flavor. Using under-ripe bananas might result in a bread that’s not as sweet or flavorful.
- More Moisture: Overripe bananas release more moisture, which helps create a soft and moist texture in the bread. This is especially important for banana bread, which can sometimes turn out dry if the bananas aren’t ripe enough to add that extra moisture.
- Easier Mashing: As bananas ripen, they soften significantly, making them much easier to mash. This creates a smoother, lump-free batter that is easier to mix and results in a more consistent loaf. Plus, the natural sugars in overripe bananas blend into the batter effortlessly, ensuring even sweetness throughout.
How to Tell if a Banana is Overripe
You might wonder how to tell when bananas have ripened enough for banana bread. Here are the key signs to look for:
- Color: The peel should be dark yellow with some brown spots, or even completely brown or black. The darker the peel, the riper and sweeter the banana is.
- Softness: Overripe bananas will be soft to the touch, and you may notice they have started to get mushy or squishy inside.
- Smell: Overripe bananas will have a strong, sweet, and slightly fermented aroma. If you detect this scent, it’s likely a good time to bake!
- Taste: You can always peel and taste a banana if you’re unsure. If it’s sweet, soft, and mushy, it’s ripe enough for banana bread!
How to Use Overripe Bananas in Banana Bread
Once you’ve selected your overripe bananas, here’s how to incorporate them into your banana bread:
- Peel and Mash: Peel the bananas and place them in a large mixing bowl. Use a fork, potato masher, or even a hand mixer to mash the bananas. You can leave a few small chunks for texture, but aim for a mostly smooth consistency to ensure a uniform batter.
- No Need to Add Extra Sugar: Since overripe bananas are naturally sweeter, you may find you don’t need to add as much sugar to your recipe. You can reduce the amount of sugar slightly, adjusting to your taste preference.
- Add to Wet Ingredients: Add the mashed bananas to the wet ingredients of your banana bread recipe (eggs, melted butter/oil, vanilla extract) and stir until well combined.
How to Speed Up the Ripening Process
If you don’t have overripe bananas on hand, don’t worry! You can speed up the ripening process using these methods:
- Paper Bag Method: Place your bananas in a brown paper bag and fold the top to close it. The bag traps ethylene gas, which speeds up ripening. Depending on how green the bananas are, they could ripen in 1-2 days.
- Oven Method: If you need ripe bananas quickly, you can place unpeeled bananas on a baking sheet and bake them in the oven at 300°F (150°C) for 15-20 minutes. The peel will turn black, but the bananas inside will become soft, sweet, and ready for your banana bread. Just let them cool before using them in the recipe.
The Key to Soft, Moist Banana Bread
Using overripe bananas is a game changer when it comes to achieving that moist and tender texture in your banana bread. Not only do they add sweetness and flavor, but they also provide the moisture needed for a perfect loaf. The bananas break down into a liquid form, which hydrates the flour and other ingredients, preventing the bread from turning dry or crumbly.
- Tip: If you’ve ever made banana bread with underripe bananas, you might have noticed that the loaf can sometimes come out dry or dense. This is why overripe bananas are a must—don’t settle for bananas that are just ripe enough for eating as a snack; go for the darkest, softest ones you can find!
Don’t Overmix
One of the most important tips for making a perfectly light and fluffy banana bread is to avoid overmixing your batter. It might seem harmless to keep stirring the mixture until it’s perfectly smooth, but overmixing can lead to undesirable results, such as dense or tough banana bread. Here’s why you should be mindful of this step and how to avoid overmixing:
Why Overmixing Is a Problem
When you mix the wet and dry ingredients, you’re activating the gluten in the flour. Gluten is a protein that gives bread its structure and texture, but too much gluten development can make your bread tough and chewy, instead of light and airy.
- Overdeveloped Gluten: Overmixing causes more gluten strands to form, which results in a denser and chewier loaf. This is why banana bread, which should have a soft, moist crumb, can end up heavy and dense if you mix the batter too much.
- Air Incorporation: When you mix ingredients, air gets incorporated into the batter, which helps the bread rise. However, overmixing causes the batter to become too thick and can lead to a flat loaf because you’re forcing out too much air from the batter.
- Uneven Texture: Overmixing can lead to uneven distribution of the ingredients. You might end up with patches of flour in some areas or overdeveloped banana chunks in others, resulting in an inconsistent texture throughout your bread.
How to Avoid Overmixing
To avoid overmixing and create a light, fluffy banana bread, here are some important tips:
- Mix Wet and Dry Ingredients Separately: As mentioned earlier, mixing wet and dry ingredients separately is crucial. By combining them separately first, you only need to mix them gently together at the end, reducing the risk of overmixing.
- Fold, Don’t Stir: When you combine the wet and dry ingredients, use a folding technique instead of vigorous stirring. To fold, simply cut through the batter with a spatula, scrape around the sides of the bowl, and gently lift and fold the ingredients over themselves. Repeat this motion until everything is just combined. This method minimizes the agitation of the batter, which prevents excessive gluten formation.
- Stop When Combined: The moment the wet and dry ingredients are incorporated, stop mixing! You’ll likely still see a few lumps in the batter—that’s perfectly fine! A few lumps won’t affect the texture of the bread, but overmixing will.
- Use a Light Touch: When mixing, be gentle and avoid the temptation to stir aggressively. This is especially important when incorporating ingredients like mashed bananas, which should remain slightly chunky to create a nice texture in the final loaf.
How to Recognize Overmixing
Sometimes, it’s hard to know when you’ve overmixed, especially if you’re not familiar with the process. Here’s how to recognize if you’ve mixed too much:
- Thick, Sticky Batter: Overmixed batter will often appear thicker and stickier, making it harder to stir.
- Dense Texture: If the batter is very smooth and almost dough-like, it’s a sign that you’ve mixed it too much. The batter should have a slightly lumpy and pourable consistency.
- Air Bubbles Escape: If you notice that the batter is starting to deflate as you mix, it’s another indicator of overmixing. You’ll want to keep the air in the batter to create a light texture, so stop mixing once everything is incorporated.
The Benefits of Not Overmixing
By taking care not to overmix, you allow the natural textures of the ingredients to shine through in your banana bread. The end result will be:
- A Light, Fluffy Loaf: Without too much gluten development, your banana bread will rise properly and have a soft, airy crumb, making each bite melt in your mouth.
- Even Texture: Folding gently ensures that the bananas, sugar, and flour are evenly distributed without affecting the overall texture of the loaf.
- Moist and Tender: Overmixing can cause banana bread to dry out, but by avoiding overmixing, you lock in moisture, leading to a soft, tender loaf that’s perfect for breakfast, a snack, or dessert.
A Little Lumps Are Okay!
In the case of banana bread, a few lumps are actually a good thing! A perfectly smooth batter isn’t necessary or even desirable. The slight lumps of mashed banana add texture and keep the bread from becoming too dense. It’s better to have a few lumps than a dense, chewy loaf!
Test for Doneness
Testing your banana bread for doneness is one of the most critical steps to ensure you don’t end up with a soggy or overbaked loaf. Baking times can vary depending on the size and type of pan used, the oven temperature, and even the moisture content of your bananas. To avoid any surprises, it’s essential to test your banana bread properly to ensure it’s fully baked through. Here’s how to do it, and why it’s important:
Why Testing for Doneness Is Crucial
If you don’t test for doneness, you run the risk of ending up with banana bread that is either:
- Undercooked: If the inside is still raw or gooey, the bread won’t have the ideal texture, and the bananas might be underdone, which can make the bread soggy or unappetizing.
- Overcooked: On the flip side, if the bread is left in the oven too long, it can become dry, crumbly, and lose its moist texture. Overbaking also darkens the crust more than necessary and may affect the flavor.
To get that perfect, golden-brown exterior with a moist, cooked-through interior, you need to test at the right time. Here are some methods to ensure you’ve baked your banana bread to perfection:
The Toothpick Test
One of the simplest and most reliable ways to test banana bread for doneness is by using a toothpick or cake tester. Here’s how to do it:
- Insert a Toothpick: Once the baking time is nearly up, take a toothpick or cake tester and insert it into the center of the loaf, making sure it reaches the thickest part of the bread.
- Check for Wetness: Remove the toothpick and observe the results. If the toothpick comes out clean or with just a few moist crumbs clinging to it, your banana bread is done.
- Look for Raw Batter: If the toothpick comes out covered in wet batter, your bread needs more time in the oven. Return it to the oven and continue checking every 5 minutes or so.
The Lightly Firm Test
Another method for checking banana bread doneness is the lightly firm test, which involves checking the texture of the bread. Here’s how you can do it:
- Press Gently on the Top: Once you think your banana bread is done, gently press on the top of the loaf with your fingertips.
- Check for Firmness: The top of the bread should spring back slightly when pressed. If it feels firm and doesn’t leave an indentation, the bread is likely cooked through.
- Soft or Dented: If the top feels soft or leaves a dent where you pressed, the bread might need more time to bake.
The Golden-Brown Crust
While the texture and moisture of the bread are essential, the appearance of the crust is another indicator of doneness. A well-baked banana bread will have:
- Golden-Brown Color: The crust should be a rich, golden-brown color. This is a sign that the sugars in the bananas have caramelized and that the bread has baked evenly. If the top looks pale or the edges are too dark, the bread may be undercooked or overbaked, respectively.
- Cracked Top: Many banana breads naturally develop a cracked top as they rise and bake. This is a sign of a well-baked loaf, as the crack allows for steam to escape while the bread sets.
The Internal Temperature Test
For the most precise way to test for doneness, you can use a kitchen thermometer to check the internal temperature of your banana bread. The ideal temperature for fully baked banana bread is around 200°F (93°C). Here’s how to check:
- Insert the Thermometer: Insert a food-safe thermometer into the center of the bread, being careful not to touch the pan or the edges.
- Check the Reading: If the thermometer reads around 200°F, your banana bread is done! If it reads lower, the bread will need a few more minutes in the oven.
- Avoid Overheating: Keep in mind that the bread will continue cooking slightly once removed from the oven, so don’t worry if the temperature is a few degrees higher than the target.
Avoiding Common Mistakes When Testing for Doneness
- Don’t rely on the time alone: Every oven is different, and factors like pan size, batter consistency, and even altitude can impact the baking time. Use the testing methods above rather than simply relying on the clock.
- Test in multiple spots: If you’re unsure, test in a couple of spots, especially if your loaf is large. Make sure that no wet batter is visible.
- Give the bread time to cool: After you’ve confirmed the banana bread is done, let it cool in the pan for about 10 minutes. This allows the bread to set and makes it easier to remove from the pan. If you cut into it while it’s still too hot, it may fall apart or be too gooey.
Variations to Try with This Banana Bread Recipe
Add Chocolate or Nuts
One of the best things about banana bread is its versatility. You can customize it with various add-ins, and chocolate and nuts are two of the most popular and delicious options. Whether you’re a chocolate lover or enjoy a satisfying crunch, these add-ins can elevate your banana bread to the next level, giving it extra flavor and texture. Here’s why you should consider adding chocolate or nuts, along with some tips on how to incorporate them into your recipe:
Why Add Chocolate or Nuts?
Adding chocolate or nuts to banana bread not only enhances its flavor but also gives it a unique twist. Here’s why you might want to consider these ingredients:
- Chocolate: Chocolate adds a rich, indulgent sweetness to the banana bread that complements the natural sweetness of the ripe bananas. Whether you use chocolate chips, cocoa powder, or chunks of dark chocolate, it creates a perfect balance between the fruity and sweet notes of the bread.
- Nuts: Nuts like walnuts, pecans, or almonds offer a satisfying crunch and a savory contrast to the sweetness of the banana bread. They also add healthy fats and protein, making your banana bread a more filling snack. The nutty flavor pairs perfectly with the natural flavors of the banana.
Both ingredients are great for those looking to elevate their banana bread by adding flavor and texture. They also make the bread feel more like a treat or dessert, which is perfect for special occasions or as a sweet indulgence.
How to Add Chocolate
When adding chocolate to your banana bread, the key is to find the right balance between chocolate and the banana flavor. Here’s how to incorporate chocolate into your banana bread recipe:
- Chocolate Chips: One of the easiest and most common ways to add chocolate is by tossing in a handful of chocolate chips. Milk chocolate chips provide a sweet, creamy touch, while dark chocolate chips add a more intense flavor. Mini chocolate chips are also a great option if you want smaller bites of chocolate throughout the bread.
- Tip: Stir the chocolate chips into the batter at the end of mixing. This helps prevent them from sinking to the bottom of the loaf while baking.
- Cocoa Powder: For a deeper chocolate flavor, you can also add unsweetened cocoa powder to the dry ingredients. Around 1/4 cup of cocoa powder should suffice to enhance the chocolate flavor without overpowering the bananas.
- Tip: You might need to adjust the sugar slightly, as cocoa powder is bitter on its own. Add a tablespoon or two more sugar to balance it out.
- Chocolate Chunks: For a chunkier texture, you can chop up a bar of dark chocolate or milk chocolate and fold it into the batter. This will give your banana bread larger pockets of melted chocolate for an indulgent bite.
- Tip: Be careful not to chop the chocolate too finely, or it might melt into the batter and create a uniform chocolate flavor throughout instead of distinct chocolate chunks.
How to Add Nuts
Nuts can bring a wonderful crunch and nutty flavor to your banana bread, making it feel heartier. Here’s how to incorporate them into your batter:
- Chop the Nuts: Whether you’re using walnuts, pecans, or almonds, it’s important to chop the nuts into smaller pieces so they evenly distribute throughout the bread. Larger chunks might create uneven baking and could cause the bread to collapse.
- Tip: Toast the nuts in a dry skillet for a few minutes before adding them to the batter to bring out their natural oils and enhance their flavor. This adds a delicious depth of flavor to your banana bread.
- Add a Handful to the Batter: Once your batter is ready, gently fold in the nuts. Aim for about 1/2 to 3/4 cup of chopped nuts for a good balance, but feel free to adjust based on your preference.
- Tip: If you’re worried about the nuts sinking to the bottom of the loaf during baking, you can toss them in a little flour before folding them into the batter. This will help them stay suspended throughout the bread.
- Use Nut Butter: If you want to add an extra layer of nutty goodness, you can also use peanut butter or almond butter in the batter. Add about 1/4 cup of nut butter along with your wet ingredients to create a rich, nutty base.
- Tip: Warm the nut butter slightly so it mixes smoothly into the batter, ensuring an even distribution.
Chocolate-Nut Combo
Why not combine both? Adding both chocolate and nuts creates the perfect balance of sweet and savory in your banana bread. You can mix in chocolate chips with chopped walnuts or sprinkle some chopped pecans over the top before baking for a beautiful finish and added texture. This combination is perfect for those who can’t decide between the richness of chocolate and the crunch of nuts!
- Tip: A mix of dark chocolate chips and walnuts or pecans is a winning combination. The bitterness of the dark chocolate pairs beautifully with the nutty, slightly sweet flavor of the walnuts.
Adjusting Your Recipe
When adding chocolate or nuts to your banana bread, you may want to adjust the other ingredients slightly. Here’s how you can make sure the add-ins don’t throw off your recipe:
- Sugar: If you’re adding chocolate chips or cocoa powder, consider increasing the sugar slightly to balance out any bitterness. On the flip side, if you’re using unsweetened chocolate or dark chocolate, you might need to reduce the sugar in your recipe.
- Moisture: Nuts can absorb some of the moisture in the batter, so if you’re adding a lot of nuts or nut butter, you might want to increase the liquid content slightly to compensate. A splash of milk or an extra mashed banana can do the trick.
- Baking Time: If you’re using large chocolate chunks or extra nuts, keep an eye on the baking time. These heavier ingredients may require a slightly longer baking time to ensure the bread is fully cooked in the center. You can always test with a toothpick to check for doneness.
Make It Healthier
Banana bread is already a relatively healthy option compared to many other baked goods, thanks to the natural sweetness of ripe bananas, but there are several ways to make it even healthier! Whether you’re looking to reduce sugar, increase fiber, or add more nutrients, there are simple swaps and additions you can make to enhance the health benefits of your banana bread without sacrificing taste. Here are some tips to make your banana bread a more nutritious option:
Swap White Flour for Whole Wheat Flour
One of the easiest ways to make banana bread healthier is by swapping out the all-purpose flour for whole wheat flour or a blend of both. Whole wheat flour retains more of the grain’s natural fiber, vitamins, and minerals because it includes the bran and germ, which are removed in the refining process of white flour. This simple substitution can:
- Increase Fiber: Whole wheat flour is high in dietary fiber, which can help with digestion, control blood sugar levels, and keep you feeling fuller longer.
- Boost Nutrients: It also adds more nutrients like B vitamins, iron, and magnesium, which are essential for overall health.
Tip: If you prefer the lighter texture of white bread but still want the benefits of whole wheat, try using a 50-50 mix of whole wheat and all-purpose flour.
Reduce Sugar
Banana bread is naturally sweetened by ripe bananas, so you don’t need to rely heavily on added sugar. To make your banana bread healthier, consider reducing the sugar by half or using healthier alternatives:
- Use Natural Sweeteners: Substitute refined sugar with healthier options such as honey, maple syrup, or coconut sugar. These natural sweeteners often contain more nutrients and have a lower glycemic index than regular sugar, meaning they won’t cause as drastic of a spike in blood sugar levels.
- Use Applesauce or Greek Yogurt: Instead of sugar or butter, try using unsweetened applesauce or Greek yogurt as a substitute to add moisture and slight sweetness while also boosting the protein content of your banana bread. These alternatives are lower in fat and calories but still keep your banana bread moist.
- Bananas for Sweetness: Increase the number of ripe bananas used in your recipe. The extra bananas will provide natural sweetness and moisture, reducing the need for added sugar altogether. The riper the banana, the sweeter it will be!
Use Healthy Fats
Fats are essential for your body, but the type of fat you use can make a big difference in the overall healthfulness of your banana bread. Instead of traditional butter or vegetable oil, try these healthier fat options:
- Avocado: Replace butter or oil with mashed avocado. Avocados are rich in heart-healthy monounsaturated fats, fiber, and antioxidants. They also keep your banana bread soft and moist.
- Coconut Oil: If you prefer using oil, coconut oil is a great alternative. It contains medium-chain triglycerides (MCTs), which are a type of fat that can boost metabolism and support heart health. Be sure to use unrefined coconut oil for the best health benefits.
- Olive Oil: Another healthy fat choice is extra virgin olive oil, which is rich in monounsaturated fats that support healthy cholesterol levels and heart health. Just use it sparingly to avoid overpowering the banana flavor.
Tip: When substituting fat in your banana bread recipe, keep the ratio at about a 1:1 swap for the best texture and consistency.
Add Nutrient-Rich Add-Ins
Banana bread is an excellent base for incorporating nutrient-dense ingredients that can add flavor, texture, and additional health benefits. Here are some healthy add-ins you can consider:
- Chia Seeds: Chia seeds are packed with omega-3 fatty acids, fiber, protein, and antioxidants. Add 2 tablespoons of chia seeds to your banana bread to boost the nutritional value without changing the flavor.
- Flaxseeds: Ground flaxseeds are a great source of fiber, protein, and omega-3s. They can help regulate digestion and support heart health. You can add 2 tablespoons of ground flaxseeds to the batter for a healthful addition.
- Oats: Instead of using all flour, consider replacing part of the flour with rolled oats or oat flour. Oats are high in soluble fiber, which can help lower cholesterol and support heart health. Oats also provide a nice texture and added chewiness to your banana bread.
- Nuts and Seeds: Adding walnuts, almonds, or pumpkin seeds can enhance the protein, healthy fats, and fiber content of your banana bread. These additions not only provide a crunch but also contribute additional vitamins and minerals like vitamin E and magnesium.
Go Dairy-Free or Add Protein
If you’re looking to make your banana bread healthier by reducing dairy or adding more protein, here are some options:
- Dairy-Free Options: Use unsweetened almond milk, coconut milk, or soy milk in place of regular milk for a dairy-free option. If you’re replacing yogurt, choose a plant-based alternative like coconut yogurt or almond yogurt.
- Add Protein: Boost the protein content by incorporating protein powder or Greek yogurt. A scoop of vanilla or plant-based protein powder can add a subtle flavor and a protein punch, perfect for a post-workout snack. Greek yogurt can also add creaminess and protein without a lot of added sugar.
Use Dark Chocolate
If you can’t resist adding chocolate to your banana bread, opt for dark chocolate (70% cacao or higher). Dark chocolate contains more antioxidants and less sugar than milk chocolate, making it a healthier choice. Dark chocolate is also heart-healthy, and the rich, intense flavor means you can use less of it to still get that chocolatey goodness.
Turn It Into Muffins
If you love banana bread but want to make individual portions or prefer a quicker, more portable snack, turning your banana bread recipe into banana bread muffins is a fantastic idea! Muffins offer the same moist, flavorful goodness of banana bread but in a more convenient, single-serve form. Plus, they’re great for meal prep, snacks, or breakfast on the go. Here’s how to easily transform your banana bread into muffins, with tips for getting them just right:
Why Turn Banana Bread into Muffins?
There are several reasons why converting your banana bread into muffins might be a great option:
- Portability: Muffins are easy to grab and go. Whether you’re heading to work, school, or a playdate, a banana muffin is a perfect snack that doesn’t require slicing.
- Faster Cooking Time: Muffins bake faster than a loaf of banana bread, which means you’ll have a fresh batch in less time. This is especially convenient if you’re in a hurry or craving banana bread but don’t want to wait an hour for it to bake.
- Control Over Portions: Muffins are pre-portioned, which means you can easily control how much you’re eating. You can also try making mini muffins for a bite-sized treat or larger muffins for a more filling snack.
- Customize for Different Diets: Making banana muffins allows you to easily customize for various diets. For example, you can make a batch with chocolate chips and another without, or add nuts in some muffins and keep others nut-free for allergies.
How to Convert Your Banana Bread Recipe into Muffins
Transforming your banana bread recipe into muffins is easy! All you need to do is adjust the baking method slightly. Here’s how to make sure your muffins turn out perfect:
- Prepare Your Muffin Tin:
Start by preparing a 12-cup muffin tin (or more, depending on the size of your muffins). Grease the muffin tin or line each cup with paper muffin liners to prevent sticking and make for easy cleanup. If you want extra moist muffins, you can use a muffin pan with a non-stick coating or silicone muffin cups. - Adjust the Baking Time:
Muffins bake more quickly than banana bread loaves because the batter is spread out in smaller portions. Typically, banana bread muffins will bake at the same temperature as banana bread (around 350°F / 175°C), but the cooking time will be much shorter. Start by baking for about 18-22 minutes, but always check for doneness by inserting a toothpick into the center of the muffin. If it comes out clean or with just a few crumbs, your muffins are done!- Tip: The larger the muffin, the longer the baking time, so if you’re making jumbo muffins, you might need to bake them for 25 minutes or more. For mini muffins, bake for about 12-15 minutes.
- Fill the Muffin Cups:
When filling the muffin cups with the banana bread batter, make sure to only fill each cup about 2/3 to 3/4 of the way full. This allows room for the batter to rise and gives you the perfect muffin dome. If you overfill the cups, the batter may spill over as it bakes, leading to uneven muffin tops. - Bake and Keep an Eye on Them:
Place the muffin tin in the oven and bake for 18-22 minutes, or until golden brown on top. If you’re making mini muffins, keep an eye on them and start checking for doneness after about 10-12 minutes.- Tip: Consider rotating the muffin tin halfway through the baking time to ensure even cooking, especially if your oven has hot spots.
Add Toppings for Extra Flavor
While the banana bread muffins are baking, this is the perfect time to add a little something extra for a special touch! You can top your banana muffins with a variety of toppings, from sweet to savory:
- Streusel Topping: If you love the crispiness of a streusel topping, sprinkle some cinnamon sugar or a simple streusel mixture (made with flour, butter, and brown sugar) over the top of your muffins before baking. This adds a sweet crunch to the muffins.
- Chopped Nuts: For a nice textural contrast, add chopped walnuts, pecans, or almonds to the tops of your muffins. This not only adds a little extra crunch but also brings in those healthy fats and proteins for a more satisfying snack.
- Chocolate Chips: If you enjoy a sweeter, more indulgent treat, sprinkle chocolate chips on top of the batter before baking, or gently fold them into the batter itself for a gooey, melty interior.
- Coconut Flakes: Add a sprinkle of shredded coconut for a tropical twist. Coconut adds sweetness and a bit of chewy texture that pairs beautifully with banana.
Customizing Banana Muffins for Dietary Preferences
Turning banana bread into muffins also gives you the opportunity to customize them for specific dietary preferences:
- Gluten-Free Muffins: Use a gluten-free flour blend in place of regular flour. You can find ready-made gluten-free baking mixes, or use a combination of rice flour, almond flour, and cornstarch to create your own blend. Be sure to check the consistency of the batter and adjust with extra liquid if necessary, as gluten-free batters can sometimes be thicker.
- Dairy-Free Muffins: To make your muffins dairy-free, use non-dairy milk (like almond or coconut milk) and dairy-free butter (or coconut oil). You can also replace any yogurt with non-dairy yogurt.
- Sugar-Free Muffins: Replace the sugar with stevia, monk fruit sweetener, or coconut sugar. These alternatives have a lower glycemic index, making them better for those watching their sugar intake.
- Vegan Muffins: If you need to make vegan banana muffins, substitute eggs with flax eggs (1 tablespoon of ground flaxseed mixed with 3 tablespoons of water, let sit for 5 minutes) or applesauce. You can also use dairy-free substitutes for milk and butter.
Storing and Freezing Muffins
One of the best things about banana muffins is their convenience for storage and freezing. You can store leftover muffins in an airtight container at room temperature for up to 3-4 days. For longer storage, freeze your banana muffins to enjoy them later. Simply place them in a freezer-safe bag or container and store them for up to 3 months. When you’re ready to enjoy, thaw them at room temperature or microwave them for a few seconds for that freshly baked taste!
- Tip: If you freeze the muffins, wrap them individually in plastic wrap before placing them in a freezer-safe bag. This helps preserve their freshness and prevents them from sticking together.
Conclusion
Recap the Simplicity and Deliciousness of This 2-Banana Bread Recipe
This banana bread recipe with 2 bananas is the epitome of simplicity and flavor. With just a handful of basic ingredients and minimal prep time, you can enjoy a moist, tender loaf of banana bread that’s perfect for any time of day. Whether you’re using overripe bananas from your counter or whipping up a quick snack for guests, this recipe delivers that classic banana bread taste we all know and love, without the hassle. It’s quick, easy, and sure to satisfy your cravings for a homemade treat.
Encourage Readers to Experiment with Add-Ins and Share Their Creations
One of the best parts about this banana bread recipe is the freedom to get creative! Feel free to experiment with your favorite add-ins, whether it’s chocolate chips, nuts, or even a swirl of peanut butter. The possibilities are endless! Try adding coconut, dried fruit, or even a spoonful of cinnamon for a unique twist. We’d love to see your creations and hear about the delicious variations you come up with—don’t forget to share your photos and ideas in the comments or on social media!
“Discover the joy of baking with our Cake Mix Cookie Recipes! These quick and easy cookies are made with cake mix, offering a fun way to create delicious treats without the fuss. Perfect for any occasion or a sweet snack in no time!”