If you’re looking for the ultimate cute and fun cake, a Hello Kitty cake is the perfect choice! Whether you’re celebrating a birthday, baby shower, or just a love for all things Sanrio, this adorable cake will steal the show. With its signature bow, whiskers, and sweet pink accents, a Hello Kitty cake isn’t just a dessert—it’s a statement piece.
The best part? You don’t need to be a professional baker to make one! This recipe will guide you through the process step by step, from baking a soft and fluffy cake to decorating it like Hello Kitty herself. Plus, we’ll share some expert tips on using buttercream, fondant, and simple tools to achieve a bakery-style look at home.
Table of Contents
Why a Hello Kitty Cake is Perfect for Any Occasion
This link to the “Best Unicorn Cake Recipe for a Stress-Free Single Mom Birthday Party” provides a detailed, fun guide to creating a magical unicorn cake that’s both budget-friendly and easy to make. It includes tips on simple decorating techniques, like buttercream swirls and edible glitter, and offers helpful steps for busy moms looking to make their child’s birthday extra special. Perfect for those wanting a stunning cake without the stress! You can find more at Veibrant Recipes’ Unicorn Cake Post.
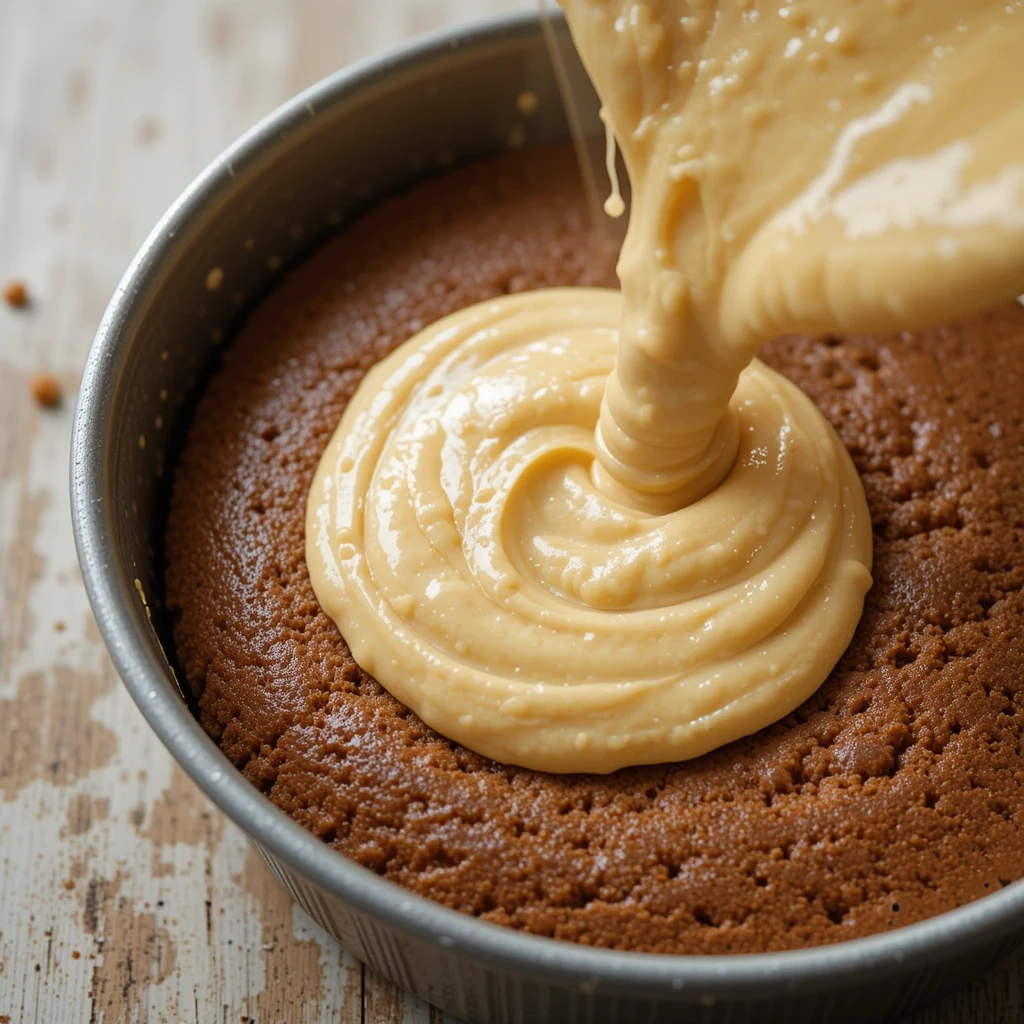
A Cute and Fun Cake for Birthdays
A Hello Kitty cake is the ultimate centerpiece for any birthday celebration, especially for fans of this beloved Sanrio character. Whether you’re baking for a child, teenager, or even an adult who grew up loving Hello Kitty, this cake brings a fun and nostalgic charm to the party. Its signature pink bow, adorable whiskers, and sweet expression make it instantly recognizable and guaranteed to delight guests of all ages.
One of the best things about a Hello Kitty cake is how versatile and customizable it is. You can make it as simple or as extravagant as you like, depending on your skill level and the theme of the party. Some fun ways to personalize your Hello Kitty birthday cake include:
- Choosing a favorite flavor – While classic vanilla or chocolate are always popular, you can get creative with options like strawberry, red velvet, or funfetti for a more festive touch.
- Playing with colors – While Hello Kitty is traditionally white with a pink bow, you can switch up the colors to match your birthday theme, such as pastel hues, rainbow effects, or even glittery decorations.
- Adding extra details – Elevate the cake with edible pearls, sprinkles, or even a fondant number topper to represent the birthday age.
Beyond its looks, a Hello Kitty cake also adds excitement to the celebration. Imagine the joy on a child’s face when they see their favorite character brought to life in cake form! It’s not just a dessert—it’s an experience that creates lasting memories.
Whether you’re baking this cake for a first birthday, a milestone celebration, or a fun get-together with fellow Hello Kitty fans, it’s a guaranteed way to make the occasion extra special. Plus, it’s a great opportunity for a DIY baking project that lets you express creativity while making something delicious.
DIY Hello Kitty Cake vs. Store-Bought
When planning a Hello Kitty-themed celebration, one of the biggest decisions you’ll face is whether to bake your own Hello Kitty cake or buy one from a bakery. While both options have their pros and cons, making a DIY Hello Kitty cake gives you more control, creativity, and a personal touch, while a store-bought version offers convenience and professional-level detail. Let’s break it down so you can decide which option works best for you!
Why a DIY Hello Kitty Cake is the Best Choice
If you love baking and enjoy a fun kitchen challenge, making your own Hello Kitty cake is the way to go! Here’s why:
More Customization: When you bake your own cake, you have complete control over the flavors, colors, and decorations. Want a strawberry-flavored Hello Kitty cake with a chocolate bow? Go for it! Prefer a gluten-free or dairy-free version? You can easily adjust the recipe to fit dietary needs.
Budget-Friendly: Buying a custom cake from a bakery can be expensive, especially for intricate designs. By making it yourself, you save money on labor costs while still creating a beautiful and tasty cake.
Fun and Rewarding Experience: There’s nothing quite like the satisfaction of creating a cake from scratch and seeing it come to life! Whether you’re baking for your child, friend, or even yourself, a DIY Hello Kitty cake adds a personal touch that makes the celebration even more special.
Perfect for Family Bonding: If you have kids, involving them in the cake-making process can be a fun activity. Let them help mix ingredients, cut out fondant shapes, or add sprinkles for a unique touch.
When a Store-Bought Hello Kitty Cake Might Be a Better Option
Of course, there are times when ordering from a bakery makes more sense. Here’s when you might consider going the store-bought route:
Limited Time: If you’re short on time or don’t feel confident in your baking skills, a professional bakery can save the day. They’ll handle all the work, so you can focus on other party preparations.
Complex Designs: If you’re looking for a highly detailed or 3D sculpted Hello Kitty cake, professional bakers have the experience and tools to create intricate fondant work, airbrushed effects, and edible printed images that might be difficult to achieve at home.
Guaranteed Perfection: While homemade cakes can be charmingly imperfect, bakery cakes often have a flawless, polished look. If presentation is a top priority, a professionally made Hello Kitty cake might be worth the investment.
Final Verdict: Which One Should You Choose?
If you love getting creative, saving money, and personalizing your cake, then making a DIY Hello Kitty cake is a fantastic choice! It’s a fun, hands-on project that adds a special homemade touch to any celebration.
However, if you’re pressed for time or want a more detailed, bakery-quality design, a store-bought Hello Kitty cake might be the better option. Some bakeries even allow you to customize the cake’s flavors and design to make it feel more personal.
Ultimately, whether you go DIY or professional, a Hello Kitty cake is always a hit at any party. If you’re up for the challenge, keep reading for a step-by-step guide to making your own!
Easy to Customize with Different Flavors and Colors
One of the greatest advantages of making a DIY Hello Kitty cake is the ability to customize it with a variety of flavors and colors to suit the tastes and preferences of the guest of honor. Whether you’re aiming for a traditional look or want to put your own spin on this iconic cake, the options are virtually endless.
Flavors: Make it Deliciously Personal
The flavor of the cake is a key component that can elevate the entire experience. While a classic vanilla or chocolate cake is always a hit, you can get more creative to make the cake stand out.
- Fruit-flavored cakes like strawberry, lemon, or raspberry add a fresh and tangy twist to the traditional Hello Kitty cake. These flavors pair beautifully with buttercream or whipped cream, giving the cake a light and airy feel.
- Red velvet cake is a popular choice for its striking red color, which works wonderfully with the pink and white theme of a Hello Kitty cake. It also adds a subtle cocoa flavor that complements sweet frostings.
- Funfetti cake is a great choice if you’re aiming for a more festive vibe. The sprinkles inside the cake not only look fun but also add a touch of sweetness and texture to each bite.
- For those with dietary preferences or restrictions, you can easily customize the recipe to make it gluten-free, dairy-free, or vegan without sacrificing taste. These alternatives can still provide a delicious and moist cake while catering to various needs.
Colors: Bring the Cake to Life
The colors you choose for decorating your Hello Kitty cake can help you match the cake to any party theme or add a personal touch. While the classic look includes white fondant for the face, pink for the bow, and black for the whiskers, you have complete freedom to get creative with the shades you use.
- Bold, vibrant colors like red, blue, or yellow can give the Hello Kitty design a playful and eye-catching vibe. You can use these colors for the bow, cake layers, or even in the background for added flair.
- For a more elegant or sophisticated twist, consider using pastel tones like lavender, mint, or soft peach. These shades can give your cake a delicate, whimsical look, perfect for a more refined celebration.
- Shimmering accents or metallic gold and silver can be added to your Hello Kitty cake for a touch of glamour, making it perfect for milestone events like sweet sixteen parties or baby showers.
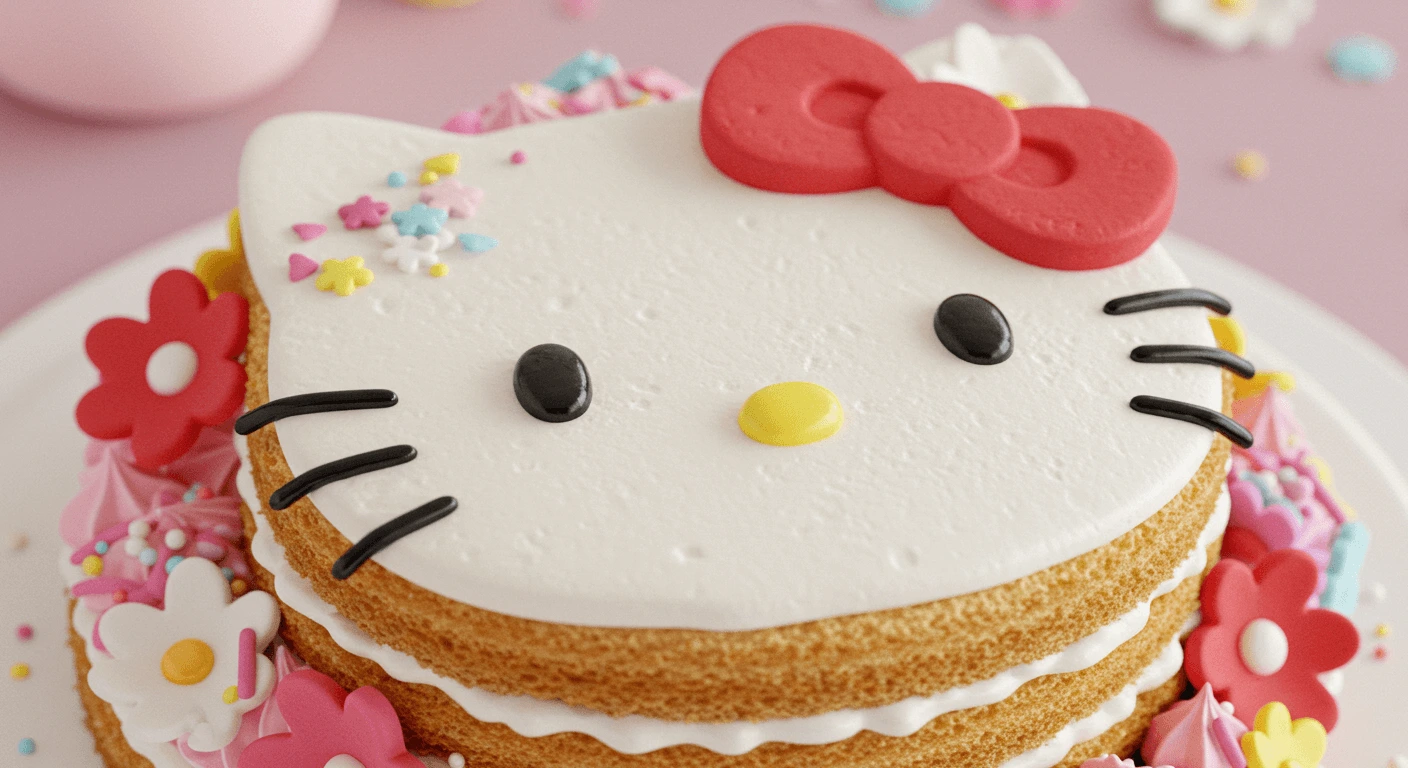
Additionally, you can get creative with colorful fondant flowers, edible glitter, or rainbow sprinkles to add even more fun to the cake design. Whether you want it simple and classic or more vibrant and bold, the colors you choose can transform the look of the cake and match your party’s theme.
Decorating Tips for Customization
Customizing your Hello Kitty cake with different flavors and colors also gives you the chance to experiment with various decorating techniques. Here are some tips to make your cake even more personalized:
- Use buttercream piping to create subtle textures and details like the outline of Hello Kitty’s face or extra flourishes around the bow.
- Consider mixing colors in the cake itself by creating ombre layers or a swirl pattern for a fun visual effect.
- For a more advanced option, hand-painting details on fondant, such as Hello Kitty’s eyes or nose, can add a unique artistic touch that showcases your personal flair.
With these ideas, you can easily create a Hello Kitty cake that’s tailored to the guest of honor’s personality and preferences, making the celebration even more special. Whether it’s choosing unique flavors or playing with vibrant colors, the possibilities are endless for making this cake your own!
Ingredients You’ll Need for a Perfect Hello Kitty Cake
Cake Base Ingredients

The foundation of a Hello Kitty cake begins with the cake base, which sets the tone for both flavor and texture. Whether you’re opting for a classic vanilla, rich chocolate, or a more unique flavor like red velvet or lemon, selecting the right ingredients for your cake base is key to ensuring the final product tastes as great as it looks. Here’s a breakdown of essential ingredients and how each one contributes to a perfect Hello Kitty cake base.
1. Flour: The Structure
The primary ingredient in any cake is flour, and for a fluffy, light texture, you’ll want to use all-purpose flour for most cakes. All-purpose flour gives just the right amount of structure without being too dense. If you want a slightly more delicate texture, you can swap out a portion of the all-purpose flour for cake flour, which has a finer texture and lower protein content.
For those following a gluten-free diet, there are great alternatives like gluten-free all-purpose flour or a blend of rice flour, potato starch, and tapioca flour that can be used in place of traditional wheat flour without sacrificing taste or texture.
2. Sugar: Sweetness and Moisture
Sugar doesn’t just make the cake sweet; it also helps in moistening the batter and creating a tender crumb. Granulated white sugar is the most common choice for a Hello Kitty cake, providing sweetness and texture. If you want a richer, more complex sweetness, you can mix in brown sugar for a hint of molasses flavor.
Additionally, some recipes may call for powdered sugar for frostings and fondant coverings, but it’s not typically used in the cake batter itself. If you want a more natural sweetness, you can experiment with honey, maple syrup, or agave nectar as a sugar substitute.
3. Butter or Oil: Flavor and Moisture
Butter is the go-to fat for many cake recipes because it adds rich flavor and helps create a moist, tender texture. If you want a richer flavor, unsalted butter is preferred since it allows you to control the level of salt in your recipe. Some recipes may call for vegetable oil, which helps create a moist, soft cake that stays fresh longer. You can even combine both to get the best of both worlds — the flavor of butter with the moisture of oil.
For a dairy-free version of the cake, coconut oil or vegan butter can be excellent alternatives that still provide moisture and a great texture.
4. Eggs: Binding and Leavening
Eggs are an essential ingredient in the cake base, serving to bind the ingredients together and help the cake rise. The egg whites provide structure, while the yolks add richness and flavor. A good Hello Kitty cake needs at least two to three eggs, depending on the size of the recipe.
If you need an egg-free alternative, you can substitute eggs with ingredients like unsweetened applesauce, mashed bananas, or flax eggs (a mixture of ground flaxseed and water). These substitutes work well to provide moisture and structure, although they may slightly alter the cake’s flavor and texture.
5. Leavening Agents: Making the Cake Rise
To ensure your Hello Kitty cake rises perfectly and achieves that light, fluffy texture, you’ll need leavening agents like baking powder or baking soda. Baking powder is most commonly used in cakes and provides a reliable lift, while baking soda works best in cakes with acidic ingredients like buttermilk or yogurt.
The key is to use the correct amount of leavening agents so that your cake has enough rise without becoming too airy or crumbly. Be careful not to overdo it, as too much leavening can lead to an overly soft or overly dry cake.
6. Milk or Liquid: Moisture and Texture
To bind the dry ingredients and help create a smooth batter, milk or another liquid such as buttermilk, cream, or even non-dairy milk like almond milk or oat milk is essential. Milk provides moisture and helps the cake maintain a tender crumb. If you’re going for a lighter texture, you might use buttermilk, which also adds a subtle tang and enhances the flavor.
For added richness, consider using cream in place of milk. It makes the batter richer and can help the cake stay moist for a longer period of time.
7. Vanilla Extract: A Classic Flavor Enhancer
Vanilla extract is an important flavor enhancer in cake recipes. It brings out the sweetness of the cake and adds depth to the overall flavor. For a true vanilla flavor, always use pure vanilla extract instead of artificial vanilla. If you want to experiment with different flavors, you can try using almond extract or even lemon extract for a zesty twist.
8. Salt: Balancing the Flavors
A small amount of salt is critical in any cake batter. It helps to balance the sweetness and enhances the overall flavors of the cake. It also strengthens the structure of the cake, making it less likely to fall apart.
Frosting and Filling Choices
When it comes to decorating a Hello Kitty cake, the frosting and fillings you choose play a significant role in both the flavor and aesthetic of the final product. From classic buttercream to indulgent ganache, the right frosting can complement the cake base and help you create a cake that not only looks amazing but also tastes fantastic. Here’s a breakdown of popular frosting and filling choices for your Hello Kitty cake, ensuring every bite is as delicious as the design is cute.
1. Buttercream Frosting: The Classic Choice
Buttercream frosting is the go-to option for most cake decorators because it’s versatile, easy to work with, and delicious. It can be easily tinted to any color, making it ideal for creating Hello Kitty’s iconic face and vibrant bows. There are a few types of buttercream you can use:
- American Buttercream: The most commonly used type, made with butter, powdered sugar, and vanilla extract. It’s sweet, smooth, and easy to spread or pipe. You can also add food coloring to create the signature pink bow and black whiskers.
- Swiss Meringue Buttercream: This version is lighter and less sweet, made with egg whites, sugar, and butter. It’s smooth and velvety, which makes it perfect for creating sharp, clean edges around the Hello Kitty face or smooth layers for a more polished look.
- Italian Meringue Buttercream: Known for its silky texture and slightly tangy flavor, Italian meringue buttercream is made by combining egg whites, sugar syrup, and butter. It holds up well to both piping and spreading, making it an excellent choice for intricate designs like Hello Kitty’s face.
While all buttercream frostings are a great option, American buttercream tends to be more forgiving for beginner decorators, and it’s easier to work with in terms of achieving smooth finishes and vibrant colors.
2. Fondant: For a Smooth, Polished Look
If you’re aiming for a sleek, professional look, fondant is the way to go. Fondant is a smooth, pliable icing made from sugar, water, and gelatin that hardens when it sets, giving your cake a smooth, satin finish. It’s perfect for creating detailed decorations, such as Hello Kitty’s face, ears, and bow.
While fondant can seem intimidating, it’s not difficult to work with once you get the hang of it. You can cover the entire cake with fondant for a flawless, uniform surface and then add the detailed accents. You can also mix fondant with food coloring to make different shades for the bow or background. Some bakers even use a combination of fondant and buttercream to take advantage of the smooth look of fondant while still keeping the creaminess and flavor of buttercream.
If you prefer to use pre-made fondant, many stores carry ready-to-roll fondant that can save you time and effort. Just make sure to roll it thin enough to avoid it being too thick and heavy on the cake.
3. Cream Cheese Frosting: A Tangy Twist
For a rich, tangy frosting that pairs beautifully with flavors like carrot cake, red velvet, or even chocolate, cream cheese frosting is a fantastic option. Made with cream cheese, butter, and powdered sugar, this frosting offers a tangy sweetness that balances the richness of the cake. While it’s a bit softer than buttercream, it can still be piped and smoothed over your cake for a lovely finish.
Cream cheese frosting works particularly well if you’re adding fruits or berries as part of your cake flavor or filling. It can complement flavors like strawberries, blueberries, or raspberries, giving the cake a creamy texture that isn’t overly sweet.
4. Ganache: Rich and Decadent
For a truly indulgent treat, chocolate ganache is an excellent frosting choice. Made by combining chocolate and heavy cream, ganache has a rich, smooth texture that can be used to coat the entire cake or drape over the top for a more rustic, dripping effect. Ganache adds a decadent depth of flavor, making it ideal for those who love chocolate in their cake.
You can make ganache in different thicknesses: a thicker ganache works well for frosting the cake, while a thinner ganache can be poured over the cake for a beautiful drip effect. This is perfect for creating a more modern or luxurious take on the Hello Kitty cake, especially if you plan to add edible gold accents or glitter.
5. Whipped Cream: Light and Fluffy
For a lighter, less sweet alternative, whipped cream frosting is a fantastic option. It’s made from heavy cream, powdered sugar, and a vanilla extract or flavoring of your choice. Whipped cream is airy and soft, offering a fluffy texture that’s perfect for those who prefer a less sugary frosting.
While whipped cream is less stable than buttercream or fondant, it can still be piped and shaped for decorative purposes. It pairs wonderfully with fresh fruits or a chocolate cake base, adding a refreshing balance to the richness of the cake.
6. Fillings: Adding Extra Flavor
The filling inside the Hello Kitty cake is just as important as the frosting, and it offers an opportunity to add more flavor and texture. Here are some filling ideas to elevate your cake:
- Fruit Preserves or Jam: Adding a layer of strawberry, raspberry, or apricot jam creates a delicious contrast to the sweet frosting. It also adds a burst of fruit flavor that can balance out the richness of the cake.
- Chocolate Mousse: A light and airy chocolate mousse filling can complement a chocolate or vanilla cake for a rich, indulgent experience. The mousse adds a creamy texture that pairs perfectly with buttercream or ganache.
- Pastry Cream: A smooth, custard-like pastry cream works great as a filling in between layers of cake. You can flavor it with vanilla, lemon, or chocolate, depending on the flavor of your cake base.
- Buttercream: For those who prefer a uniform cake with the same frosting throughout, adding a simple buttercream filling between cake layers can enhance the flavor and provide a satisfying richness.
Decorative Elements for the Hello Kitty Look
Creating a Hello Kitty cake involves careful attention to the small but essential details that make the character instantly recognizable. The key to achieving a successful Hello Kitty look lies in using the right materials and techniques to bring her iconic face, bow, and other features to life. Below are the primary decorative elements to consider for a flawless Hello Kitty cake.
1. Fondant for the Face and Bow
Fondant is one of the best mediums for achieving a smooth, polished look on a Hello Kitty cake. It allows you to shape and mold the cake’s design to the exact specifications of Hello Kitty’s character.
- White Fondant for the Face: Start by covering the entire top of your cake with white fondant to create the base for Hello Kitty’s face. White fondant is ideal because it provides a clean and smooth surface for the facial features and other decorative elements. You can roll out the fondant evenly and use a pizza cutter or a sharp knife to trim it to fit the shape of your cake.
- Pink Fondant for the Bow: Hello Kitty’s signature pink bow is a must-have decorative element. To make the bow, roll out pink fondant and shape it into the distinctive bow design. You can use a bow mold if you prefer precision, or shape it by hand for a more organic look. Make sure the bow is big enough to be a prominent feature on the cake, but not so large that it overwhelms the face. Once formed, place the bow in a central position on top of the cake or to the side of her face. You can even add a small knot in the center with black fondant or edible gel for an authentic touch.
2. Edible Food Markers or Black Icing for the Eyes and Whiskers
Edible food markers and black icing are essential for adding the small but important details to Hello Kitty’s face, such as her eyes and whiskers.
- Edible Food Markers: For the eyes and whiskers, you can use edible food markers, which are perfect for fine details. A black edible marker is ideal for drawing on Hello Kitty’s large, round eyes and three whiskers on each side of her face. The marker allows you to have precise control and draw directly on the fondant, ensuring the delicate features are sharp and clean. The beauty of food markers is that they are easy to use, don’t require special piping skills, and result in perfectly outlined eyes and whiskers.
- Black Icing: If you prefer to pipe the details, black buttercream icing or royal icing works wonderfully for both the eyes and whiskers. Use a small piping tip (such as a #1 or #2) for a fine, controlled application. For the eyes, pipe two dots on the white fondant to create Hello Kitty’s eyes, ensuring they are spaced evenly apart. For the whiskers, pipe three thin lines on each side of the face, adjusting the length and angle as needed for a playful and natural look. You can also pipe a small round nose using black icing, but typically, Hello Kitty’s nose is yellow, so this would only be for style variations.
3. Cake Piping Tools for Detailed Designs
If you want to add extra detail and texture to your Hello Kitty cake, having the right cake piping tools on hand will be invaluable. These tools can help you create perfectly shaped decorations, add texture to the cake, and give it that extra visual appeal.
- Piping Tips for the Bow and Ears: Use a petal tip or a leaf tip to add texture to the bow or create the inner ear details. These tips create beautiful, ruffled effects that can make the fondant bow or the ears appear more lifelike and textured. The petal tip is particularly useful for the ears to give them a natural, soft look, and the leaf tip can be used to create the inner part of the bow.
- Piping for the Background: Use a star tip or round tip to add some detail to the background. For example, you can pipe small designs around Hello Kitty’s face, such as polka dots, stars, or hearts, to enhance the overall aesthetic. If you’re feeling creative, you could also pipe small flowers or other decorative elements along the sides of the cake to give it a more festive and playful look.
- Piping for Texture: For a more textured look, buttercream or royal icing can be piped using different tips to create a raised effect on the cake. A star tip (such as a #16) can be used for the outer border of the cake or for creating fun accents around the face. This adds an extra layer of dimension and can make the cake visually striking when viewed from different angles.
4. Additional Decorative Details
Once you have the foundational elements in place — the face, eyes, whiskers, and bow — you can add more decorative accents to elevate your cake’s appearance.
- Edible Glitter or Pearls: To add a little sparkle, sprinkle some edible glitter or place edible pearls around the cake’s base or in between the details of the bow. This creates a fun, festive feel, especially for special occasions like birthdays.
- Sprinkles: You can use heart-shaped or star-shaped sprinkles to complement the design. You might also consider adding Hello Kitty-themed sprinkles or other cute designs that match the cake’s theme, such as mini flowers, bows, or hearts.
- Fondant Accessories: If you have extra fondant, you can create small accessories like mini flowers, stars, or even other Sanrio characters to adorn the sides of the cake. These add a creative touch and can make the cake feel more personalized.
Step-by-Step Guide to Making a Hello Kitty Cake
Baking the Perfect Cake Base
Baking a perfect cake base is essential to creating a Hello Kitty cake that is not only visually appealing but also delicious and satisfying. The cake acts as the foundation for your design, so it’s important to get it right. Below are tips on how to mix, bake, and cool your cake, along with helpful techniques to ensure a moist and fluffy texture.
1. How to Mix, Bake, and Cool the Cake Properly

The mixing, baking, and cooling process may seem straightforward, but small details make a big difference in the outcome. Here’s a step-by-step breakdown to achieve a cake base that will complement your Hello Kitty design.
- Mixing the Ingredients: Start by ensuring that your ingredients are at room temperature before mixing. This will help them combine more easily and evenly. Begin by creaming the butter and sugar together until the mixture is light and fluffy. This step is crucial as it incorporates air into the batter, giving your cake a light texture. After the butter and sugar are well-combined, add the eggs one at a time, beating well after each addition. Follow by gradually adding the dry ingredients, alternating with the wet ingredients (such as milk or buttermilk), beginning and ending with the dry ingredients. This method prevents overmixing, which can lead to a dense texture. Be careful not to over-mix the batter once the dry ingredients are added, as this can toughen the cake.
- Baking: Once your batter is ready, pour it into your prepared cake pans. It’s essential to grease and flour the pans or line them with parchment paper to prevent sticking. For even baking, spread the batter out evenly in the pan. If you’re using multiple pans, make sure to divide the batter as evenly as possible between them. Bake in a preheated oven at the temperature specified in your recipe (usually around 350°F / 175°C), but always start checking a few minutes before the recommended time. Use a toothpick or cake tester to check for doneness—insert it into the center of the cake, and if it comes out clean, your cake is ready. If you find the top of the cake is browning too quickly, you can cover it loosely with aluminum foil to prevent over-browning.
- Cooling: After the cake has finished baking, allow it to cool in the pan for about 10 minutes. This helps it firm up slightly and makes it easier to remove from the pan. Once it’s cool enough to handle, gently invert the pan and let the cake cool completely on a wire rack. Cooling the cake completely before decorating is essential to prevent any melting or sliding of the frosting. If you’re in a hurry, you can place the cake in the refrigerator for a short time, but avoid putting hot cake directly in the fridge as it can cause condensation to form, which may affect the texture.
2. Tips for a Moist and Fluffy Texture
Achieving the ideal moist and fluffy cake texture is the key to making your Hello Kitty cake a standout treat. Here are some tips to ensure your cake is as tender and moist as possible:
- Use Room Temperature Ingredients: Ingredients such as butter, eggs, and milk should be at room temperature. Cold ingredients can cause the batter to seize up and result in a denser texture. Take out the eggs and butter about 30 minutes before you start baking to allow them to warm up naturally.
- Don’t Overmix the Batter: Overmixing the cake batter can incorporate too much air and result in a tough cake. Mix the ingredients just enough to combine them. Once you add the flour, be careful not to beat the batter vigorously.
- Add Moisture-Rich Ingredients: Ingredients such as buttermilk, sour cream, or yogurt can help retain moisture in your cake. These ingredients also contribute to the tender crumb and soft texture. If you prefer a lighter texture, using a combination of all-purpose flour and cake flour can help achieve a more delicate and airy consistency.
- Baking Soda or Baking Powder: Make sure your baking soda or baking powder is fresh, as old leavening agents will not work effectively, leading to a dense cake. If you’re using both, ensure the correct balance between the two so that your cake rises properly without becoming overly fluffy or flat.
- Don’t Overbake: Overbaking can dry out your cake and result in a crumbly texture. Always check for doneness a few minutes before the recipe’s suggested baking time. If the cake is done, it should spring back when lightly touched and have a golden color.
- Simple Syrup or Moisture Lock: For an extra layer of moisture, consider brushing your cooled cake with simple syrup (equal parts sugar and water, boiled and cooled). This will help lock in moisture and prevent the cake from drying out, especially if you’re planning to stack several layers.
Shaping and Carving the Hello Kitty Face
Shaping and carving the Hello Kitty face is a crucial step in creating a memorable and visually striking cake. Whether you choose to use a Hello Kitty cake mold or carve the shape manually, this process requires precision to ensure the face is symmetrical, smooth, and appealing. Here’s a breakdown of the steps and tips to help you achieve the perfect Hello Kitty face on your cake.
1. How to Use a Hello Kitty Cake Mold or Carve the Shape Manually
Option 1: Using a Hello Kitty Cake Mold

If you want a quicker and easier approach, using a Hello Kitty cake mold is a great option. These molds are specifically designed to help you achieve the iconic face shape with minimal effort. Here’s how to use it:
- Prepare the Mold: Grease and flour the Hello Kitty cake mold to ensure the cake doesn’t stick. Alternatively, you can line it with parchment paper to make removal easier.
- Fill the Mold: Pour your batter into the mold, making sure to spread it evenly. Fill it just under the rim to avoid any overflow while baking.
- Bake According to Instructions: Follow the baking instructions specific to the mold. Because Hello Kitty’s face is detailed and can be somewhat shallow, it’s important to monitor the cake carefully while baking to ensure the entire shape is evenly cooked.
- Remove from Mold: Once the cake has cooled slightly (but not fully), carefully remove it from the mold. If necessary, gently run a butter knife around the edges to help lift the cake out without damaging its shape.
Using a mold ensures that your Hello Kitty face will have consistent, clean lines, making it a good choice for beginners or anyone seeking a streamlined process.
Option 2: Carving the Shape Manually
If you prefer a more hands-on approach and want full control over the design, you can carve the Hello Kitty face manually. Here’s how to do it:
- Bake a Square or Round Cake: Start with a square or round cake that’s large enough to allow you to carve out the desired shape. A 9-inch square cake or a 9-inch round cake works well.
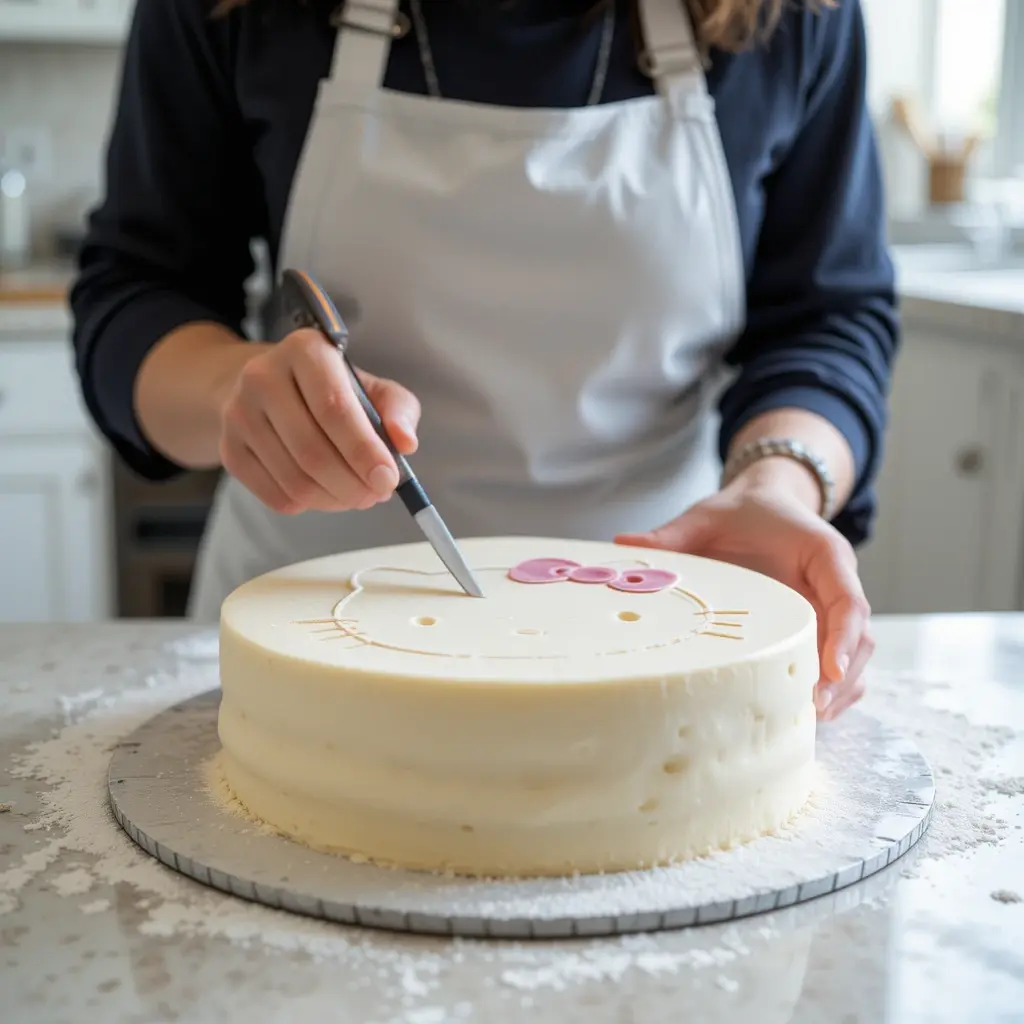
- Cut the Shape Outline: Once your cake is baked and completely cooled, use a template or drawing of Hello Kitty’s face as a guide. Place the template on top of the cake and use a sharp knife to cut around the edges, creating the face shape. If you prefer a freehand approach, lightly sketch the face shape on the cake with a toothpick or edible marker first, then begin carving.
- Carve the Features: Once the basic face shape is cut, start carving out the inner features like the eyes, whiskers, and the space for the bow. A serrated knife works best for clean cuts. Take your time and carve slowly to ensure the details are sharp and smooth.
2. Tips for Smooth Edges and a Symmetrical Look
When shaping the Hello Kitty face, symmetry and smoothness are key to making the cake look polished and professional. Here are some tips to achieve clean, smooth edges and a perfectly symmetrical face:
- Use a Template or Guide: If you’re carving by hand, a template can help ensure the shape is symmetrical. You can either print a picture of Hello Kitty’s face to scale or draw your own symmetrical outline to trace on the cake. If you’re using a mold, the design will already be pre-shaped, so focus on ensuring that the details inside the mold are even.
- Carve Slowly and Gently: Take your time when carving, especially around the edges. Using a serrated knife can help create smooth, precise cuts. Avoid cutting too deep in one go—making gradual cuts ensures the cake doesn’t lose its shape or become uneven.
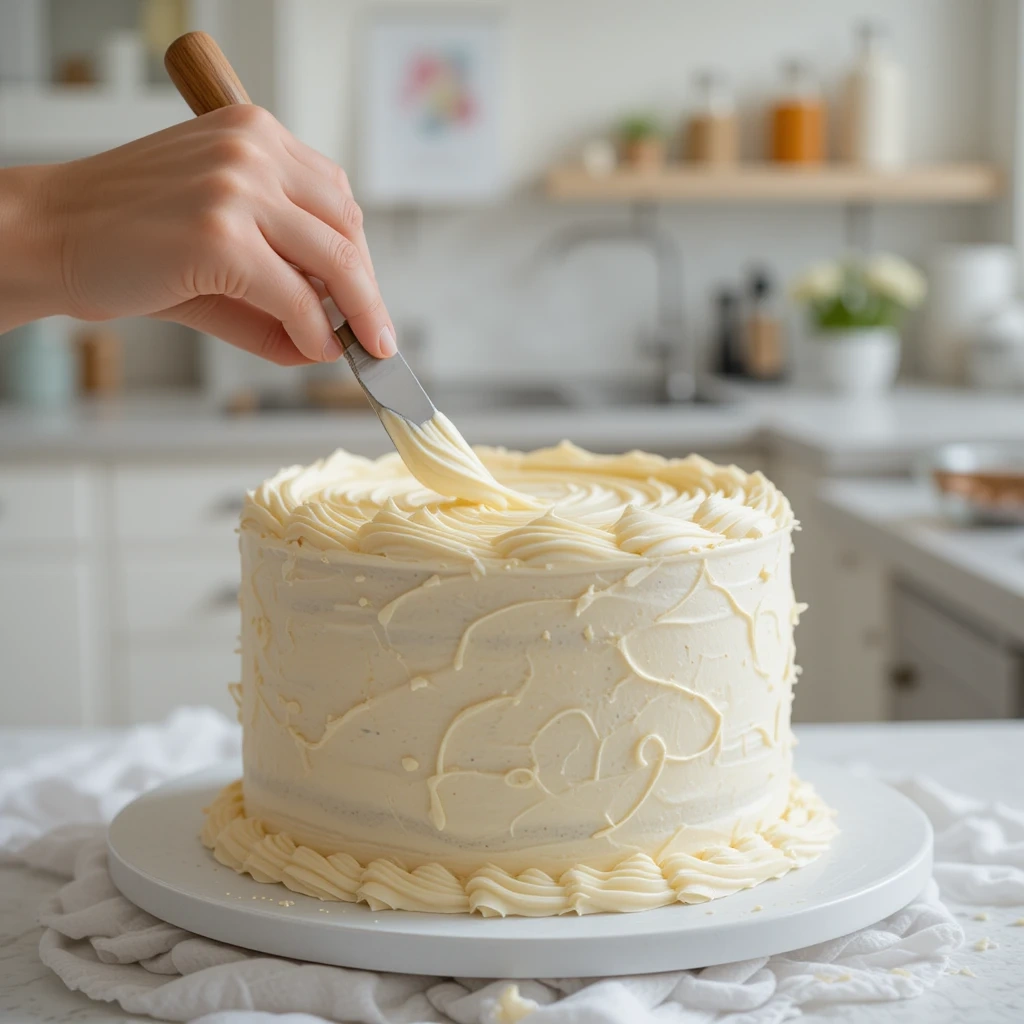
- Use a Crumb Coat: After carving, it’s essential to apply a crumb coat—a thin layer of buttercream or frosting—to the entire cake. This helps seal in any crumbs, smooths out rough patches, and provides a solid base for the final coat of frosting. Use an offset spatula to apply the crumb coat, making sure to cover the entire surface evenly.
- Smooth the Frosting: Once the crumb coat is set, apply the final layer of frosting or fondant. To ensure smooth edges and a symmetrical look, use a bench scraper or offset spatula to smooth out the frosting. You can also use a fondant smoother to gently press and smooth the fondant across the cake surface. If you’re using fondant, be sure to roll it out evenly and cover the cake in a smooth, wrinkle-free layer.
- Use a Leveling Tool: To ensure the top of your cake is even and flat, you can use a leveling tool or serrated knife to trim off any excess cake from the top. This will make it easier to place the fondant or frosting on top without it sinking or sliding.
- Symmetry Check: After the initial shaping and frosting, it’s important to step back and check the cake for symmetry. Make sure that the eyes, whiskers, and bow are evenly spaced and aligned. Use a ruler or measuring tape to double-check the placement of the features if necessary.
Decorating with Buttercream and Fondant
When it comes to decorating your Hello Kitty cake, buttercream and fondant are two popular and effective options. Each has its own set of benefits, and depending on the desired texture, finish, and level of detail, you can choose to use either one or combine both. Let’s break down how to use these two decorating mediums to achieve the perfect Hello Kitty cake.
1. Using Buttercream for a Smooth Finish
Buttercream is a classic cake decoration choice, known for its creamy texture, rich flavor, and versatility. It’s great for spreading over a cake and achieving a smooth finish, as well as for creating fun details.
- Choosing the Right Buttercream: When making buttercream, you can use several different types, depending on the desired outcome. American buttercream is the most common because it’s easy to make and has a sweet, rich flavor. For a smoother, less sweet option, Swiss meringue buttercream or Italian meringue buttercream may be ideal. These options create a silky smooth texture and can be easier to work with, especially for those new to cake decorating.
- Frosting the Cake: After your cake is shaped and has its crumb coat, apply a thick layer of buttercream. Use an offset spatula to spread the buttercream evenly across the top and sides of the cake. For a smooth and polished finish, you can use a bench scraper to smooth the buttercream along the edges and make the surface as flat as possible. The idea is to create a clean, flawless surface that will support any additional decorative elements like fondant or piping.
- Creating Details with Buttercream: Buttercream is perfect for piping small details such as Hello Kitty’s nose, whiskers, or bow. You can use piping bags fitted with different tips to create textured elements. For example, you can use a round tip to pipe the black whiskers, a petal tip for the bow, or even a leaf tip for subtle design accents.
- Adding Color to Buttercream: Buttercream takes food coloring well, so you can create the bright pink bow and yellow nose of Hello Kitty by tinting the buttercream in different shades. Make sure to use gel food coloring, as it provides more vibrant color without altering the texture of the frosting. Start by mixing a small amount of coloring into the buttercream and gradually adding more until you reach your desired hue.
2. Using Fondant for a Sleek, Professional Look
Fondant is a smooth, pliable sugar dough that can be rolled out and applied to cakes for a flawless, polished finish. It’s ideal for those looking to create sharp edges and detailed decorations, like the Hello Kitty face.
- Preparing Fondant: Fondant typically comes in pre-made packages, which makes it easy to work with. However, you can also make your own fondant at home using ingredients like marshmallows, powdered sugar, and water. To start, dust your work surface with powdered sugar or cornstarch to prevent the fondant from sticking. Roll it out using a rolling pin, ensuring that it’s thin but thick enough to cover the cake without tearing. For a Hello Kitty cake, you’ll need enough fondant to cover both the face and any additional decorations like the bow.
- Covering the Cake with Fondant: After applying a crumb coat and smoothing the buttercream, the next step is to cover the entire cake with fondant. Gently lift the rolled fondant and drape it over the cake. Use your hands to smooth the fondant down along the sides of the cake, ensuring it adheres to the surface without any air bubbles. Once it’s securely in place, trim the excess fondant at the bottom of the cake with a sharp knife. For clean edges, use a fondant smoother tool to press down the edges and ensure a seamless finish.
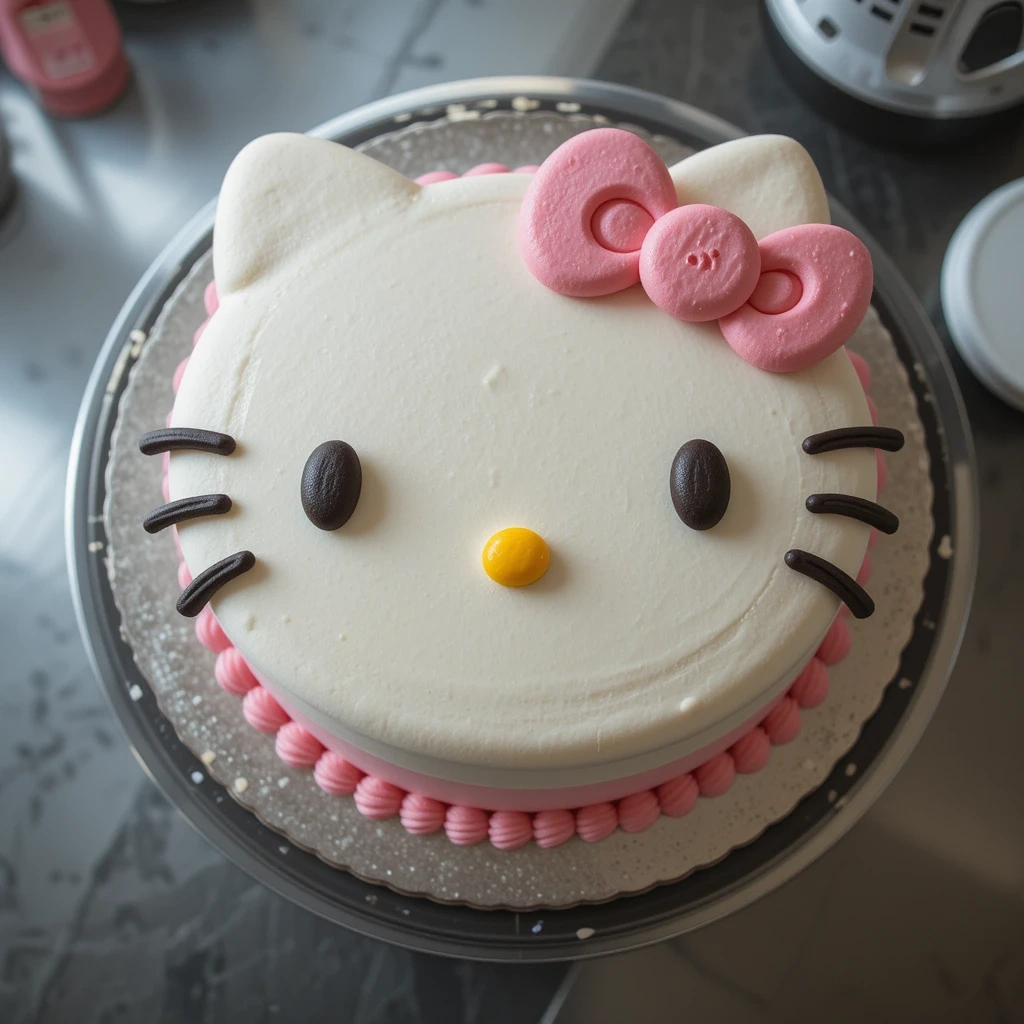
- Creating Hello Kitty’s Face with Fondant: Fondant is perfect for creating the distinct features of Hello Kitty. Start by rolling out white fondant to form the face. Shape it into an oval or circle and place it on the cake. For the bow, roll out pink fondant and cut it into two shapes—one for the main bow and one for the loop. These pieces should fit snugly at the top left side of the Hello Kitty face. Use a little water or edible glue to attach the bow pieces to the face.
- Adding the Eyes, Nose, and Whiskers: To create the facial features, you can use black fondant for the eyes and whiskers. Roll small pieces of fondant into round shapes for the eyes, and for the whiskers, roll tiny pieces of black fondant into long thin strands. If you’re not comfortable using fondant for the eyes and whiskers, edible food markers or black royal icing can also do the trick. For the nose, you can either roll yellow fondant into a small oval shape or use yellow candy melts.
3. Combining Buttercream and Fondant for a Custom Look
While both buttercream and fondant are effective on their own, using them together can give your Hello Kitty cake a more dynamic and detailed appearance.
- Fondant Base with Buttercream Details: A great way to combine both mediums is to use fondant as the base layer for smoothness and structure, and buttercream for intricate details. For example, after covering the cake with fondant, you can pipe buttercream whiskers or a buttercream mouth for a slightly textured, realistic look.
- Buttercream Piping Over Fondant: Sometimes, you may want to add a touch of texture or color using buttercream after applying fondant. You can pipe additional elements like polka dots or roses on the cake, making sure the fondant acts as a smooth backdrop to the piping work.
- Blending Edges: If you use both fondant and buttercream, be sure to blend the edges where they meet for a seamless transition. For example, if you pipe a small bow in buttercream, use fondant to cover the rest of the cake, and gently smooth the edges of the buttercream into the fondant to create a professional-looking finish.
4. Final Touches
Once your cake is covered with buttercream and fondant and all the features are in place, it’s time for the finishing touches. You can add extra embellishments, such as edible glitter, small sugar flowers, or other cute details that match the theme of the cake.
Whether you choose to use buttercream, fondant, or both, the key to decorating a Hello Kitty cake is to keep the design clean, neat, and whimsical. With a little creativity and attention to detail, you’ll have a cake that’s not only visually striking but also fun and delicious!
Pro Tips for a Stunning and Tasty Hello Kitty Cake
How to Get a Smooth Buttercream Finish
A smooth buttercream finish is essential for creating a professional-looking Hello Kitty cake. Whether you’re leaving the buttercream as the final decoration or using it as a base for fondant, achieving a flawless, even surface takes the right techniques and tools. Here’s a step-by-step guide to ensuring your buttercream is perfectly smooth.
1. Prepare Your Cake for Frosting
Before applying buttercream, make sure your cake layers are properly prepared.
- Level the Cake: If your cake has domed tops after baking, use a serrated knife or cake leveler to trim them flat. This will create an even surface for stacking the layers.
- Chill the Cake Layers: Chilled cake layers are firmer and easier to work with. After baking and cooling, wrap the cake layers in plastic wrap and refrigerate for at least 30 minutes before frosting.
- Apply a Simple Syrup (Optional): If your cake is dry or you want extra moisture, brush a light layer of simple syrup (a mix of sugar and water) over each layer before assembling.
2. Crumb Coat for a Flawless Base
A crumb coat is a thin layer of buttercream applied before the final coat. It helps trap crumbs and provides a stable base for a smooth finish.
- Apply a Thin Layer of Buttercream: Use an offset spatula to spread a thin layer of buttercream over the entire cake. This first coat doesn’t need to be perfect—it’s just to hold in the crumbs.
- Chill the Cake: Once the crumb coat is applied, place the cake in the refrigerator for at least 15-30 minutes. Chilling helps set the buttercream and prevents crumbs from mixing into the final layer.
3. Apply the Final Coat of Buttercream
Now that the crumb coat has set, it’s time for the final layer of buttercream.
- Use a Generous Amount of Buttercream: Start by adding more buttercream than you think you’ll need. It’s easier to remove excess than to keep adding more.
- Spread Evenly with an Offset Spatula: Use a large offset spatula to spread the buttercream across the top and sides of the cake. Work in smooth, even strokes to distribute the frosting.
- Smooth the Sides with a Bench Scraper: A bench scraper (or cake scraper) is the best tool for achieving a flawless finish. Hold it at a slight angle against the cake while rotating a turntable. Continue scraping off excess buttercream until the sides are smooth.
4. Perfecting the Edges
Once the sides are smooth, focus on the top edges for a clean look.
- Sharp Edges Method: After smoothing the sides, use an offset spatula to carefully pull excess buttercream inward toward the center of the cake. This creates a clean, crisp edge.
- Round Edge Method: If you prefer a softer, rounded edge, use gentle circular motions with the spatula to blend the buttercream over the top.
5. Fixing Imperfections and Final Touches
Even with careful smoothing, minor imperfections may remain.
- Dip the Spatula in Hot Water: Run your offset spatula under hot water, wipe it dry, and then glide it over the buttercream to create an ultra-smooth finish. The heat slightly melts the buttercream, making it easier to smooth.
- Patch Small Gaps: If you notice gaps or uneven spots, apply a tiny bit of buttercream and smooth it out with a spatula or bench scraper.
- Chill Again if Needed: If the buttercream starts to soften while working, pop the cake in the fridge for 10-15 minutes before making final adjustments.
6. Optional: Textured Buttercream Effects
If you don’t want a completely smooth finish, you can create fun textures with a spatula or piping tools:
- Rustic Swirls: Use an offset spatula to create soft swirls in the buttercream.
- Ridged Texture: Drag a cake comb along the sides for a decorative pattern.
- Ombre Effect: Blend two or more buttercream colors using a spatula for a gradient look.
Alternative Decorating Ideas
While traditional Hello Kitty cakes often feature smooth fondant and piped buttercream, there are many creative ways to decorate your cake while still capturing the adorable essence of Hello Kitty. Whether you want a different texture, a simpler approach, or a unique twist, here are some alternative decorating ideas to make your cake stand out.
1. Whipped Cream for a Soft, Fluffy Look
If you prefer a lighter, less sweet alternative to buttercream or fondant, whipped cream can create a soft and fluffy texture that still looks beautiful.
- Stabilized Whipped Cream: To ensure the whipped cream holds its shape, stabilize it with powdered sugar, gelatin, or cornstarch.
- Piping with Whipped Cream: Use a star tip to pipe the whipped cream in small rosettes or ruffles, mimicking the smoothness of fondant with a softer touch.
- Adding Color: Light pink or pastel-colored whipped cream can add a playful element to the design.
2. Chocolate and Candy Decorations
For a fun and delicious take on decorating, consider using chocolate and candy to bring Hello Kitty’s features to life.
- Chocolate Outlines: Melted dark or white chocolate can be piped into shapes like Hello Kitty’s whiskers, eyes, and bow. Once hardened, they can be carefully placed on the cake.
- Candy Accents: Small candies like chocolate pearls or licorice strings can replace piped details, making it easier to achieve precise features.
- Colored Candy Melts: Use pink or red candy melts to create an edible Hello Kitty bow.
3. Printed Edible Images
If you want a highly detailed Hello Kitty face without the effort of shaping fondant or piping intricate details, edible images are a great option.
- Custom Edible Prints: Many bakeries or online stores offer custom edible prints featuring Hello Kitty. Simply place the edible image on top of a smooth buttercream or fondant base.
- Wafer Paper Cutouts: For a DIY approach, print a Hello Kitty design on wafer paper and attach it using a thin layer of piping gel.
4. Sprinkle and Stencil Designs
For a fun and easy decorating technique, try using sprinkles or stencils to create a Hello Kitty-inspired look.
- Stenciling with Powdered Sugar or Cocoa: Place a Hello Kitty stencil over the cake and dust powdered sugar or cocoa over it for a simple yet striking design.
- Shaped Sprinkle Patterns: Use small pink, white, and black sprinkles to outline Hello Kitty’s face and features. You can even create her bow with tiny red sprinkles.
- Confetti Sprinkle Borders: Add a playful touch by covering the sides of the cake with colorful confetti sprinkles.
5. 3D Cake Toppers and Toys
If you want a fun and reusable decoration, consider using Hello Kitty-themed cake toppers and figurines.
- Plastic or Resin Hello Kitty Figures: These can be placed on top of the cake as an easy, mess-free way to decorate. Plus, they make a great keepsake after the party.
- DIY Paper Toppers: Print and cut out a Hello Kitty design on sturdy cardstock, then attach it to a lollipop stick for a simple and cute cake topper.
- Marzipan or Modeling Chocolate Figures: If you enjoy sculpting, create a small 3D Hello Kitty figure using marzipan or modeling chocolate for an edible topper.
By exploring these alternative decorating ideas, you can customize your Hello Kitty cake to fit your skill level, style, and creativity while still achieving an adorable and fun design.
Storage and Serving Suggestions
A beautifully decorated Hello Kitty cake deserves to be stored properly to maintain its freshness and visual appeal. Whether you’re preparing the cake in advance or saving leftovers for later, the right storage methods will keep it tasting delicious. Additionally, serving it at the right temperature enhances its flavor and texture. Here’s everything you need to know about storing and serving your Hello Kitty cake.
1. Short-Term Storage (Same-Day or Overnight)
If you plan to serve the cake within a few hours or the next day, follow these simple steps to keep it fresh:
- At Room Temperature: If your cake is covered in buttercream or fondant, you can leave it at room temperature for up to 24 hours. Make sure to place it in a cool, dry area away from direct sunlight and heat sources.
- Use a Cake Dome or Cover: A cake dome or an inverted large bowl can protect the cake from dust and moisture while keeping it fresh.
- Avoid Refrigeration Unless Necessary: Refrigerating a fondant-covered cake can cause condensation, making the decorations sticky or droopy. However, if your cake has perishable fillings like whipped cream or cream cheese, refrigeration is necessary.
2. Long-Term Storage (More than 24 Hours)
If you need to store your Hello Kitty cake for multiple days or want to prepare it ahead of time, follow these storage tips:
- Refrigerating the Cake:
- If your cake has perishable ingredients, store it in an airtight container in the fridge.
- To prevent drying out, wrap the cake in plastic wrap before placing it in the container.
- Let the cake sit at room temperature for about 30–60 minutes before serving to allow the flavors to shine.
- Freezing the Cake:
- If you want to store the cake for longer than a few days, freezing is the best option.
- Wrap individual cake slices or the whole cake tightly in plastic wrap, followed by a layer of aluminum foil.
- Place the wrapped cake in an airtight container or a freezer-safe bag.
- It can stay fresh for up to 3 months. When ready to serve, thaw it in the fridge overnight and bring it to room temperature before enjoying.
3. Best Ways to Serve the Cake
Presentation matters just as much as taste when serving a Hello Kitty cake. Here are a few tips to make the experience extra special:
- Ideal Serving Temperature: Cakes with buttercream or fondant should be served at room temperature for the best texture. Chilled cakes can be a bit firm, so letting them sit out for about an hour before serving ensures a soft bite.
- Perfect Cake Slices: To get clean, even slices, use a sharp knife dipped in warm water. Wipe the knife between each cut for the best results.
- Pairing with Drinks: Serve the cake with complementary beverages like milk, tea, hot chocolate, or fruit-infused water for a balanced dessert experience.
- Decorative Presentation: For a fun touch, serve each slice with a small Hello Kitty-themed cupcake topper, a dusting of powdered sugar, or a drizzle of berry sauce.
Proper storage and serving techniques ensure that your Hello Kitty cake remains just as delightful as when it was first made, whether you’re enjoying it fresh or saving a slice for later.
Final Thoughts – Make Your Own Hello Kitty Cake Today!
Recap: How Easy and Fun This Recipe Is
Making a Hello Kitty cake is not only a delightful baking project but also a fun way to unleash your creativity. Whether you’re a beginner or an experienced baker, this recipe is designed to be simple and enjoyable from start to finish.
1. A Straightforward and Approachable Recipe
One of the best things about this Hello Kitty cake is how easy it is to make. The cake base uses basic ingredients like flour, sugar, eggs, and butter, making it a foolproof recipe for any home baker. The step-by-step process of baking, shaping, and decorating ensures that even those with little baking experience can achieve an adorable and professional-looking cake.
- Simple Ingredients: Most of the ingredients are pantry staples, so there’s no need for special or hard-to-find items.
- Easy-to-Follow Steps: Each stage—from mixing the batter to carving the shape and adding decorations—is straightforward, with plenty of room for customization.
- Beginner-Friendly Techniques: Whether you choose to use a Hello Kitty cake mold or carve the shape manually, the process is approachable and rewarding.
2. A Creative and Fun Baking Experience
Baking a Hello Kitty cake isn’t just about following a recipe—it’s an opportunity to express your creativity and have fun with decorating. The possibilities are endless, whether you choose classic fondant decorations, buttercream piping, or alternative decorating ideas.
- Customizable Flavors and Colors: You can experiment with different cake flavors, fillings, and frosting colors to match any occasion or personal preference.
- Decorating for All Skill Levels: Whether you use a simple stencil, edible images, or handcrafted fondant details, you can adapt the decorations to your comfort level.
- A Great Activity for Kids and Families: If you’re baking with kids, they’ll love getting involved in shaping, frosting, and decorating the cake. It’s a perfect bonding activity for birthdays, parties, or just for fun.
3. A Showstopping and Memorable Cake
Beyond its ease and fun factor, this Hello Kitty cake is sure to impress. Whether it’s for a birthday party, a themed celebration, or just a special treat, the finished cake is both eye-catching and delicious.
- Perfect for Any Occasion: Whether for a child’s birthday, a Hello Kitty-themed party, or just a fun baking project, this cake is always a hit.
- Adorable and Instagram-Worthy: The iconic Hello Kitty face, complete with its bow and whiskers, makes for a picture-perfect dessert.
- A Sweet Treat Everyone Will Love: With its fluffy cake layers, delicious frosting, and charming design, this cake is just as tasty as it is cute.
Encourage Readers to Try Different Flavors and Decorations
One of the best things about making a Hello Kitty cake is how versatile it is. You don’t have to stick to a single flavor or decoration style—this cake can be customized in countless ways to suit any taste or occasion. Whether you prefer classic vanilla, rich chocolate, or something more adventurous, there’s a perfect combination for everyone. Here’s why you should get creative with flavors and decorations to make your Hello Kitty cake truly unique.
1. Experiment with Different Cake Flavors
The beauty of this cake is that you can switch up the base flavor to match your personal preference or the theme of your event.
- Classic Vanilla: A simple and timeless choice that pairs well with any frosting or filling.
- Rich Chocolate: For those who love a deeper, more indulgent flavor. A moist chocolate cake with buttercream or ganache makes for a delicious contrast to the cute Hello Kitty design.
- Strawberry or Raspberry: A fruity, slightly tart flavor that complements the pink and white color scheme of the cake.
- Funfetti or Birthday Cake: Adding sprinkles to the batter creates a colorful, festive surprise inside every slice.
- Matcha or Green Tea: A unique, slightly earthy flavor for a more sophisticated twist.
- Red Velvet: A deep red cake with a hint of cocoa for an elegant yet fun variation.
2. Get Creative with Frosting and Fillings
Frosting and fillings can completely change the taste and texture of your cake. Instead of sticking with just one, why not mix and match?
- Buttercream Frosting: Easy to work with, smooth, and great for piping decorations. You can add different extracts like almond, lemon, or coconut for extra flavor.
- Cream Cheese Frosting: A slightly tangy, creamy option that pairs well with red velvet, carrot cake, or spice cake.
- Whipped Cream Frosting: Light, airy, and perfect if you prefer a less sweet topping.
- Chocolate Ganache: A rich and glossy coating that adds a touch of elegance.
- Fruit Fillings: Layers of strawberry, raspberry, or passionfruit jam can add a refreshing twist.
3. Play Around with Decorations
While the classic Hello Kitty design features a white face with a pink bow, there are endless ways to add your own creative touch.
- Different Colors: Instead of the usual pink bow, try blue, purple, or even a glittery gold one.
- Sprinkles and Edible Glitter: Add a little sparkle to the bow, whiskers, or around the edges for a festive touch.
- Ombre or Marbled Frosting: Blend two or more colors together for a unique visual effect.
- Themed Additions: If you’re making the cake for a specific event, consider adding details like hearts, stars, or floral designs.
- Personalized Messages: Use edible markers or piped icing to write a name or special message on the cake.
4. Try Mini Hello Kitty Cakes or Cupcakes
If you don’t want to make a full-sized cake, consider baking smaller versions for an easy-to-serve treat.
- Cupcakes: Make individual Hello Kitty cupcakes using white frosting and small fondant bows.
- Mini Cakes: Use small round cake molds and decorate them individually for a party-friendly option.
- Cake Pops: Turn cake crumbs and frosting into adorable bite-sized Hello Kitty cake pops.
5. Make It a Fun Family or Group Activity
Encouraging creativity in the kitchen is a great way to bond with family and friends. If you have kids, let them decorate their own mini Hello Kitty cakes or cupcakes with different colors and toppings. Hosting a cake decorating party can also be a fun way to celebrate birthdays or special occasions.
Invite Them to Share Their Creations on Social Media and Stay Tuned for More Fun Recipes
Baking a Hello Kitty cake is not just about making a delicious dessert—it’s about creativity, fun, and sharing the joy with others. Now that you’ve put time and effort into creating your own adorable masterpiece, why not show it off?
1. Share Your Hello Kitty Cake Creations Online
One of the best parts of baking is seeing how everyone puts their own twist on a recipe. Whether you followed the classic Hello Kitty design or gave it a unique touch with different flavors and decorations, I’d love to see your version!
- Post Your Cake on Social Media: Share a picture on Instagram, Facebook, or Pinterest and tag @VeibrantRecipes so I can check it out and feature some of your creations.
- Use a Fun Hashtag: Try using #HelloKittyCake #VeibrantBakes or #CuteBakingIdeas to connect with other bakers and see how others have decorated their cakes.
- Share Your Baking Journey: If you had fun baking with your family, tried a new technique, or learned something along the way, feel free to share your experience along with the photo.
2. Join the Baking Community
Baking is always more fun when you do it together! If you enjoy making themed cakes, why not connect with others who love to bake and decorate?
- Follow Veibrant Recipes for More Baking Inspiration: If you enjoyed making this Hello Kitty cake, stay tuned for more fun and creative baking ideas. From character-themed cakes to delicious homemade desserts, there’s always something new to try.
- Subscribe for More Recipes: If you don’t want to miss out on future recipes, make sure to follow my blog for the latest updates.
- Engage with Other Bakers: Comment on posts, ask questions, and share your favorite baking tips with fellow cake lovers.
3. Try More Fun Recipes
If you had fun making this cake, why stop here? There are plenty of other themed cakes and desserts you can try:
- A Barbie Cake – Perfect for a princess-themed birthday.
- A Pokémon Cake – Great for kids and anime lovers.
- Chocolate Drip Cakes – A stylish and indulgent option for any occasion.
- Cute Animal-Themed Cupcakes – Adorable and easy-to-make treats.
4. Stay Connected for More Baking Fun
Baking should always be exciting and creative. If you’re looking for more dessert ideas, cake decorating tips, and fun recipes, be sure to stay connected. There’s always something new coming up!
So grab your piping bags, get inspired, and start baking your next fun treat. I can’t wait to see what you create—happy baking!
Conclusion
Creating a Hello Kitty cake is a delightful experience that combines baking, decorating, and creativity. Whether you’re making it for a birthday, a themed party, or just for fun, this cake is guaranteed to impress with its adorable design and delicious flavors. From choosing the perfect cake base to shaping, frosting, and decorating, every step allows you to personalize your creation and make it uniquely yours.
The best part is how easy it is to customize! With different flavors, colors, and decorating techniques, you can make your Hello Kitty cake as simple or elaborate as you like. Whether you go for a classic vanilla cake with smooth fondant or a bold, colorful version with fun buttercream piping, the possibilities are endless.
Now it’s time to put your skills to the test! Gather your ingredients, grab your decorating tools, and start baking. And when you’re done, don’t forget to share your creation with friends, family, or on social media—I’d love to see your Hello Kitty cake! Stay tuned for more fun and creative recipes to keep your baking adventures going.
https://www.bettycrocker.com/recipes/hello-kitty-cake/abb16cd4-e425-4d60-ac3d-b45c0afeea90