Few things capture the spirit of creativity and celebration quite like a Minecraft cake-both in the pixelated world of the game and in real-life kitchens. In Minecraft, cake is a unique food item and placeable block, instantly recognizable with its blocky shape and bright red-and-white frosting. Unlike other foods in the game, you can’t simply eat cake from your inventory; you have to place it in the world and take slices, making it a communal treat perfect for in-game parties and milestones.
Bringing a Minecraft cake to life outside the screen is an adventure in itself. Baking one at home means gathering classic cake ingredients-like flour, sugar, eggs, and butter-alongside colorful decorations to mimic the game’s iconic look. Whether you’re crafting a simple grass block or going all out with fondant figures of Steve and Creepers, building and decorating a Minecraft cake is as much about creativity as it is about baking skill.
This guide will walk you through each step of making your own Minecraft cake, from mixing the batter to assembling and decorating your edible masterpiece. Whether you’re a seasoned baker or a Minecraft fan trying your hand at cake-making for the first time, you’ll find tips, tricks, and inspiration to help you celebrate your love for the game-one delicious slice at a time
When I first decided to bake a Minecraft cake, I was both excited and a bit overwhelmed. The vibrant world of Minecraft is filled with creativity, and I wanted to capture that essence in my baking. The first step was gathering all the necessary ingredients and supplies.
I made a list that included flour, sugar, eggs, butter, baking powder, and vanilla extract. I also needed food coloring to create those iconic green and brown hues reminiscent of the game’s landscape. I remember standing in the grocery aisle, staring at the array of baking supplies.
It felt like a mini-adventure in itself! I picked up some fondant for decorating, as well as edible glitter to give my cake that extra sparkle. I also made sure to grab a few essential tools: mixing bowls, measuring cups, a whisk, and of course, a cake pan shaped like a square—because what’s more Minecraft than a blocky cake?
With everything in my cart, I felt ready to embark on this culinary quest.
Table of Contents
Preparing the Cake Batter
Getting the Right Texture
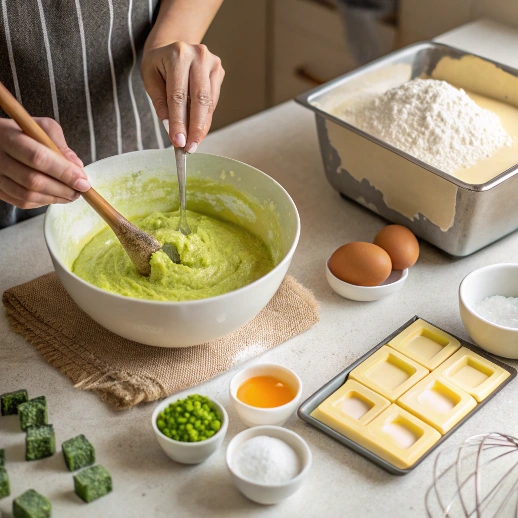
As I sifted the flour and baking powder together, I couldn’t help but think about how important it is to get the right texture for the cake. After mixing everything together, I divided the batter into two bowls. One bowl would remain plain, while I added green food coloring to the other to create that signature Minecraft grass block look.
Bringing the Game to Life
The vibrant green hue brought a smile to my face; it was like bringing a piece of the game into my kitchen.
Building the Minecraft Cake Structure
With my cake batter ready, it was time to bake! I poured the plain batter into one square cake pan and the green batter into another. As they baked in the oven, I took a moment to reflect on how much fun this project was turning out to be.
The aroma of baking cake wafted through my home, making it feel cozy and inviting. After about 25 minutes, I pulled them out and let them cool on a wire rack. Once cooled, it was time to assemble my Minecraft cake structure.
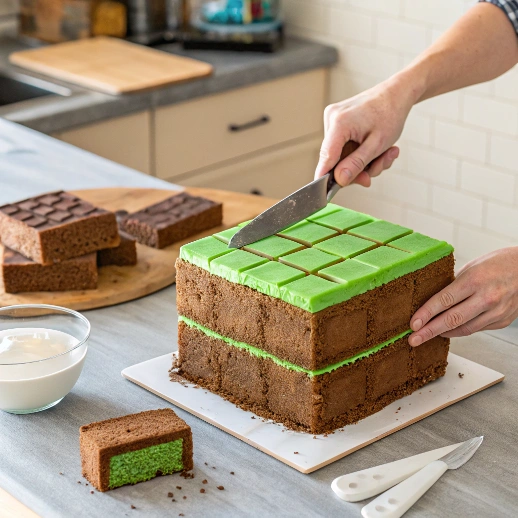
I carefully leveled off the tops of both cakes with a serrated knife to ensure they would stack neatly. I placed the green cake on the bottom as the grass layer and topped it with the plain cake to represent dirt. It felt like building in Minecraft itself—layering blocks to create something unique!
To hold everything together, I spread a thin layer of frosting between the two layers. It was satisfying to see my creation take shape, and I couldn’t wait to move on to the decorating phase.
Decorating the Cake with Minecraft-themed Designs
| Design | Number of cakes decorated | Time taken (in hours) |
|---|---|---|
| Creeper face | 15 | 2 |
| Steve character | 10 | 1.5 |
| Diamond sword | 8 | 1 |
| Enderman | 12 | 2.5 |
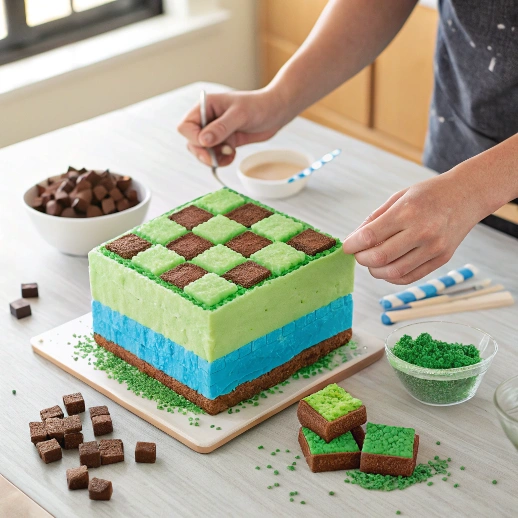
Now came the most exciting part: decorating! I whipped up a batch of buttercream frosting and divided it into several bowls, tinting them with various food colors to match different elements from Minecraft—brown for dirt, blue for water, and green for grass. As I spread the brown frosting around the sides of the cake, I felt like an artist painting on a canvas.
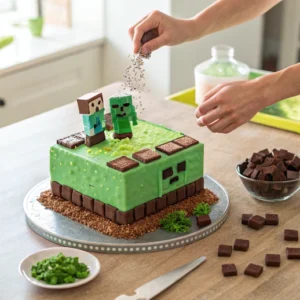
Each stroke brought me closer to transforming this simple cake into a Minecraft masterpiece. I then rolled out my fondant and cut it into squares to mimic Minecraft blocks. Placing them strategically around the cake made it look like a mini landscape from the game.
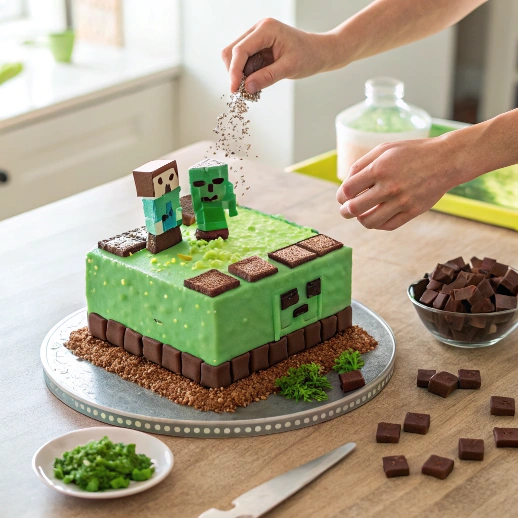
I even crafted tiny fondant figures of Steve and a Creeper to add some character! As I stepped back to admire my work, I couldn’t help but feel proud. It was more than just a cake; it was a tribute to one of my favorite games.
Adding the Finishing Touches
With the main decorations complete, it was time for those all-important finishing touches. I sprinkled edible glitter over the top of the cake for that magical sparkle effect—just like finding diamonds in Minecraft! Then, I added some chocolate rocks around the base for an authentic touch that resembled gravel blocks in the game.
Each little detail made me giddy with excitement; it felt like I was crafting something truly special. As I placed my completed cake on a decorative stand, I couldn’t help but take a few photos before cutting into it. The vibrant colors and intricate designs were too good not to share!
It was a moment of pure joy as I realized that all my hard work had paid off. This wasn’t just any cake; it was a celebration of creativity and nostalgia wrapped up in one delicious package.
Tips for Baking a Moist and Fluffy Cake
Throughout my baking journey, I’ve learned that achieving a moist and fluffy cake is an art form in itself. One key tip is to ensure that all your ingredients are at room temperature before you start mixing. This simple step can make a world of difference in how well your batter comes together.
Additionally, be careful not to overmix once you add your dry ingredients; this can lead to a dense texture instead of that light fluffiness we all crave. Another trick I’ve picked up is to add a bit of sour cream or yogurt into the batter. This not only enhances moisture but also adds a subtle tang that elevates the flavor profile of your cake.
Lastly, don’t forget to check your oven temperature with an oven thermometer; sometimes our ovens can be off by quite a bit! These little tips have transformed my baking experience and helped me create cakes that are consistently delicious.
Planning a Minecraft-themed celebration? Check out this fun and easy Minecraft Cake recipe on Allrecipes: https://www.allrecipes.com/recipe/254203/minecraft-cake/. With its pixel-perfect design and classic cake flavor, it’s the ultimate dessert for gamers of all ages. Whether you’re crafting it for a birthday or just because, this cake brings the world of Minecraft to life—one delicious square at a time.
Serving and Enjoying the Minecraft Cake
After all that hard work, it was finally time to serve my Minecraft cake! I gathered my friends for a small gathering, excited to share this creation with them. As I sliced into the cake, everyone’s eyes lit up at the sight of those colorful layers inside.
It felt like unveiling a treasure chest filled with goodies! The first bite was met with delighted cheers; they loved how moist and flavorful it turned out. We spent the evening reminiscing about our favorite Minecraft moments while enjoying slices of cake adorned with fondant characters.
It was more than just dessert; it became a centerpiece for laughter and storytelling. Sharing this experience with friends reminded me why I love baking so much—it’s not just about creating something delicious but also about bringing people together.
Craving something sweet but don’t want a full-sized dessert? Head over to Veibrant Recipes and explore our Mini Desserts collection: https://veibrantrecipes.com/mini-desserts/. From bite-sized cheesecakes to tiny tarts and layered dessert cups, these fun and easy-to-make recipes are perfect for parties, holidays, or anytime you need just a little indulgence. They’re as cute as they are delicious—perfect for satisfying your sweet tooth without overdoing it.
5 Common Mistakes to Avoid and Their Solutions
As someone who has baked quite a few cakes over the years, I’ve encountered my fair share of mishaps along the way. One common mistake is not measuring ingredients accurately; this can lead to disastrous results! To avoid this, always use proper measuring cups and spoons for dry and wet ingredients respectively.
Another pitfall is opening the oven door too soon while baking; this can cause your cake to sink in the middle. To prevent this from happening, resist the urge to peek until at least two-thirds of the baking time has passed. Additionally, using cold ingredients can lead to uneven mixing; always remember to bring everything to room temperature before starting.
Lastly, don’t forget about cooling your cakes properly before decorating them! If you frost while they’re still warm, you risk melting your frosting into a gooey mess. Patience is key here—let them cool completely!
By keeping these common mistakes in mind, you’ll be well on your way to creating your own perfect Minecraft cake at home!
FAQs
What ingredients do I need to bake a Minecraft cake at home?
What supplies do I need to bake a Minecraft cake at home?
How do I prepare the cake batter for a Minecraft cake?
How do I build the Minecraft cake structure?
How do I decorate the Minecraft cake with Minecraft-themed designs?
What are the finishing touches for a Minecraft cake?
What are some tips for baking a moist and fluffy Minecraft cake?
How do I serve and enjoy the Minecraft cake?
minecraft cake
Ingredients
- 2 cups all-purpose flour
- 1 ½ cups granulated sugar
- 1 cup unsalted butter softened
- 4 large eggs
- 1 cup milk
- 2 tsp baking powder
- 2 tsp vanilla extract
- Green brown, and blue food coloring
- Fondant white, green, brown, black
- Edible glitter
- Chocolate rocks or candies for decoration
- Buttercream frosting for decorating
- Optional: sour cream or yogurt for extra moisture
- Pros
- Fun and creative cake for Minecraft fans
- Great for birthdays and themed parties
- Customizable with different Minecraft designs
- Moist and fluffy texture with the right technique
- Brings people together for a memorable experience
- Cons
- Requires time and patience for decorating
- Fondant work can be challenging for beginners
- Needs special square cake pans for best effect
- Can be messy with food coloring and fondant
Instructions
- Gather Ingredients and Supplies:
- Prepare all ingredients at room temperature. Gather mixing bowls, measuring cups, whisk, and square cake pans.
- Prepare the Cake Batter:
- Sift flour and baking powder together.
- In a separate bowl, cream butter and sugar until light and fluffy.
- Add eggs one at a time, then mix in vanilla.
- Alternate adding flour mixture and milk, mixing gently.
- Divide batter into two bowls. Tint one bowl with green food coloring for the grass layer.
- Bake the Cakes:
- Pour plain batter into one square cake pan, green batter into another.
- Bake at 350°F (175°C) for about 25 minutes, or until a toothpick comes out clean.
- Let cakes cool completely on a wire rack.
- Build the Cake Structure:
- Level the tops of both cakes with a serrated knife.
- Place the green cake on the bottom, plain cake on top.
- Spread a thin layer of frosting between layers to hold them together.
- Decorate with Minecraft-Themed Designs:
- Prepare buttercream frosting in green, brown, and blue.
- Frost the sides and top to mimic grass, dirt, and water blocks.
- Roll out fondant and cut into squares. Arrange on cake to resemble Minecraft blocks.
- Add fondant figures (Steve, Creeper) and chocolate rocks.
- Add the Finishing Touches:
- Sprinkle edible glitter over the cake for sparkle.
- Place cake on a decorative stand.
- Add candles or extra edible decorations if desired.
- Serve and Enjoy:
- Slice and serve with friends and family.
- Enjoy the moist, flavorful cake and celebrate your Minecraft creation!
