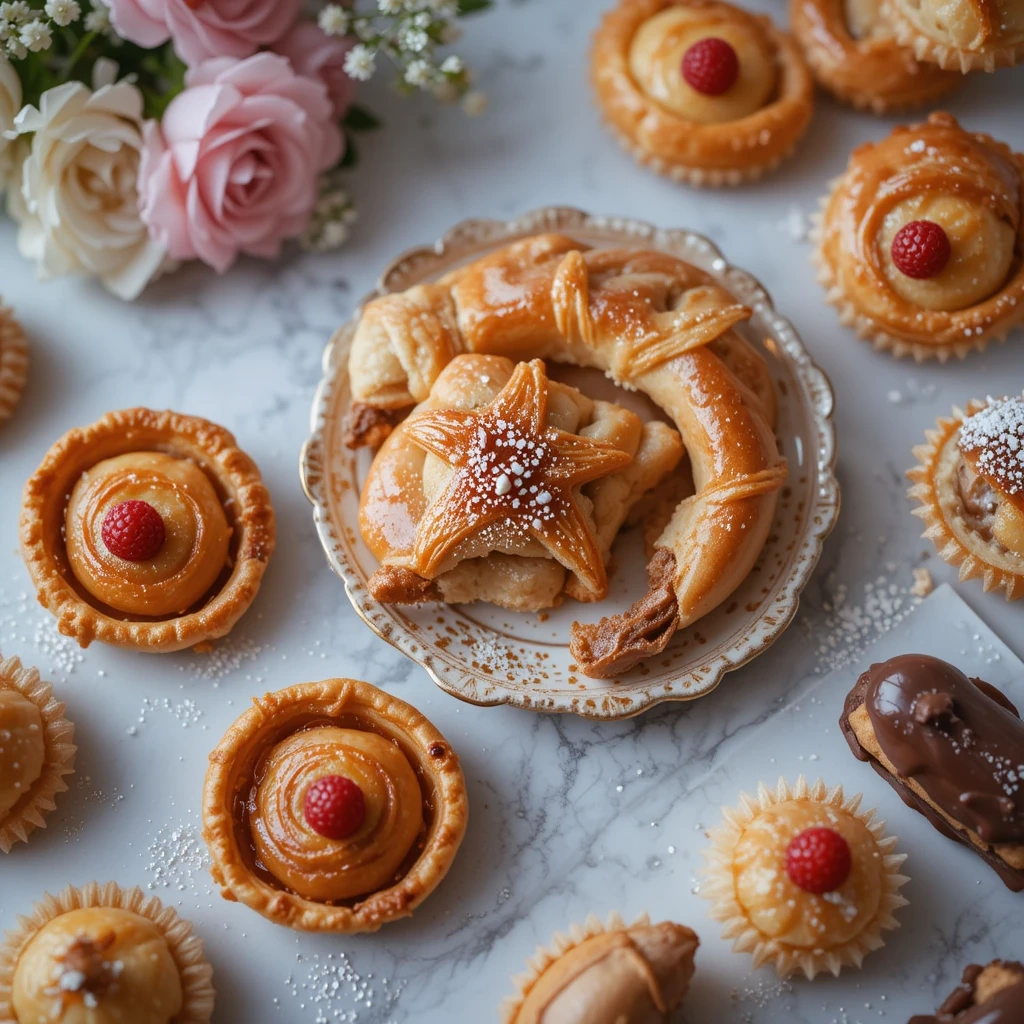
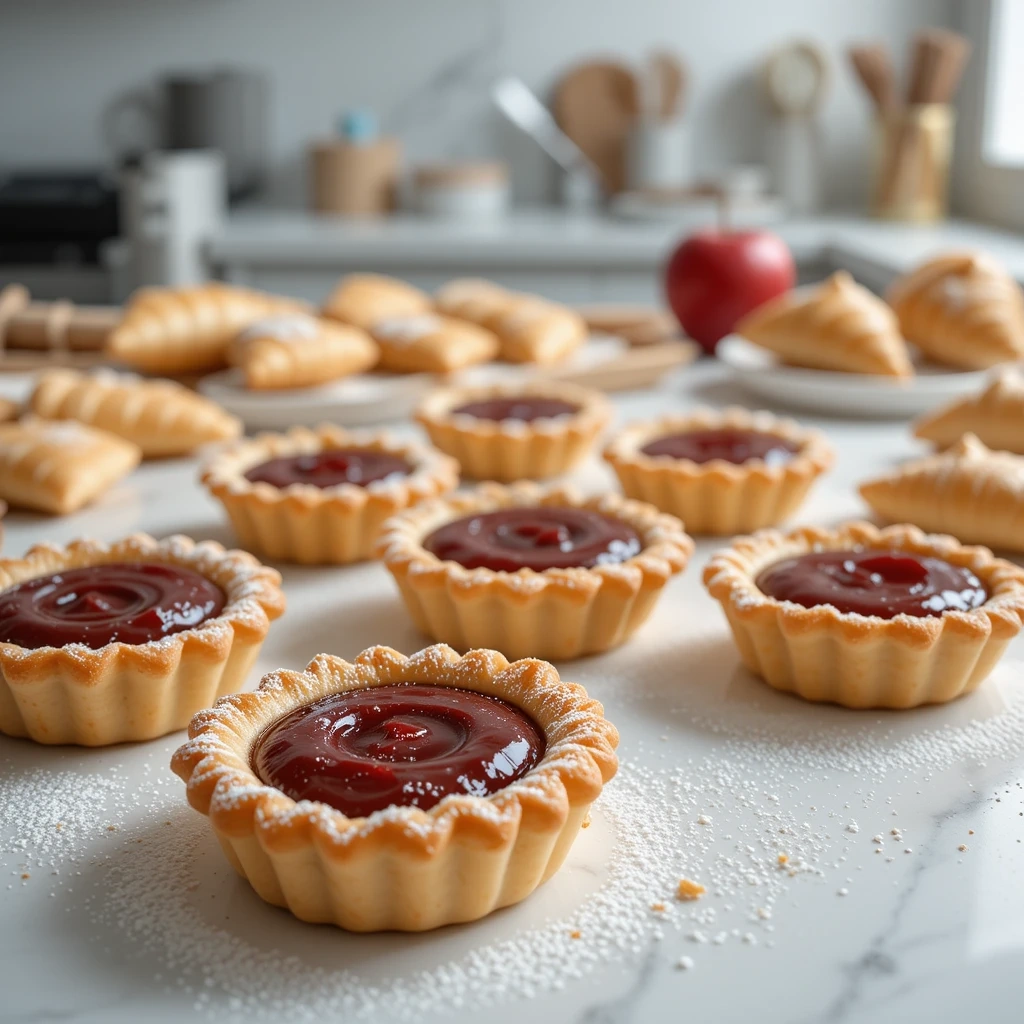
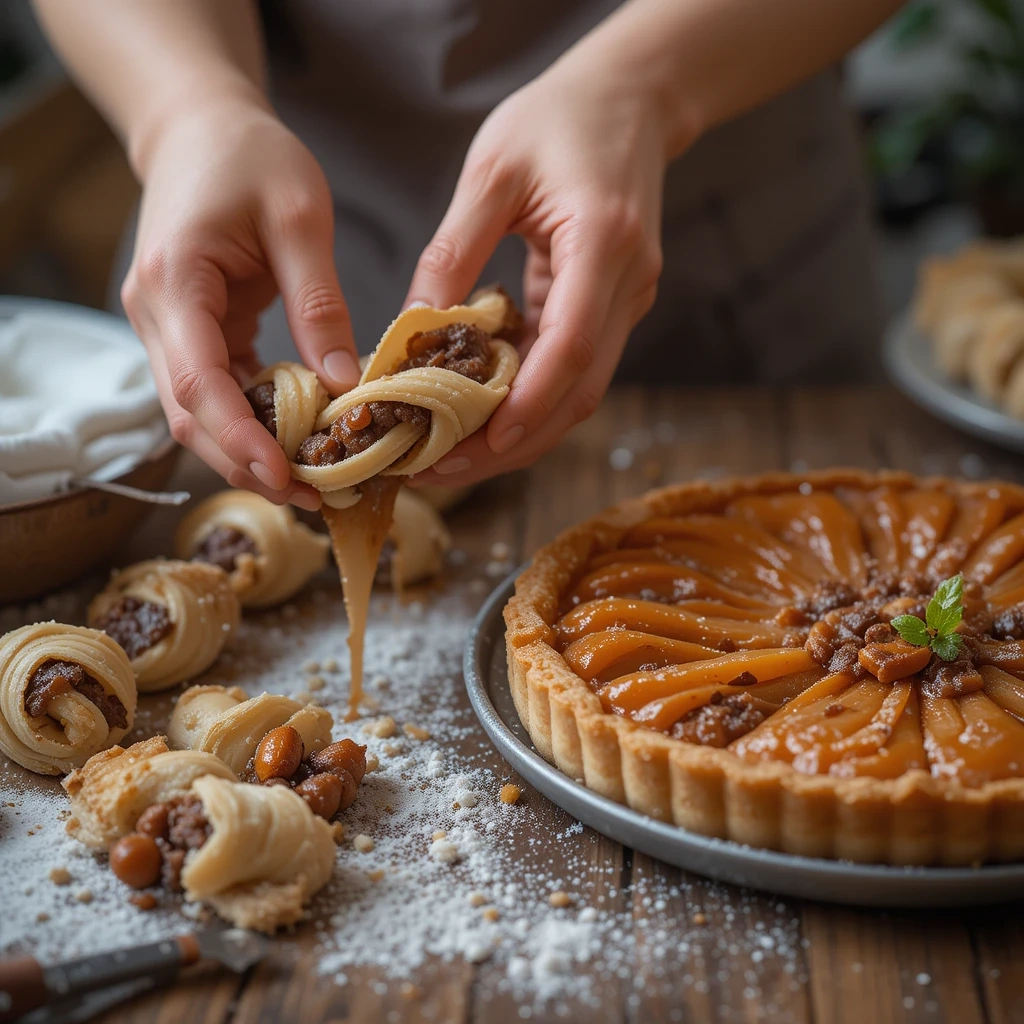
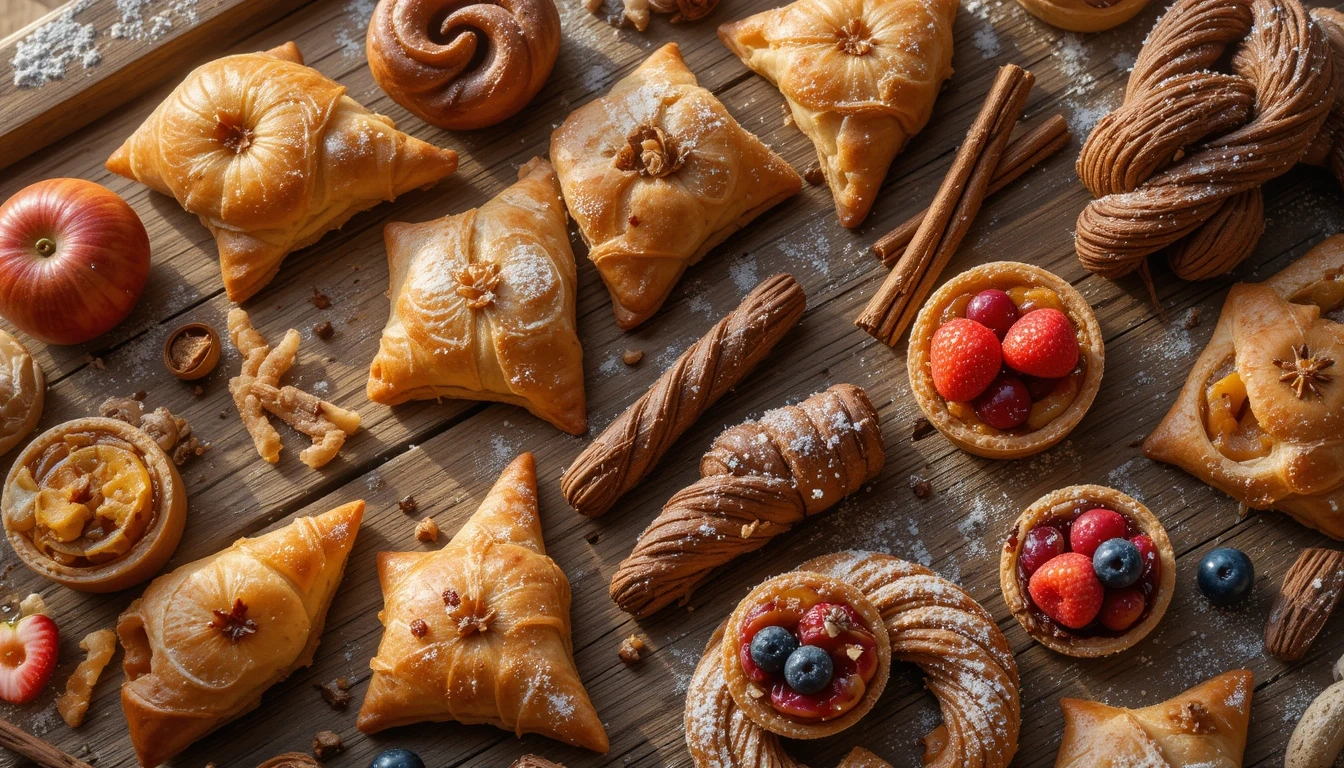
If you love desserts that are flaky, buttery, and irresistibly delicious, then puff pastry is your best friend in the kitchen. Whether you’re a seasoned baker or just looking for quick and easy treats, puff pastry dessert recipes are the perfect way to impress without the hassle.
The best part? You don’t have to make puff pastry from scratch! Store-bought puff pastry makes it incredibly simple to whip up elegant desserts in no time. From chocolate-filled pastries to fruit tarts and custard-filled delights, there’s a puff pastry dessert for every craving.
In this post, I’ll share 10 irresistible puff pastry dessert recipes that you can easily make at home. Get ready to enjoy crispy, golden layers packed with sweet, decadent flavors!
Table of Contents
Classic Puff Pastry Dessert Recipes: Simple Yet Delicious
https://www.allrecipes.com/puff-pastry-dessert-recipes-8746729
Apple Turnovers – Flaky Pastry Filled with Cinnamon-Spiced Apples
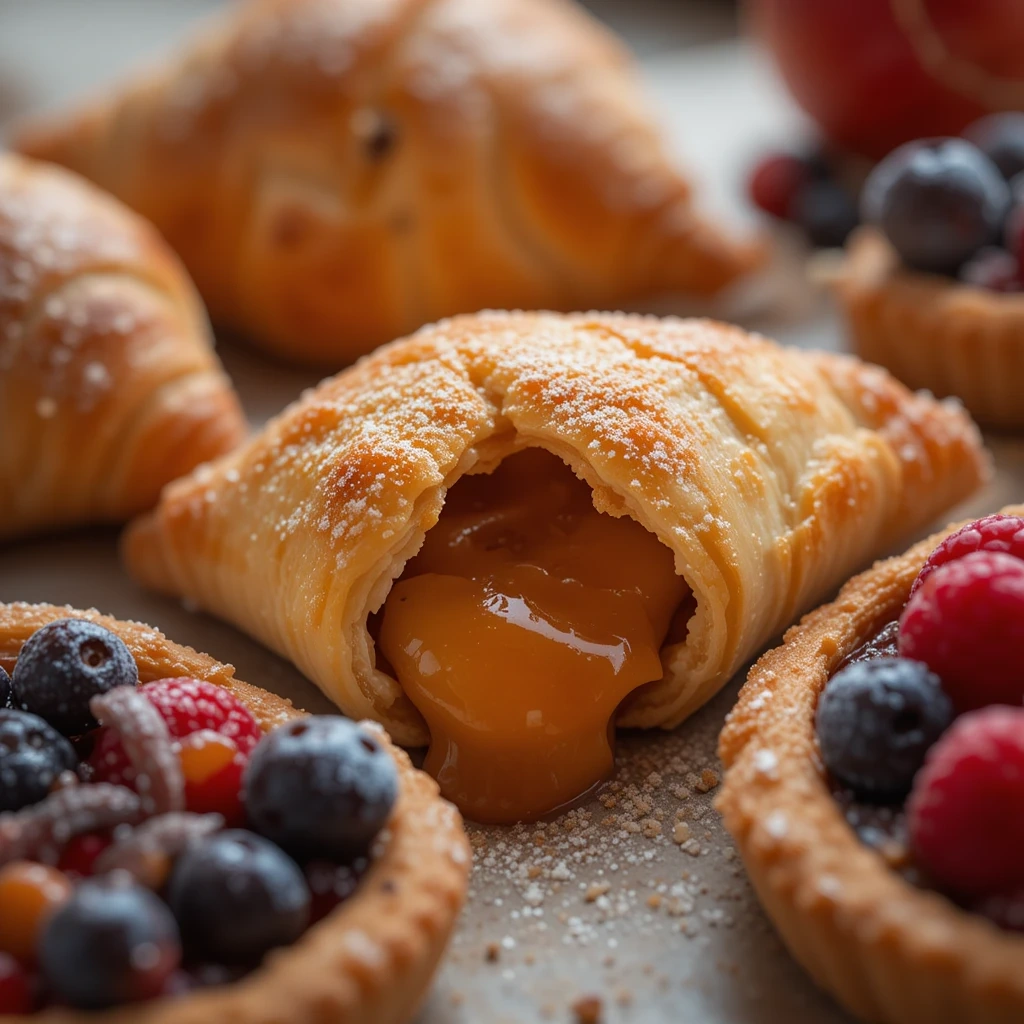
Apple turnovers are a classic puff pastry dessert that never goes out of style. With their crispy, golden-brown crust and warm, spiced apple filling, they’re the perfect combination of comfort and elegance. Best of all, they’re incredibly easy to make using store-bought puff pastry, so you can enjoy homemade apple turnovers without the fuss of making dough from scratch.
Why You’ll Love Apple Turnovers
✔ Simple Ingredients – Just a handful of pantry staples like apples, sugar, and cinnamon.
✔ Quick to Make – Ready in under 30 minutes with minimal prep time.
✔ Perfect for Any Occasion – Great for breakfast, snacks, or dessert.
Ingredients
- 1 sheet store-bought puff pastry, thawed
- 2 medium apples, peeled, cored, and diced (Granny Smith or Honeycrisp work best)
- 2 tbsp brown sugar (or adjust to taste)
- 1 tsp cinnamon
- ½ tsp vanilla extract
- 1 tbsp lemon juice (to prevent apples from browning)
- 1 tbsp cornstarch (to thicken the filling)
- 1 egg, beaten (for egg wash)
- 1 tbsp coarse sugar (for sprinkling, optional)
Instructions
- Preheat the oven to 375°F (190°C) and line a baking sheet with parchment paper.
- Prepare the apple filling: In a saucepan over medium heat, combine the diced apples, brown sugar, cinnamon, vanilla, and lemon juice. Cook for about 5 minutes until the apples soften slightly. Stir in cornstarch to thicken the mixture, then remove from heat and let cool.
- Cut the puff pastry: Roll out the puff pastry sheet on a lightly floured surface and cut it into four equal squares.
- Fill and fold: Spoon a small amount of apple filling onto one side of each square. Fold the pastry over to form a triangle, pressing the edges together with a fork to seal.
- Egg wash and sprinkle: Brush the tops with the beaten egg and sprinkle with coarse sugar for extra crunch.
- Bake: Transfer to the prepared baking sheet and bake for 18-20 minutes, or until golden brown and flaky.
- Cool and serve: Let the turnovers cool for a few minutes before serving. Enjoy them warm, optionally dusted with powdered sugar or drizzled with caramel sauce.
Tips for the Best Apple Turnovers
- Use tart apples like Granny Smith for a balanced sweet-tart flavor.
- Don’t overfill the turnovers, or the filling may leak out while baking.
- For extra crispiness, bake them in a preheated oven at high heat (375-400°F).
- Store leftovers in an airtight container and reheat in the oven for a crispy texture.
Apple turnovers are a timeless, crowd-pleasing dessert that you can whip up with minimal effort. Whether you serve them with a scoop of vanilla ice cream or enjoy them as a morning treat with coffee, these puff pastry delights will always be a hit!
Palmiers – Crispy, Caramelized Puff Pastry Cookies
Palmiers, also known as elephant ears, are delicate, buttery puff pastry cookies with a crisp, caramelized sugar coating. These elegant French treats may look fancy, but they’re surprisingly easy to make with just two ingredients—store-bought puff pastry and sugar! With their light, flaky texture and golden-brown crunch, palmiers are perfect for snacking, tea-time, or gifting.
Why You’ll Love Palmiers
✔ Only Two Ingredients – No complicated dough or fancy equipment required.
✔ Super Quick to Make – Ready in about 20 minutes with minimal prep.
✔ Crispy, Buttery, and Sweet – The perfect balance of caramelized sugar and flaky layers.
✔ Customizable – Can be flavored with cinnamon, chocolate, or even Nutella.
Ingredients
- 1 sheet store-bought puff pastry, thawed
- ½ cup granulated sugar (or more for extra caramelization)
- Optional: ½ tsp cinnamon for a warm spice twist
Instructions
- Preheat the oven to 400°F (200°C) and line a baking sheet with parchment paper.
- Roll out the puff pastry on a lightly floured surface, ensuring it’s smooth and even.
- Sprinkle sugar evenly over the surface, then gently press it into the dough with a rolling pin. Flip the pastry and repeat on the other side.
- Fold the dough: Starting from both short edges, roll the pastry inward toward the center until both rolls meet in the middle. Press gently to secure.
- Chill for 10-15 minutes to firm up the dough, making it easier to slice.
- Slice into ½-inch pieces and place them on the prepared baking sheet, leaving space between each.
- Bake for 12-15 minutes, flipping them over halfway through, until golden-brown and caramelized.
- Cool and serve once they reach room temperature.
Variations and Customizations
- Cinnamon Sugar Palmiers – Mix cinnamon with sugar before sprinkling.
- Chocolate Palmiers – Spread a thin layer of Nutella before rolling the dough.
- Savory Palmiers – Skip the sugar and use grated Parmesan cheese for a cheesy, crispy version.
Tips for the Perfect Palmiers
- Use a generous amount of sugar to ensure proper caramelization.
- Chill the rolled dough before slicing to keep its shape.
- Flip them halfway through baking for even caramelization on both sides.
- Let them cool completely before storing in an airtight container to maintain crispness.
Palmiers are a simple yet elegant dessert that proves that sometimes, the best treats require just a few ingredients. Whether enjoyed with a cup of tea or given as a homemade gift, these crispy puff pastry cookies are sure to impress!
Nutella Pastry Twists – Buttery Layers with a Chocolate-Hazelnut Filling
If you’re a fan of flaky puff pastry and creamy Nutella, then Nutella pastry twists are about to become your new favorite treat. These buttery, golden-brown twists are made with just three simple ingredients—puff pastry, Nutella, and an egg wash—but they taste like something straight out of a bakery. The best part? They’re super easy to make and require minimal prep time. Whether you need a quick dessert for a party, an indulgent snack, or just a way to satisfy your chocolate cravings, these Nutella pastry twists have you covered.
Why You’ll Love Nutella Pastry Twists
Only three ingredients, making them simple and fuss-free. Crispy, flaky, and chocolaty with the perfect contrast of textures and flavors. Great for any occasion, whether breakfast, dessert, or a quick snack. Kid-friendly and fun to make, making them perfect for baking with children.
Ingredients
One sheet of store-bought puff pastry, thawed. One-fourth cup Nutella (or more if you love extra filling). One egg, beaten (for egg wash). Optional: Powdered sugar for dusting or chopped hazelnuts for extra crunch.
Instructions
Preheat the oven to 375°F (190°C) and line a baking sheet with parchment paper. Roll out the puff pastry on a lightly floured surface to ensure it’s smooth and even. Spread Nutella evenly over half of the pastry sheet, leaving a small border around the edges. Fold the pastry in half over the Nutella layer, pressing down gently to seal. Cut into strips about one inch wide using a sharp knife or pizza cutter. Twist each strip a few times and place them on the baking sheet, leaving space between each. Brush with egg wash to give them a golden, glossy finish. Bake for 15 to 18 minutes, or until golden brown and crispy. Let them cool slightly before serving. Optionally, dust with powdered sugar or sprinkle with chopped hazelnuts for extra flavor.
Variations & Customizations
Cinnamon Nutella Twists – Sprinkle a little cinnamon sugar over the Nutella before twisting. Chocolate Chip Twists – Add mini chocolate chips for even more chocolaty goodness. Peanut Butter & Nutella Twists – Spread a thin layer of peanut butter along with Nutella for a delicious flavor combination. Savory Twists – Swap Nutella for pesto and Parmesan for a cheesy, herby twist.
Tips for Perfect Nutella Pastry Twists
Do not overload with Nutella, as too much can make the pastry difficult to twist and bake evenly. Chill the pastry before cutting to help keep the layers crisp and flaky. Bake until deep golden brown to ensure the pastry is fully cooked and not soggy. Store leftovers in an airtight container and reheat in the oven for a fresh-from-the-bakery taste.
These Nutella pastry twists are crispy, chocolatey, and completely irresistible. Whether you enjoy them with a cup of coffee, a glass of milk, or as an after-dinner treat, they are sure to be a hit.
Creamy and Custard-Filled Puff Pastry Delights
Mille-Feuille (Napoleon Pastry) – Layers of Flaky Pastry and Luscious Cream

Mille-feuille, also known as Napoleon pastry, is a classic French dessert made with layers of crisp, golden puff pastry and silky pastry cream, all topped with a glossy glaze or powdered sugar. This elegant treat is both light and indulgent, with a perfect balance of textures and flavors. Though it looks like something from a fancy patisserie, it is surprisingly simple to make at home with store-bought puff pastry.
Why You’ll Love Mille-Feuille
- Crispy and creamy combination that melts in your mouth.
- Visually stunning, making it great for special occasions.
- Customizable with different fillings and toppings.
- Perfect make-ahead dessert since it tastes even better after a few hours in the fridge.
Ingredients
- 1 sheet store-bought puff pastry, thawed
- 1 cup pastry cream (homemade or store-bought)
- 1/4 cup powdered sugar, for dusting
- 2 tablespoons apricot jam or chocolate glaze (optional)
Instructions
Bake the Puff Pastry:
Preheat the oven to 375°F (190°C). Roll out the puff pastry on a lightly floured surface and cut it into three equal rectangles. Place them on a baking sheet lined with parchment paper. Prick the pastry all over with a fork to prevent excessive puffing. Cover with another sheet of parchment paper and place a second baking tray on top to weigh it down. Bake for 15 to 18 minutes, until the pastry is golden and crisp. Let it cool completely.
Prepare the Layers:
If using homemade pastry cream, chill it until firm. Once the pastry sheets have cooled, spread a thick layer of pastry cream evenly over one sheet of baked puff pastry. Place the second pastry layer on top and repeat with another layer of cream. Top with the third pastry sheet.
Finishing Touches:
Dust the top layer with powdered sugar for a traditional finish, or glaze it with melted apricot jam for a glossy appearance. For a chocolate version, drizzle melted chocolate or a simple sugar glaze over the top and create a marbled effect using a toothpick.
Variations & Customizations
- Berry Mille-Feuille: Add layers of fresh strawberries, raspberries, or blueberries between the cream for a fruity twist.
- Chocolate Mille-Feuille: Mix a bit of melted dark chocolate into the pastry cream for a richer filling.
- Caramel Mille-Feuille: Drizzle salted caramel sauce over the layers before assembling.
- Coffee-Flavored Mille-Feuille: Add espresso powder to the cream for a subtle coffee flavor.
Tips for the Best Mille-Feuille
- Keep the pastry layers crisp by assembling the dessert just before serving, or chilling it for a few hours to set.
- Use a serrated knife to cut the mille-feuille into neat slices without squishing the layers.
- Refrigerate before serving for a firmer texture and better flavor.
Mille-feuille is a show-stopping dessert that is easier to make than it looks. Whether you keep it classic or add a creative twist, this elegant pastry is sure to impress.
Cream Cheese Danish – A Rich, Sweet, and Flaky Delight
A Cream Cheese Danish is the perfect balance of flaky puff pastry and a rich, creamy cheese filling, creating a decadent dessert or breakfast treat that is sure to please. Often served in bakeries or cafes, this beloved pastry is surprisingly simple to make at home, and the results are always impressive. With just a handful of ingredients and a few easy steps, you can create a warm, gooey, and satisfying Danish that rivals anything you’d find at your local bakery.
Why You’ll Love Cream Cheese Danish
- Flaky, buttery pastry that melts in your mouth.
- Sweet and tangy cream cheese filling that’s both rich and refreshing.
- Customizable toppings like fresh fruit, chocolate, or a sweet glaze.
- Perfect for breakfast, brunch, or a light dessert to enjoy with coffee or tea.
Ingredients
- 1 sheet store-bought puff pastry, thawed
- 8 oz cream cheese, softened
- 1/4 cup powdered sugar
- 1 teaspoon vanilla extract
- 1 egg (for egg wash)
- Optional: Fresh fruit like berries, or apricot jam for a glaze
Instructions
Prepare the Cream Cheese Filling:
In a mixing bowl, beat together the cream cheese, powdered sugar, and vanilla extract until smooth and creamy. Make sure the cream cheese is softened to room temperature to avoid lumps.
Assemble the Danish:
Preheat the oven to 375°F (190°C) and line a baking sheet with parchment paper. Roll out the puff pastry on a lightly floured surface and cut it into 4 equal squares. Place a spoonful of the cream cheese mixture in the center of each square. You can also add fruit (like fresh strawberries or blueberries) or a drizzle of jam on top of the filling for extra flavor. Fold the edges of the pastry over the filling, creating a slight pocket or envelope shape, and pinch the edges to seal.
Add Egg Wash and Bake:
Brush the edges of the pastry with the beaten egg to give it a golden, glossy finish. Bake in the preheated oven for 15-20 minutes, or until the pastry is golden brown and puffed up. The cream cheese filling should be slightly set and deliciously gooey.
Finish with a Glaze:
For an extra touch of sweetness, drizzle the cooled Danish with a simple glaze made by mixing powdered sugar and milk, or use a store-bought fruit glaze for a fruity shine.
Variations & Customizations
- Berry Cream Cheese Danish: Add a handful of fresh raspberries or blueberries inside the cream cheese filling for a fruity burst.
- Cinnamon Sugar Danish: Sprinkle cinnamon sugar on the pastry before folding it to give a sweet, spiced flavor.
- Lemon Cream Cheese Danish: Add a teaspoon of lemon zest to the cream cheese mixture for a fresh, citrusy flavor.
- Chocolate Chip Danish: Mix mini chocolate chips into the cream cheese filling for a richer, chocolatey treat.
Tips for the Best Cream Cheese Danish
- Use room temperature cream cheese – It will blend more easily with the sugar and vanilla, making the filling smooth.
- Don’t overfill – Too much filling can cause the Danish to spill over and lose its shape during baking.
- Chill the pastry before baking – If you’re working with homemade puff pastry, chilling it can help prevent it from becoming too soft and losing its flakiness.
- Serve warm – Cream Cheese Danishes are best when they’re fresh out of the oven, so enjoy them while they’re still warm for the ultimate flaky, gooey experience.
A Cream Cheese Danish is a wonderfully versatile pastry that can be adapted to suit any preference. Whether you go for a classic version with a sweet glaze or add fruits and flavors for a twist, it’s the kind of pastry that brings smiles to faces and adds a touch of indulgence to your day.
Boston Cream Puff Pastry Bites – Miniature Treats with Big Flavor
Boston Cream Puff Pastry Bites take the classic Boston cream pie and transform it into bite-sized indulgences. These pastries combine crispy puff pastry, a rich vanilla custard filling, and a decadent chocolate glaze for an irresistible treat that’s perfect for any occasion. While Boston cream pie is traditionally a cake, these puff pastry bites are a fun, easier-to-eat version that still packs all the classic flavors. Whether you’re hosting a party or just craving something sweet, these miniature delights are sure to impress.
Why You’ll Love Boston Cream Puff Pastry Bites
- Miniature and bite-sized for easy eating, perfect for parties or gatherings.
- Flaky puff pastry that provides a crisp, buttery base.
- Rich vanilla custard filling that’s creamy and smooth.
- Chocolate glaze adds the finishing touch, making them feel indulgent.
- No need for special equipment—everything can be made with store-bought puff pastry and a few simple ingredients.
Ingredients
- 1 sheet store-bought puff pastry, thawed
- 1 cup vanilla custard (or use pastry cream for a richer flavor)
- 1/2 cup heavy cream (for the chocolate glaze)
- 3 oz semi-sweet chocolate (for the glaze)
- 1 egg (for egg wash)
- 1 tablespoon powdered sugar (for dusting, optional)
Instructions
Prepare the Puff Pastry:
Preheat the oven to 375°F (190°C). Roll out the puff pastry on a floured surface and cut it into small squares or circles, about 2 to 3 inches wide. Place the pastry pieces onto a baking sheet lined with parchment paper. Brush the tops with beaten egg to give them a golden, glossy finish during baking. Bake for 10 to 12 minutes, or until the puff pastry is golden and puffed up. Let them cool completely on a wire rack.
Make the Vanilla Custard Filling:
While the puff pastry is cooling, prepare the vanilla custard (or pastry cream). If you’re making homemade custard, heat milk, sugar, and egg yolks over low heat, whisking constantly until it thickens. Once thickened, remove from heat and stir in vanilla extract. Allow the custard to cool completely before using it to fill the puff pastry.
Assemble the Bites:
Once the puff pastry is cooled, gently slice the puffs in half, creating a top and bottom. Spoon or pipe the vanilla custard into the center of the bottom half of each puff. Place the top half of the pastry on to create a mini “sandwich.”
Make the Chocolate Glaze:
To prepare the chocolate glaze, heat the heavy cream in a small saucepan until it’s warm but not boiling. Remove from heat and add the semi-sweet chocolate, stirring until smooth and glossy. Drizzle the chocolate glaze over the top of each filled puff. Let the glaze set before serving, or dust with powdered sugar for an extra touch of sweetness.
Variations & Customizations
- Fruit-filled Boston Cream Puff Bites: Add a few fresh raspberries, strawberries, or other berries alongside the custard for a fresh burst of flavor.
- Chocolate Custard Filling: For a more decadent twist, swap the vanilla custard with chocolate custard.
- Caramel Drizzle: Top with caramel sauce instead of chocolate glaze for a different flavor profile.
- Miniature Boston Cream Pies: If you prefer larger servings, stack two or three layers of puff pastry with custard in between to create a more traditional-sized Boston cream pie.
Tips for the Best Boston Cream Puff Pastry Bites
- Cool the puff pastry before filling it. If the pastry is too warm, the custard may melt and become runny.
- Use a piping bag to fill the pastries evenly and keep them neat. If you don’t have one, a spoon works just as well.
- Chill the filled pastries for a few minutes after assembling to allow the custard to firm up before glazing.
- Use good-quality chocolate for the glaze, as it’s the finishing touch and enhances the overall flavor.
Boston Cream Puff Pastry Bites offer a delicious twist on a classic favorite, providing all the rich flavors of a traditional Boston cream pie in a bite-sized treat. They’re perfect for a sweet snack or dessert, and they’re sure to be a hit at any gathering!
Fruity Puff Pastry Desserts for a Refreshing Bite
Raspberry Danish – Sweet Raspberry Jam Wrapped in Flaky Pastry

A Raspberry Danish is a delightful pastry that combines the sweet-tart flavor of fresh raspberries with the buttery, flaky texture of puff pastry. This classic breakfast or dessert pastry is simple to make yet so satisfying, offering a perfect balance of fruitiness and richness. The raspberry filling is often made from jam or fresh fruit that is slightly cooked down to intensify its flavor, all wrapped in a delicate, crisp pastry. Whether enjoyed with a cup of coffee in the morning or as a sweet afternoon treat, a Raspberry Danish is both comforting and elegant.
Why You’ll Love Raspberry Danish
- Flaky, golden-brown pastry that melts in your mouth.
- Sweet, tangy raspberry filling with just the right amount of sweetness.
- Easy to make using store-bought puff pastry, saving time without sacrificing flavor.
- Perfect for breakfast, brunch, or dessert, and great for sharing with family and friends.
- Customizable – Add icing, almonds, or extra fruit to suit your taste.
Ingredients
- 1 sheet store-bought puff pastry, thawed
- 1/2 cup raspberry jam (or fresh raspberries cooked down with sugar)
- 1 egg, for egg wash
- 1 tablespoon powdered sugar (optional, for dusting)
- 1/4 teaspoon vanilla extract (optional, for extra flavor)
Instructions
Prepare the Puff Pastry:
Preheat the oven to 375°F (190°C). Roll out the thawed puff pastry on a lightly floured surface. Cut the dough into squares, about 3 to 4 inches each, or rectangles, depending on your preference. Place the puff pastry squares onto a baking sheet lined with parchment paper.
Add the Raspberry Filling:
In the center of each pastry square, spoon a small amount of raspberry jam or fresh raspberry filling. If using fresh raspberries, cook them down with a little sugar and cornstarch to create a thick, jam-like consistency. Be careful not to overfill, as too much jam can spill over during baking.
Fold and Shape the Pastries:
Fold the edges of the puff pastry to partially cover the filling, leaving a small opening at the center for the filling to peek through. You can also create a traditional Danish shape by folding in the corners of the pastry to meet in the middle, forming a little pocket.
Brush with Egg Wash and Bake:
Brush the edges of the pastry with a beaten egg to give it a golden, glossy finish. Bake in the preheated oven for 15-18 minutes, or until the pastry is golden brown and puffed up. The filling should be bubbly and slightly caramelized.
Finish with Powdered Sugar:
Once the pastries have cooled slightly, dust them with powdered sugar for a light, sweet finish. You can also drizzle a simple icing made of powdered sugar and milk over the top for an extra layer of sweetness.
Variations & Customizations
- Almond Raspberry Danish: Add a thin layer of almond paste underneath the raspberry jam for a nutty flavor that complements the fruitiness.
- Mixed Berry Danish: Instead of just raspberries, use a mix of strawberries, blueberries, and blackberries for a more complex flavor profile.
- Lemon Zest Raspberry Danish: Add a little lemon zest to the raspberry filling for a citrusy twist that brightens up the flavor.
- Raspberry Cream Cheese Danish: Add a layer of sweetened cream cheese underneath the raspberry filling for a creamy contrast to the fruity jam.
Tips for the Best Raspberry Danish
- Use high-quality raspberry jam for the best flavor. Homemade jam or fruit preserves can elevate the taste, but store-bought works perfectly in a pinch.
- Don’t overfill the pastries – A little jam goes a long way. Overfilled pastries may leak during baking.
- Chill the pastry before baking – If you have time, chilling the assembled pastries in the fridge for about 15 minutes before baking can help them hold their shape better.
- Serve fresh – These pastries are best served fresh and warm, but you can store them in an airtight container for a couple of days. Reheat briefly in the oven to restore the crispiness.
A Raspberry Danish is a beautifully simple yet sophisticated pastry that combines the delightful sweetness of raspberry jam with the crisp, buttery layers of puff pastry. It’s a perfect treat for any time of day, from a morning pastry with coffee to a special dessert at the end of a meal. With endless customization options and an easy preparation process, this pastry is bound to become a family
Peach Puff Pastry Tarts – Fresh Peach Slices on a Puff Pastry Base
Peach Puff Pastry Tarts are a deliciously sweet and visually stunning dessert that pairs the natural sweetness of fresh peaches with the delicate, buttery crispness of puff pastry. These tarts are the perfect balance of textures and flavors: the flaky puff pastry provides a light, crisp base, while the juicy peach slices add a refreshing, slightly tart contrast. Whether made for a summer party, a brunch gathering, or as a special treat for your family, these tarts bring a burst of freshness and are a beautiful way to showcase seasonal peaches. They are incredibly easy to make, yet elegant enough to impress your guests.
Why You’ll Love Peach Puff Pastry Tarts
- Sweet and juicy peach slices offer a refreshing, fruity flavor that is perfect for summer.
- Crispy puff pastry forms the perfect base that is light, flaky, and buttery.
- Simple and quick to prepare, using just a few ingredients but resulting in a show-stopping dessert.
- Versatile – You can serve them as an elegant dessert or a fun brunch treat.
- Customizable – Add extra spices, cream cheese, or a drizzle of honey for personalized flavor twists.
Ingredients
- 1 sheet store-bought puff pastry, thawed
- 2 to 3 fresh peaches, thinly sliced
- 2 tablespoons brown sugar (for sweetening the peaches)
- 1 tablespoon cornstarch (optional, to thicken any juices from the peaches)
- 1 tablespoon lemon juice (to enhance the peach flavor)
- 1 egg (for egg wash)
- 1/4 teaspoon cinnamon (optional, for added warmth)
- 1 tablespoon honey or maple syrup (for drizzling, optional)
- Powdered sugar (for dusting, optional)
Instructions
Prepare the Puff Pastry:
Preheat your oven to 375°F (190°C) and line a baking sheet with parchment paper. Roll out the puff pastry on a lightly floured surface. Cut the dough into squares or rectangles, approximately 3 to 4 inches wide. Using a fork, gently score a border around the edges of each pastry, creating a frame to keep the center from puffing up too much during baking.
Prepare the Peaches:
Wash and slice the fresh peaches thinly. If desired, toss the peach slices with brown sugar, lemon juice, and cinnamon to enhance the natural sweetness and flavor of the peaches. For a slightly thicker filling, you can add cornstarch to the mixture to help absorb any juices released during baking.
Assemble the Tarts:
Place the peach slices in the center of each pastry, leaving the border free for the crust to puff up. Arrange the peaches in a single layer, slightly overlapping, to create an even distribution of fruit. Brush the edges of the pastry with a beaten egg to ensure a golden, shiny finish.
Bake the Tarts:
Bake the tarts in the preheated oven for 18 to 20 minutes, or until the pastry is puffed and golden brown, and the peaches are soft and slightly caramelized. You can baste the peaches with any leftover juices halfway through baking to keep them moist and flavorful.
Finish and Serve:
Once the tarts are baked and slightly cooled, drizzle with honey or maple syrup for extra sweetness. You can also dust the tarts with a light sprinkle of powdered sugar to give them a refined, elegant touch. These tarts are best served fresh, but they can also be stored in an airtight container for a couple of days and reheated briefly to restore their crispiness.
Variations & Customizations
- Peach and Cream Cheese Tarts: For an added creamy richness, spread a thin layer of sweetened cream cheese or mascarpone on the puff pastry before adding the peach slices.
- Peach and Almond Tarts: Sprinkle the tarts with slivered almonds before baking for a nutty crunch that complements the sweetness of the peaches.
- Peach and Berry Tarts: Add a handful of blueberries, raspberries, or blackberries along with the peaches for a burst of color and additional flavor.
- Peach and Honey Lavender Tarts: Infuse the peaches with a hint of lavender for a floral note that pairs beautifully with the sweetness of honey.
Tips for the Best Peach Puff Pastry Tarts
- Use ripe but firm peaches for the best texture – they should be juicy but not too soft, to avoid making the pastry soggy.
- Don’t skip the egg wash – it gives the tarts a beautiful golden finish and makes them look professional.
- Allow the tarts to cool slightly before serving – this helps the flavors settle and ensures the pastries don’t burn your mouth.
- Chill the puff pastry before baking if it starts to soften too much while handling. This will help it puff up better when baked.
- Experiment with different sugars – brown sugar gives a deeper, caramelized flavor, but you can also use granulated sugar for a lighter sweetness.
Peach Puff Pastry Tarts offer a perfect blend of sweet, juicy peaches and flaky, buttery pastry, creating a mouthwatering treat that’s both simple and indulgent. Whether you’re baking them for a special event or as an afternoon snack, these tarts are sure to become a family favorite. The versatility of the recipe allows for countless variations, ensuring that each tart is just as unique and delightful as your preferences.
Blueberry Cream Cheese Pastries – Blueberry Filling with a Creamy Layer Inside a Crisp Shell
Blueberry Cream Cheese Pastries are an indulgent and delicious combination of fresh blueberries, a rich and creamy cream cheese filling, and crisp, flaky puff pastry. These pastries offer a delightful contrast in texture with the smoothness of the cream cheese layer, the bursting sweetness of the blueberries, and the light, airy crunch of the pastry shell. Whether served for breakfast, brunch, or dessert, these pastries are a perfect way to showcase fresh fruit in a sophisticated and comforting treat. Their sweet, tangy filling and buttery, golden crust make them irresistibly good.
Why You’ll Love Blueberry Cream Cheese Pastries
- Balanced flavors – The tangy cream cheese filling perfectly complements the sweet, juicy blueberries.
- Crispy puff pastry that’s light, buttery, and flaky, creating a satisfying crunch with every bite.
- Quick and easy to make with store-bought puff pastry, saving time without compromising on taste.
- Great for any occasion – Perfect for breakfast, a light dessert, or a sweet snack with coffee or tea.
- Customizable – Add a touch of lemon zest or vanilla to enhance the flavor, or use mixed berries for a twist.
Ingredients
- 1 sheet store-bought puff pastry, thawed
- 1/2 cup cream cheese, softened
- 1/4 cup powdered sugar (or to taste)
- 1/2 teaspoon vanilla extract
- 1/2 cup fresh blueberries (or frozen, thawed)
- 1 tablespoon lemon juice (optional, for extra brightness)
- 1 egg (for egg wash)
- 1 tablespoon honey or maple syrup (optional, for drizzling)
- Powdered sugar (for dusting, optional)
Instructions
Prepare the Puff Pastry:
Preheat your oven to 375°F (190°C). Line a baking sheet with parchment paper. Roll out the thawed puff pastry on a lightly floured surface. Cut the pastry into squares or rectangles, about 3 to 4 inches in size, depending on your preference. Using a fork, gently score a border around each pastry square to allow the edges to puff up beautifully during baking.
Make the Cream Cheese Filling:
In a bowl, combine the softened cream cheese, powdered sugar, and vanilla extract. Mix until smooth and creamy. For a slight tangy kick, add a teaspoon of lemon juice to the mixture. The cream cheese filling should be thick but spreadable. Adjust sweetness by adding more powdered sugar to taste.
Assemble the Pastries:
Place a spoonful of the cream cheese filling in the center of each puff pastry square, leaving a small border around the edges. Gently press the filling down so it spreads evenly but doesn’t touch the edges. Top the cream cheese layer with a handful of fresh blueberries (or frozen, if preferred), pressing them gently into the cream cheese to make sure they don’t roll off during baking.
Brush with Egg Wash and Bake:
Brush the edges of the puff pastry with a beaten egg for a beautiful golden finish. Place the pastries on the prepared baking sheet and bake in the preheated oven for 15 to 20 minutes, or until the pastry is golden and puffed, and the blueberries are soft and starting to burst.
Finish and Serve:
Once the pastries are done, remove them from the oven and allow them to cool slightly. For an extra touch of sweetness, drizzle them with a bit of honey or maple syrup. Dust with powdered sugar just before serving to add a final touch of elegance.
Variations & Customizations
- Lemon Blueberry Cream Cheese Pastry: Add a teaspoon of lemon zest to the cream cheese mixture for a fresh, citrusy twist that brightens up the sweetness of the blueberries.
- Mixed Berry Cream Cheese Pastries: Use a mix of blueberries, raspberries, blackberries, or strawberries for a burst of different fruit flavors.
- Cinnamon Blueberry Cream Cheese Pastry: Add a pinch of ground cinnamon to the cream cheese filling for a warm, cozy flavor that complements the fruitiness.
- Blueberry Almond Cream Cheese Pastry: Sprinkle slivered almonds on top of the blueberries before baking for a delightful crunch that pairs well with the creamy filling.
Tips for the Best Blueberry Cream Cheese Pastries
- Use fresh blueberries whenever possible for the juiciest, most flavorful results. If using frozen berries, be sure to thaw and drain them thoroughly to prevent excess moisture that could make the pastry soggy.
- Don’t overfill the pastries – A little filling goes a long way. Overfilling can cause the pastry to burst open, creating a mess and making it hard to serve.
- Chill the puff pastry before assembling the pastries if the dough starts to soften too much while handling. This helps ensure the pastry puffs up beautifully during baking.
- Experiment with fruit jams – For a more intense fruit flavor, spread a thin layer of blueberry or mixed berry jam on the pastry before adding the cream cheese filling.
- Serve warm – These pastries are best served fresh out of the oven or slightly warmed to preserve their crispness and creamy filling.
Blueberry Cream Cheese Pastries are a wonderful way to elevate a simple puff pastry into a showstopping treat. The combination of rich cream cheese filling, sweet blueberries, and flaky pastry creates a dessert that’s both comforting and indulgent. Whether you’re serving them at a brunch, as an afternoon snack, or as a delightful dessert, these pastries will quickly become a favorite in your home.
Chocolate Lovers’ Puff Pastry Recipes
Chocolate Croissants (Pain au Chocolat) – Flaky Pastry Filled with Melted Chocolate

Chocolate Croissants, or Pain au Chocolat, are a quintessential French pastry that combines the delicate, buttery layers of flaky puff pastry with the rich, melted chocolate filling. These indulgent treats are a breakfast classic in Parisian cafés and bakeries, and for good reason. The combination of crispy, airy pastry and gooey chocolate creates a mouthwatering experience that satisfies both the sweet tooth and the craving for something warm and comforting. Perfect for breakfast, a light dessert, or an afternoon snack, Chocolate Croissants are simple to make and sure to impress anyone lucky enough to try them.
Why You’ll Love Chocolate Croissants
- Rich and decadent – The melted chocolate filling is indulgent and luxurious, creating the ultimate sweet experience.
- Flaky pastry – The buttery puff pastry provides a perfect contrast to the smooth and creamy chocolate, creating a delightful textural balance.
- Quick and easy to make – You don’t have to be a professional baker to achieve the perfect chocolate croissant. Store-bought puff pastry makes the process simple and hassle-free.
- Customizable – You can choose dark, milk, or white chocolate for the filling, or add additional ingredients like nuts, fruit, or cream cheese for extra flair.
- Impressive yet simple – These croissants look elegant and sophisticated but are surprisingly easy to make at home.
Ingredients
- 1 sheet store-bought puff pastry, thawed
- 3 to 4 ounces dark, milk, or white chocolate (chocolate bars or chips)
- 1 egg (for egg wash)
- 1 tablespoon sugar (optional, for extra sweetness)
- 1 teaspoon vanilla extract (optional, for a subtle depth of flavor)
- Powdered sugar (for dusting, optional)
Instructions
Prepare the Puff Pastry:
Preheat your oven to 375°F (190°C) and line a baking sheet with parchment paper. Roll out your store-bought puff pastry on a lightly floured surface. Cut the pastry into rectangles—roughly 3 inches by 4 inches—depending on how large you want your croissants to be.
Fill the Pastry:
Place a small piece of chocolate (about 1 to 2 tablespoons of chocolate chips or a few small squares) near the center of each pastry rectangle. Be sure to leave some space around the edges so the pastry can fold easily and seal. For a fun twist, you can also add a little bit of vanilla extract to the chocolate or even mix in a handful of chopped nuts like almonds or hazelnuts for added texture.
Roll and Shape the Croissants:
Carefully fold the pastry over the chocolate, forming a simple rectangle or triangle shape, depending on your preference. You can either fold the pastry into a traditional crescent shape or keep it more rectangular if you prefer. Pinch the edges to seal the pastry and ensure the chocolate stays inside during baking.
Egg Wash and Bake:
Brush the top of each croissant with a beaten egg to create a shiny, golden finish once baked. If you like, you can sprinkle a little sugar over the top for a touch of sweetness and extra crunch. Place the croissants on the prepared baking sheet and bake for 15 to 20 minutes, or until the pastry is golden, puffed, and crispy, and the chocolate is fully melted inside.
Finish and Serve:
Once baked, allow the chocolate croissants to cool for a few minutes before serving. If desired, dust with a light sprinkle of powdered sugar for an elegant finishing touch. Serve them warm for the best experience—freshly baked, flaky, and oozing with melted chocolate.
Variations & Customizations
- Chocolate and Hazelnut Croissants: Spread a thin layer of Nutella or your favorite hazelnut spread on the pastry before adding the chocolate for a rich, nutty flavor that pairs beautifully with the chocolate.
- Dark Chocolate and Orange Croissants: Add a hint of orange zest to the chocolate filling for a citrusy, aromatic twist that brightens the deep flavor of the dark chocolate.
- Chocolate and Almond Croissants: Mix almond extract into the chocolate for a nutty undertone or sprinkle chopped almonds on top of the filling before folding the pastry.
- Mini Chocolate Croissants: For smaller, bite-sized treats, use smaller squares of puff pastry and chocolate, rolling them up into mini croissants perfect for snacking or serving at a party.
- Fruit-Filled Chocolate Croissants: Add thin slices of banana or raspberry jam to the chocolate filling for a fruity touch that complements the richness of the chocolate.
Tips for the Best Chocolate Croissants
- Use high-quality chocolate – Whether you prefer dark, milk, or white chocolate, using a good-quality chocolate will make a significant difference in the flavor of your croissants.
- Don’t overfill – Avoid using too much chocolate, as it can cause the pastry to burst open and make a mess. A small amount of filling is enough to create that perfect melted center.
- Keep the pastry cold – If the puff pastry starts to soften too much while working with it, place it in the refrigerator for a few minutes to firm it up before continuing to shape the croissants. This helps the pastry puff up properly during baking.
- Bake until golden brown – The perfect chocolate croissant should have a crispy, golden exterior with flaky layers that create a satisfying crunch. Be sure to bake them until they reach that golden perfection.
Chocolate Croissants (Pain au Chocolat) are a perfect breakfast treat or afternoon indulgence that will transport you to the charming patisseries of France with just one bite. The combination of buttery, flaky puff pastry and melted chocolate is irresistible, making these croissants a delightful choice for any occasion. With endless possibilities for customization, you can tailor the filling to your personal taste, creating a decadent pastry that’s as unique as you are. Enjoy them fresh out of the oven for the ultimate indulgence.
Puff Pastry S’mores Bites – Chocolate and Marshmallow Baked in Puff Pastry
Puff Pastry S’mores Bites are a fun and delicious twist on the classic s’mores treat. They combine the sweet, gooey marshmallow, the rich, melty chocolate, and the light, flaky puff pastry, all baked to golden perfection. These bite-sized pastries are an irresistible snack or dessert that bring together the best of campfire treats and elegant pastry. The combination of textures – crispy, buttery pastry with gooey chocolate and marshmallow – creates a delightful experience that’s sure to please both kids and adults.
Why You’ll Love Puff Pastry S’mores Bites
- Easy and Quick – These bites are simple to make, with store-bought puff pastry making the process a breeze while still giving you that homemade feel.
- Perfect Balance of Flavors – The sweetness of the marshmallow paired with the richness of the chocolate is a match made in heaven, while the buttery, flaky puff pastry rounds everything off perfectly.
- Bite-sized Delights – Perfect for sharing, these mini-sized treats are ideal for any occasion – a fun snack for kids, a party treat, or a unique dessert.
- Customizable – You can switch up the chocolate, add different toppings, or even experiment with flavored marshmallows for a new twist on this classic snack.
- Fun to Make and Serve – Baking these s’mores bites is an enjoyable process, and they come out looking so cute and tempting that no one can resist grabbing one!
Ingredients
- 1 sheet store-bought puff pastry, thawed
- 3 to 4 ounces milk or dark chocolate (chocolate bars or chips)
- 1/2 cup mini marshmallows
- 1 tablespoon butter, melted (for brushing)
- 1 tablespoon sugar (optional, for extra sweetness)
- 1 teaspoon vanilla extract (optional, for extra flavor)
- Powdered sugar (optional, for dusting)
Instructions
Prepare the Puff Pastry:
Preheat your oven to 375°F (190°C) and line a baking sheet with parchment paper. Roll out the puff pastry on a lightly floured surface. Using a sharp knife or pizza cutter, cut the pastry into small squares or rectangles, about 3 inches by 3 inches. This will create the perfect size for bite-sized pastries.
Add the Chocolate and Marshmallows:
Place a small square of chocolate (or a few chocolate chips) in the center of each puff pastry square. Follow this with about 5 to 6 mini marshmallows. Be careful not to overstuff, as this will help keep the filling inside the pastry and prevent it from overflowing during baking.
Fold and Seal the Pastries:
Carefully fold each pastry square into a parcel or pocket by bringing the corners together and pinching the edges to seal the filling inside. For a more rustic look, you can fold them into triangles or rectangular shapes, just ensure that the edges are tightly sealed to prevent the filling from leaking out.
Brush with Butter and Bake:
Brush the top of each pastry with melted butter to help the puff pastry turn golden and crisp during baking. You can also sprinkle a little sugar on top for extra sweetness and a slight crunch. Place the prepared pastries on the baking sheet and bake for 15 to 20 minutes, or until the puff pastry is golden, puffy, and crispy.
Finish and Serve:
Once baked, remove the s’mores bites from the oven and let them cool for a few minutes. If desired, dust them with a light sprinkle of powdered sugar for a touch of elegance and extra sweetness. Serve warm to enjoy the gooey, melted chocolate and marshmallow center.
Variations & Customizations
- Peanut Butter S’mores Bites: Spread a thin layer of peanut butter inside the pastry before adding the chocolate and marshmallows for a delicious, nutty twist on the classic.
- Nutella S’mores Bites: Replace the chocolate with Nutella for a creamy, hazelnut-chocolate filling that pairs beautifully with the marshmallows.
- S’mores with a Twist: Add a layer of chopped graham crackers inside the pastry along with the chocolate and marshmallows to mimic the traditional s’mores flavor and texture.
- Flavored Marshmallows: Use flavored marshmallows like strawberry or cinnamon for a unique twist on the classic marshmallow filling.
- Mini S’mores Bites: For smaller treats, cut the puff pastry into even smaller squares and reduce the amount of chocolate and marshmallows used in each bite. This makes them perfect for a snack or party appetizer.
Tips for the Best Puff Pastry S’mores Bites
- Use high-quality chocolate – Since the chocolate is the star ingredient in these bites, opt for a good-quality milk or dark chocolate that will melt beautifully.
- Don’t overfill – It’s tempting to load these with lots of chocolate and marshmallows, but overstuffing can cause the pastries to burst open and make a mess. Stick to a moderate amount for the perfect balance.
- Seal the edges well – Be sure to pinch the edges of the puff pastry together firmly to prevent the filling from leaking out during baking.
- Serve immediately – These treats are best enjoyed warm, so serve them as soon as they’ve cooled enough to eat safely. The gooey chocolate and melty marshmallows are part of the magic!
Puff Pastry S’mores Bites bring the nostalgia of s’mores to a whole new level with the flaky puff pastry and the gooey goodness of chocolate and marshmallows. They’re a perfect snack to share with family and friends, and their bite-sized nature makes them easy to serve at parties or gatherings. Whether you stick to the classic recipe or get creative with variations, these treats are sure to satisfy your sweet tooth and become a family favorite in no time!
Chocolate Ganache Tartlets – Mini Puff Pastry Shells Filled with Rich Chocolate Ganache
Chocolate Ganache Tartlets are a decadent, elegant dessert that combines the delicate, buttery layers of puff pastry with the rich, velvety texture of chocolate ganache. These mini-sized tarts make for a perfect treat to serve at dinner parties, celebrations, or even as a luxurious snack to satisfy your chocolate cravings. The beauty of these tartlets lies in their simplicity—each component, from the flaky pastry to the smooth, shiny ganache, complements the others perfectly, resulting in an indulgent dessert that’s both easy to make and delightful to eat.
Why You’ll Love Chocolate Ganache Tartlets
- Luxurious yet simple – These tartlets look and taste like they came from a high-end bakery, but they’re incredibly easy to make with just a few basic ingredients.
- Perfect balance of textures – The crisp, flaky puff pastry shell offers a contrast to the rich chocolate ganache, creating a harmonious blend of flavors and textures with each bite.
- Customizable – While the classic chocolate ganache filling is always a crowd-pleaser, you can easily add different flavors, toppings, or garnishes to personalize the tartlets to your liking.
- Impressive presentation – These mini tarts are visually stunning, making them the perfect dessert for special occasions like birthdays, holidays, or elegant dinner parties.
- Make ahead – The tartlets can be made in advance, making them a convenient option for entertaining or preparing treats for a busy week.
Ingredients
- 1 sheet store-bought puff pastry, thawed
- 1 cup heavy cream
- 8 ounces dark or milk chocolate, chopped
- 2 tablespoons unsalted butter
- 1 teaspoon vanilla extract
- Pinch of salt
- Optional toppings: fresh berries (such as raspberries or strawberries), grated chocolate, or whipped cream
Instructions
Prepare the Puff Pastry Shells:
Preheat your oven to 375°F (190°C) and line a baking sheet with parchment paper. Roll out the puff pastry on a lightly floured surface and cut it into small squares or circles, about 2 to 3 inches in diameter. If you’re using a muffin tin to shape the tartlets, press the puff pastry into the cups of the tin, allowing the edges to come over the sides. Use a fork to prick the bottom of each pastry to prevent it from puffing up too much while baking.
Bake the puff pastry in the preheated oven for about 12 to 15 minutes, or until the pastry is golden brown and fully cooked through. Once baked, remove from the oven and let the pastry shells cool completely before filling them with the ganache.
Make the Chocolate Ganache:
In a small saucepan, bring the heavy cream to a simmer over medium heat. Once it begins to simmer, remove it from the heat and immediately pour it over the chopped chocolate in a heatproof bowl. Let the mixture sit for 2-3 minutes to allow the chocolate to soften. Then, whisk the cream and chocolate together until smooth and well combined. Add the unsalted butter, vanilla extract, and a pinch of salt, stirring until the butter is melted and fully incorporated into the ganache.
Fill the Tartlets:
Carefully spoon the chocolate ganache into the cooled puff pastry shells. Fill each tartlet to the top with the silky ganache, ensuring an even distribution of the filling. If you want a smooth, polished look, use a small offset spatula or spoon to level the ganache in each tartlet.
Garnish and Serve:
Once the ganache is set, feel free to get creative with your toppings. You can top the tartlets with fresh berries, such as raspberries, strawberries, or blueberries, to add a burst of freshness that balances the richness of the chocolate. Alternatively, you could sprinkle the tops with grated chocolate, a dusting of cocoa powder, or even a dollop of whipped cream for extra indulgence. Allow the ganache to set for a few minutes before serving.
Variations & Customizations
- Flavor Variations: Add different flavors to the ganache by incorporating espresso powder, orange zest, or a splash of liquor such as Grand Marnier, rum, or Kahlúa to the cream before mixing it with the chocolate.
- Salted Caramel Ganache Tartlets: For a salted caramel twist, drizzle salted caramel sauce over the ganache after filling the tartlets, and finish with a sprinkle of sea salt on top.
- Nutty Ganache Tartlets: Add chopped toasted hazelnuts or almonds to the ganache filling or as a topping to bring in a crunchy texture that pairs wonderfully with chocolate.
- Dark Chocolate Tartlets: For a more intense chocolate flavor, opt for dark chocolate ganache. You can also enhance the richness with bittersweet or semi-sweet chocolate.
- Mini Tartlets: Use a mini muffin tin to make even smaller bite-sized tartlets, perfect for parties or events where you want to serve individual portions.
Tips for the Best Chocolate Ganache Tartlets
- Use high-quality chocolate – Since the ganache is the star of this dessert, using a high-quality dark or milk chocolate will make a big difference in flavor. Aim for chocolate that’s at least 60% cocoa for a rich, smooth ganache.
- Let the ganache set – Allow the ganache to cool and firm up in the tartlets for the best texture. If you’re in a rush, you can refrigerate the tartlets for 15-30 minutes to help the ganache set faster.
- Perfect puff pastry – Be sure to bake the puff pastry until it’s fully golden and crisp. If you’re using a muffin tin, you can line it with parchment paper to ensure the tartlets don’t stick.
- Make ahead – These tartlets can be prepared in advance. The puff pastry shells can be baked and stored in an airtight container for up to 2 days before filling. The ganache can also be made ahead and refrigerated. Just let it come to room temperature and re-whisk before filling the tartlets.
Chocolate Ganache Tartlets are a truly indulgent dessert that blends buttery puff pastry with the richness of chocolate ganache. These mini tarts offer a satisfying balance of textures and flavors, making them a great choice for any special occasion or as a luxurious treat for yourself. Whether you stick with the classic recipe or explore new variations, these tartlets are sure to impress your guests and leave everyone wanting more.
Quick and Easy Puff Pastry Recipes for Any Occasion
Crescent Roll Cinnamon Sugar Twists – Buttery, Sweet, and Spiced Pastry Twists
Crescent Roll Cinnamon Sugar Twists are a simple, yet incredibly delicious pastry that’s perfect for any occasion. Combining the flaky, buttery layers of crescent roll dough with a sweet and spiced cinnamon sugar mixture, these twists are easy to make and always a crowd favorite. Whether served for breakfast, as a snack, or at a gathering, these delightful treats are sure to impress with their perfect balance of sweetness and spice.
Why You’ll Love Crescent Roll Cinnamon Sugar Twists
- Effortless and quick – Made with store-bought crescent roll dough, these twists come together in no time, making them the perfect treat for when you’re short on time but still want something delicious.
- Buttery and flaky – The crescent roll dough gives these twists their signature flaky texture, while the butter ensures they are tender and melt-in-your-mouth.
- Perfect balance of sweetness and spice – The cinnamon sugar blend provides a delightful warm spiciness that complements the richness of the butter, making each bite irresistible.
- Customizable – You can tweak the recipe by adding fillings like chocolate chips, chopped nuts, or even a drizzle of glaze to make them even more indulgent.
- Versatile serving options – Serve them warm for breakfast, as an afternoon snack, or with coffee at a gathering. They’re also great for holiday mornings or special occasions.
Ingredients
- 1 can refrigerated crescent roll dough
- 3 tablespoons unsalted butter, melted
- 1/2 cup granulated sugar
- 1 tablespoon ground cinnamon
- Optional toppings: vanilla glaze, chopped nuts, or chocolate chips
Instructions
Prepare the Crescent Rolls:
Preheat your oven to 375°F (190°C). Unroll the crescent roll dough onto a clean surface, keeping the triangles intact. If you prefer smaller twists, you can cut the dough into smaller strips. Brush the surface of the dough with melted butter, ensuring it’s evenly covered.
Cinnamon Sugar Mixture:
In a small bowl, mix together the granulated sugar and ground cinnamon. Sprinkle the cinnamon sugar generously over the buttered dough. You can adjust the amount of sugar and cinnamon to your taste, making it sweeter or spicier based on your preference.
Twisting the Pastry:
Starting from one side of the dough, carefully twist each triangle or strip of dough into a spiral or rope shape, ensuring that the cinnamon sugar mixture is folded into the twists. This not only makes them visually appealing but also ensures each twist is coated with the delicious cinnamon sugar.
Baking the Twists:
Place the twisted pastry onto a baking sheet lined with parchment paper, making sure to leave enough space between each twist to allow for expansion. Bake for about 10-12 minutes or until the twists are golden brown and crispy on the outside.
Optional Toppings:
For an extra touch of sweetness, drizzle a simple vanilla glaze over the twists once they’ve cooled slightly. You can also sprinkle chopped pecans, walnuts, or hazelnuts on top for a bit of crunch or add a few chocolate chips into the twists before baking for a richer flavor.
Serve and Enjoy:
Let the twists cool slightly, then serve them warm. The crispy exterior and soft, buttery interior make them the perfect treat to enjoy with coffee, milk, or tea.
Why These Cinnamon Sugar Twists Are a Hit
These Crescent Roll Cinnamon Sugar Twists are one of the easiest yet most indulgent desserts you can make with minimal ingredients. The flaky pastry and sweet cinnamon sugar coating are universally loved, making them a great option for serving at casual get-togethers, family breakfasts, or even just for a fun dessert at the end of a meal. Plus, the buttery richness and warm spice of cinnamon create a comforting, homey flavor that’s perfect for any season. Whether you’re serving them for a special occasion or simply indulging in a sweet craving, these twists are sure to become a go-to favorite.
Variations & Customizations
- Chocolate Cinnamon Twists: Add a handful of chocolate chips to the cinnamon sugar mix before twisting for a richer, chocolaty flavor. This variation is especially loved by chocolate lovers!
- Nutty Cinnamon Sugar Twists: Sprinkle chopped nuts like pecans, walnuts, or almonds on top of the cinnamon sugar before twisting for an added crunch and depth of flavor.
- Pumpkin Spice Twists: For a seasonal twist, substitute the cinnamon with pumpkin pie spice or add a teaspoon of pumpkin puree to the butter before spreading it over the dough for a fall-inspired treat.
- Cream Cheese Filling: Roll the crescent dough with a layer of sweetened cream cheese filling before sprinkling the cinnamon sugar. This adds a creamy center to the twists and makes them even more indulgent.
- Glazed Cinnamon Twists: Once baked, drizzle a simple vanilla glaze made from powdered sugar, milk, and vanilla extract over the twists for an extra touch of sweetness.
Tips for Perfect Cinnamon Sugar Twists
- Even Butter Coating – Be sure to coat the dough evenly with the melted butter to ensure the cinnamon sugar sticks well and the pastry turns out buttery and rich.
- Don’t Overbake – Keep an eye on the twists while baking. They should turn golden brown and crispy, but overbaking can make them dry. Aim for a golden, slightly puffed texture.
- Serve Fresh – These twists are best enjoyed warm, right out of the oven. If you have leftovers, you can store them in an airtight container for up to two days and reheat them in the oven for a few minutes to bring back the flaky texture.
Crescent Roll Cinnamon Sugar Twists are the ultimate combination of sweet, buttery, and spiced indulgence. With minimal ingredients and a quick baking time, these twists are an excellent choice for a snack or dessert. Customize them to fit your personal taste and enjoy the simplicity and comfort of these delightful treats!
Puff Pastry Strawberry Shortcake – A Twist on the Classic, Using Layers of Puff Pastry
Puff Pastry Strawberry Shortcake is a delightful, elevated version of the classic strawberry shortcake. By swapping out traditional biscuit layers for flaky puff pastry, this dessert achieves an extra level of lightness and crispness that complements the sweetness of the strawberries and the richness of the whipped cream. This twist on the classic recipe is a perfect way to add a gourmet touch to a beloved dessert, making it ideal for gatherings, celebrations, or just as a special treat.
Why You’ll Love Puff Pastry Strawberry Shortcake
- Flaky and Light Texture – The layers of puff pastry bring a wonderful crispness and lightness that add depth and texture, making it an ideal base for the fresh strawberries and whipped cream.
- Fresh and Fruity – The strawberries provide a burst of freshness and natural sweetness that pairs perfectly with the flaky puff pastry and creamy filling. It’s a perfect dessert for showcasing seasonal fruit.
- Versatile and Elegant – This dessert takes the traditional strawberry shortcake and turns it into something a bit more sophisticated while still being approachable and easy to make. It’s versatile enough to serve for everything from casual family dinners to fancy dinner parties.
- Easy to Make – Using store-bought puff pastry makes this dessert a breeze to prepare while still looking and tasting homemade. With just a few simple ingredients, you can create an elegant dessert that will wow your guests.
Ingredients
- 1 sheet of puff pastry, thawed
- 2 cups fresh strawberries, hulled and sliced
- 1/4 cup granulated sugar, for macerating the strawberries
- 1 cup heavy whipping cream
- 2 tablespoons powdered sugar, for sweetening the cream
- 1 teaspoon vanilla extract
- Optional garnish: fresh mint leaves or additional strawberry slices
Instructions
Prepare the Puff Pastry Layers
Preheat your oven to 400°F (200°C). Roll out the puff pastry sheet onto a floured surface and use a knife to cut the pastry into rectangles, squares, or circles—depending on how you want to serve them. Place the cut pieces on a baking sheet lined with parchment paper. To ensure a golden, flaky texture, score the edges of the dough lightly with a knife, creating a border for the puffing process. Bake for 12-15 minutes, or until the pastry is golden and crisp. Once baked, remove from the oven and allow the pastry to cool.
Macerate the Strawberries
While the puff pastry is baking, prepare the strawberries. Slice them into even pieces and place them in a bowl. Sprinkle the granulated sugar over the strawberries and mix gently. Allow the strawberries to sit for about 15-20 minutes to release their natural juices and create a flavorful syrup. This step enhances the sweetness and depth of the fruit while softening it slightly.
Make the Whipped Cream
In a chilled bowl, combine the heavy whipping cream, powdered sugar, and vanilla extract. Use a hand mixer or stand mixer to whip the cream on high speed until soft peaks form. Be careful not to overwhip, as this can cause the cream to become too stiff. Once the whipped cream is ready, set it aside.
Assemble the Puff Pastry Strawberry Shortcake
To assemble the dessert, take one layer of puff pastry and place it on a plate or serving dish. Spoon a generous amount of macerated strawberries (including some of the syrup) over the pastry. Top with a dollop of freshly whipped cream. Repeat with a second layer of puff pastry and more strawberries and whipped cream. Garnish with additional strawberry slices or mint leaves for a pop of color and freshness.
Serve and Enjoy
Serve the Puff Pastry Strawberry Shortcake immediately after assembly, so the puff pastry stays crisp. You can also refrigerate any leftover components separately, but the pastry will soften if assembled too far in advance.
Why This Twist on Classic Strawberry Shortcake Works
The beauty of Puff Pastry Strawberry Shortcake lies in its contrast of textures. The buttery, flaky puff pastry provides the perfect crunchy base to balance out the juicy strawberries and smooth whipped cream. The layers of pastry not only add a visual appeal but also create a delightful eating experience with each bite—crisp, sweet, creamy, and fruity all at once.
By using puff pastry instead of biscuits, this dessert takes on a more refined, elegant quality, making it ideal for any occasion, from family meals to special events like birthdays, anniversaries, or summer parties. The use of seasonal strawberries adds a natural, fresh sweetness that is hard to beat, and the addition of whipped cream brings a richness that contrasts beautifully with the crisp pastry.
Tips for Perfect Puff Pastry Strawberry Shortcake
- Choose the Right Puff Pastry – Opt for high-quality puff pastry for the best results. While store-bought versions work well, choosing a brand that uses butter as its primary fat will give you a richer flavor and better texture.
- Serve Immediately – Puff pastry can lose its crispness if it sits for too long with the filling on top. To enjoy the best texture, assemble the dessert just before serving.
- Make Ahead Components – You can prepare the puff pastry layers and whipped cream ahead of time and store them separately. When ready to serve, just assemble the dessert with the fresh strawberries.
- Flavor Variations – Try swapping the strawberries for other seasonal berries like blueberries or raspberries. You can even mix different fruits for a fresh fruit medley topping.
- Add a Drizzle of Chocolate or Caramel – For an extra touch of indulgence, consider drizzling chocolate sauce or caramel over the top of the finished dessert.
Puff Pastry Strawberry Shortcake is a delicious and elegant twist on the classic, making it the perfect dessert for any occasion. With its flaky layers, sweet strawberries, and rich whipped cream, this dessert offers the perfect balance of textures and flavors. Whether you’re serving it for a special celebration or just as a sweet treat for yourself, it’s sure to become a favorite in your dessert repertoire.
Caramelized Banana Puff Pastry Pockets – Warm Bananas Wrapped in Golden, Flaky Pastry
Caramelized Banana Puff Pastry Pockets are a delightful combination of warm, sweet caramelized bananas encased in golden, flaky puff pastry. The beauty of this dessert lies in its simple yet indulgent nature—making it a perfect treat for any occasion, from casual afternoon snacks to elegant dinner parties. The bananas are sautéed in butter and sugar, creating a rich, caramelized flavor that perfectly complements the crispness of the puff pastry.
Why You’ll Love Caramelized Banana Puff Pastry Pockets
- Sweet and Savory Balance – The caramelized bananas are naturally sweet, while the puff pastry offers a light, buttery contrast. This combination creates a delicious balance of flavors that is irresistible.
- Golden and Flaky – The puff pastry becomes golden brown and flaky when baked, adding a satisfying crunch to each bite, perfectly complementing the tender, sweet banana filling inside.
- Simple and Quick – With just a handful of ingredients, this recipe is surprisingly easy to make and can be prepared in under an hour, making it perfect for those who want to indulge without spending too much time in the kitchen.
- Versatile – While bananas are the star of the show in this recipe, you can experiment with other fruits like apples, pears, or berries. You can also add spices like cinnamon or nutmeg to enhance the flavor.
Ingredients
- 1 sheet of puff pastry, thawed
- 2 ripe bananas, sliced
- 2 tablespoons butter
- 2 tablespoons brown sugar, or to taste
- 1 teaspoon vanilla extract
- A pinch of cinnamon (optional)
- 1 egg (for egg wash, optional)
- Powdered sugar (for dusting, optional)
Instructions
Prepare the Caramelized Banana Filling
Start by melting the butter in a skillet over medium heat. Add the sliced bananas and cook for 2-3 minutes, turning occasionally to ensure they are evenly browned. Once the bananas start to soften, add the brown sugar and stir gently until it melts and forms a caramel-like sauce. Add a splash of vanilla extract and a pinch of cinnamon if desired. Let the mixture simmer for another 2 minutes, then remove from heat. The bananas should be tender, and the caramel sauce should coat them lightly.
Prepare the Puff Pastry
While the bananas are caramelizing, preheat your oven to 400°F (200°C). Roll out the puff pastry onto a lightly floured surface and cut it into squares or rectangles, depending on the size of the pockets you want. You can make them small for individual servings or larger for a more shareable treat.
Assemble the Puff Pastry Pockets
Spoon a generous amount of the caramelized banana mixture onto the center of each puff pastry square. Be careful not to overfill, as this may cause the filling to spill out during baking. Fold the pastry over the filling to form a pocket, then seal the edges by pressing with a fork. If you want a golden, glossy finish, brush the top of the pastry with a beaten egg wash (simply whisk an egg with a little water). This step will help the pastry turn a beautiful golden brown while baking.
Bake the Pockets
Place the filled pastry pockets on a baking sheet lined with parchment paper. Bake in the preheated oven for about 12-15 minutes, or until the puff pastry is golden brown and crisp. The puff pastry should have risen slightly and formed a delicate, flaky exterior, encasing the warm caramelized banana filling.
Serve and Enjoy
Once baked, remove the pockets from the oven and let them cool for a few minutes. If you like, dust them with a little powdered sugar for added sweetness and presentation. Serve these delightful pockets warm, either on their own or with a scoop of vanilla ice cream or a dollop of whipped cream for an extra indulgent treat.
Why This Recipe Works
The caramelized bananas are the star of this dessert, providing a deep, rich sweetness that contrasts beautifully with the flaky, buttery puff pastry. The puff pastry cooks to a perfect golden crisp, forming a delicate, crunchy exterior that’s the ideal vessel for the soft, sweet bananas. As the puff pastry bakes, it rises and puffs up around the caramelized bananas, creating pockets that are warm, sweet, and incredibly satisfying.
The brown sugar and butter in the filling bring out the natural sweetness of the bananas, creating a caramel-like sauce that seeps into the puff pastry, making every bite a little piece of heaven. The hint of vanilla and optional cinnamon adds extra depth of flavor, making this dessert feel special and comforting.
Tips for Perfect Caramelized Banana Puff Pastry Pockets
- Use ripe bananas – To achieve the best caramelized flavor, make sure your bananas are ripe but not overripe. Ripe bananas will caramelize beautifully, creating the perfect filling.
- Don’t overstuff the pockets – If you add too much filling, the pastry may burst open while baking. Stick to a small amount of filling to ensure the pockets stay sealed and cook evenly.
- Add a touch of spice – For an extra flavor kick, you can sprinkle a little cinnamon, nutmeg, or allspice into the filling while caramelizing the bananas.
- Try with other fruits – While bananas are the main focus, other fruits like apples or pears can also work wonderfully in this recipe. If using apples or pears, slice them thinly and sauté them with the butter and sugar until they are tender and caramelized.
- Serve with ice cream or whipped cream – These puff pastry pockets are fantastic on their own, but serving them with a scoop of vanilla ice cream or a dollop of whipped cream can take them to the next level.
Caramelized Banana Puff Pastry Pockets are a fun and easy dessert that combines sweet bananas, buttery pastry, and a touch of caramelization for an indulgent treat. Whether you’re preparing them for a quick snack or serving them as a dessert at a gathering, they are sure to be a hit!
Conclusion
Recap How Puff Pastry Makes Dessert-Making Easy and Impressive
Puff pastry is the unsung hero in the world of dessert-making. Its light, flaky layers puff up to create a beautiful, delicate texture that makes any dessert look like it’s been made by a professional pastry chef. Whether you’re a seasoned baker or a novice in the kitchen, puff pastry offers a shortcut to making desserts that not only taste amazing but also look impressive.
One of the reasons puff pastry is such a game-changer is its versatility. It can be used for everything from simple fruit tarts to intricate cream-filled pastries or indulgent chocolate croissants. The best part? You don’t have to worry about making your own dough from scratch! With store-bought puff pastry, you can save time and effort while still enjoying flaky, buttery layers that elevate any dessert.
When baking with puff pastry, the possibilities are endless. Its ability to hold a variety of fillings means you can experiment with chocolate, fruit, custards, and even savory fillings. It allows you to get creative and tailor desserts to suit your preferences or the occasion, all while ensuring that the texture and flavor are spot on. And let’s not forget how well it pairs with the natural sweetness of fruits like berries, apples, peaches, and bananas, or how it can perfectly complement rich chocolate ganache or smooth custard.
Puff pastry not only adds a professional touch to your desserts, but it also gives you a quick, foolproof way to impress your guests. You don’t have to worry about perfecting complicated pastry techniques—puff pastry lets you focus on the fun part: the fillings and flavors.
Encourage Readers to Try Their Favorite and Experiment with Fillings Like Chocolate, Fruit, and Custard
Now that you’ve seen just how easy it is to create beautiful puff pastry desserts, why not experiment with your own fillings? If you’re a fan of rich chocolate, try filling puff pastry with melted chocolate or Nutella for a sweet, indulgent treat. For something lighter, a fresh fruit filling, like blueberries, raspberries, or apples, wrapped in that flaky, buttery pastry is always a winner. And if you’re looking to get a little fancy, why not try a classic custard filling for a creamy, dreamy bite?
The beauty of puff pastry is that you can take simple ingredients and create something truly remarkable. Want a more decadent dessert? Add layers of chocolate ganache and whipped cream. Or maybe a tangy twist with a citrus-infused cream cheese filling? The sky’s the limit.
Experimentation is key, and the great thing about puff pastry is that it’s forgiving. Even if your first attempt doesn’t look perfect, the flaky layers will still make it look and taste incredible. The flexibility in puff pastry allows you to create anything from simple, quick treats to more elaborate and decorative desserts, all while maintaining that deliciously flaky texture everyone loves.
Invite Them to Share Their Favorite Puff Pastry Dessert Ideas in the Comments
I’d love to hear about your own puff pastry adventures! What’s your favorite puff pastry dessert to make? Have you tried experimenting with unique fillings, or maybe a fun twist on a classic? Whether it’s a simple peach puff pastry tart or a more complex chocolate cream puff, share your ideas in the comments below. Your creativity might just inspire someone else to try something new in the kitchen.
If you’ve made any of these puff pastry desserts, let me know how they turned out! Were you able to create that perfectly flaky crust? Or did you try adding a unique twist? I’m always excited to hear your feedback and learn about your favorite puff pastry combos.
Desserts are all about creativity and fun, and puff pastry is the perfect ingredient to help you explore new ideas. So go ahead, play with your ingredients, and don’t forget to share your creations with me. You never know, your idea could be the next viral dessert recipe!
If you love easy and delicious baked goods, check out this simple banana bread recipe using just two bananas. It’s perfect for when you have ripe bananas on hand and want a moist, flavorful loaf without any hassle. Find the full recipe here: Banana Bread Recipe with 2 Bananas.
1 thought on “10 Irresistible Puff Pastry Dessert Recipes You Can Make at Home”