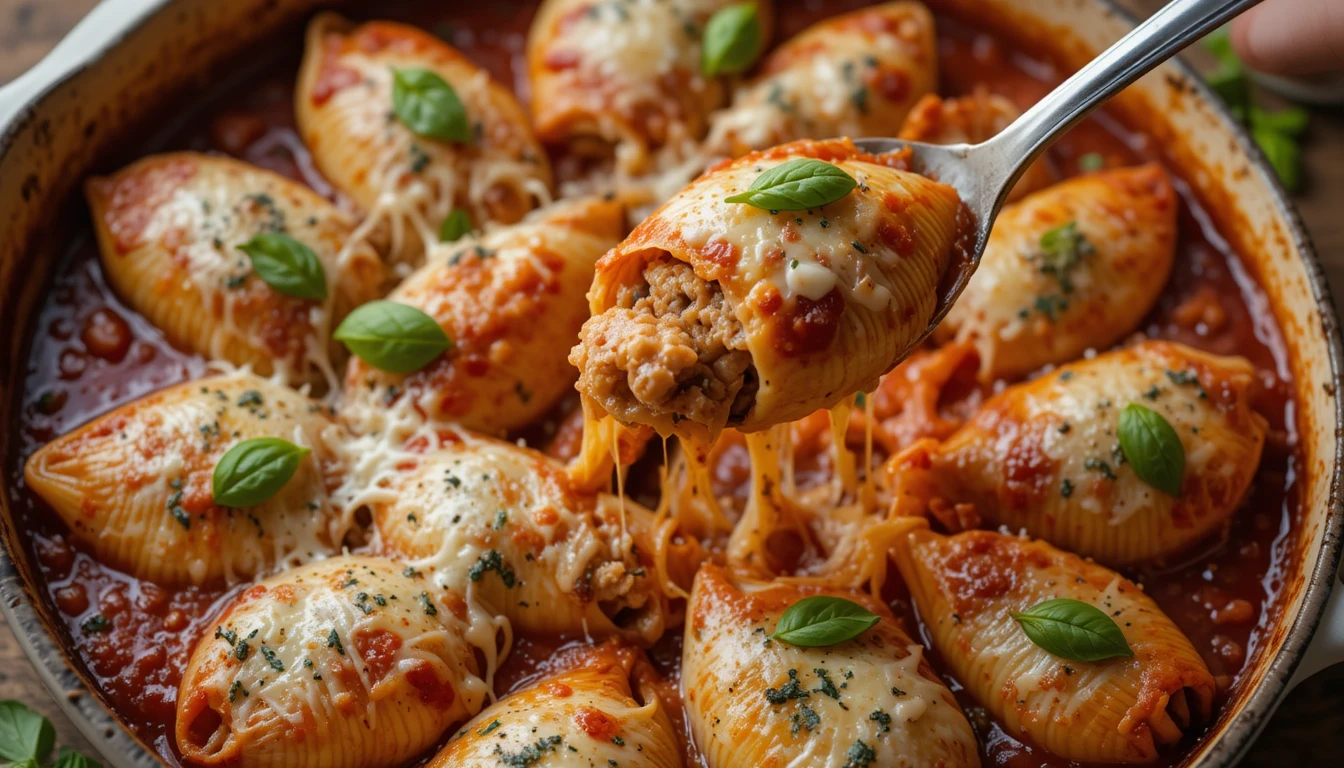
5 Easy Steps to Make the Best Chicken Stuffed Shells Recipe

If you love cheesy, comforting pasta dishes, this chicken stuffed shells recipe is a must-try! These jumbo pasta shells are filled with a rich and creamy mixture of shredded chicken, ricotta, mozzarella, and parmesan cheese, then baked to perfection in a delicious marinara or Alfredo sauce. It’s an easy yet impressive meal that’s perfect for family dinners, meal prep, or even a cozy weekend treat.

The best part? You only need a few simple ingredients and five easy steps to bring this dish to life. Whether you’re a fan of classic marinara flavors or prefer a creamy Alfredo twist, this recipe can be customized to your taste. Let’s get started on making the best chicken stuffed shells you’ve ever had!

Gather Your Ingredients for Chicken Stuffed Shells

Check out this delicious Garlic Parmesan Chicken Pasta recipe on Veibrant Recipes! This creamy and flavorful dish features tender chicken, al dente pasta, and a rich garlic Parmesan sauce that’s perfect for a comforting meal. Whether you’re cooking for family dinner or meal prepping for the week, this easy-to-make recipe is sure to be a favorite.

👉 Read the full recipe here: Garlic Parmesan Chicken Pasta

List the Key Ingredients: Jumbo Pasta Shells, Chicken, Ricotta, Mozzarella, Parmesan, Marinara Sauce, and Seasonings

The secret to making the best chicken stuffed shells recipe lies in using the right ingredients. Each component plays a crucial role in creating a dish that’s rich, creamy, and full of flavor. Let’s break down the essentials:

Jumbo Pasta Shells

The foundation of this dish, jumbo pasta shells, are the perfect vessel for holding the creamy chicken filling. When cooked properly, they offer a tender bite while maintaining their shape. To ensure the best results:

  • Cook the shells al dente (firm to the bite) since they will continue cooking in the oven.
  • Rinse them with cold water after boiling to prevent sticking and to stop the cooking process.
  • Lay them on a parchment-lined tray to keep them from clumping together before stuffing.

Shredded Chicken

For ease and convenience, cooked shredded chicken is the star protein in this dish. It adds a delicious, hearty texture while soaking up the creamy cheese flavors. You can use:

  • Rotisserie chicken for a quick, no-prep option.
  • Boiled and shredded chicken breasts or thighs for a homemade touch.
  • Leftover grilled or baked chicken for a slightly smoky flavor.

Ricotta Cheese

This soft, creamy cheese gives the filling a smooth and velvety texture. It blends well with the chicken, making each bite rich and satisfying. If you prefer an alternative:

  • Cottage cheese can be used for a slightly tangy, protein-packed swap.
  • Mascarpone cheese offers an ultra-creamy, indulgent variation.

Mozzarella Cheese

No stuffed shells recipe is complete without gooey, melty mozzarella! This cheese is responsible for that irresistible cheese pull when you take a bite.

  • Use shredded mozzarella for easy mixing and even melting.
  • If you want a bolder cheese flavor, try smoked mozzarella for a hint of depth.
  • Fresh mozzarella slices can be placed on top for a creamier, more decadent finish.

Parmesan Cheese

Parmesan adds a sharp, nutty flavor that enhances the overall richness of the dish. It balances out the creaminess of the ricotta and mozzarella.

  • Use freshly grated parmesan for the best taste and texture.
  • If you prefer a bolder flavor, opt for Pecorino Romano as an alternative.

Marinara Sauce or Alfredo Sauce

The sauce you choose can completely transform the dish. Marinara sauce gives a classic, tangy tomato flavor, while Alfredo sauce creates a creamy, decadent experience.

  • Marinara Sauce: Perfect if you want a more traditional Italian flavor with a bright, herby tomato base.
  • Alfredo Sauce: Great for those who love extra creaminess and a buttery, garlicky taste.
  • Blended Sauces: For a unique twist, mix both marinara and Alfredo for a rich and well-balanced combination.

Seasonings & Herbs

To enhance the natural flavors of the ingredients, adding the right seasonings is key. Some must-have spices include:

  • Garlic powder & onion powder – Adds depth and a savory kick.
  • Italian seasoning – A blend of oregano, basil, thyme, and rosemary for an authentic taste.
  • Red pepper flakes – Optional, but great for adding a touch of heat.
  • Salt & black pepper – Essential for balancing all the flavors.
  • Fresh basil or parsley – Sprinkle on top for a fresh, vibrant finish.

By using these high-quality ingredients, your chicken stuffed shells will turn out creamy, cheesy, and absolutely delicious! Now that we’ve covered the essentials, let’s move on to preparing the pasta shells for stuffing.

Optional Variations: Alfredo Sauce Instead of Marinara, Adding Spinach or Mushrooms

One of the best things about this chicken stuffed shells recipe is its versatility. While the classic version is made with marinara sauce and a cheesy chicken filling, you can easily switch things up to suit your taste preferences. Whether you’re craving something creamier, want to sneak in extra veggies, or just love experimenting in the kitchen, these optional variations will take your stuffed shells to the next level!

1. Swap Marinara for Alfredo Sauce – A Creamy, Indulgent Twist

If you prefer rich, buttery flavors over tomato-based sauces, using Alfredo sauce is a fantastic alternative. This version is extra creamy, pairing perfectly with the ricotta, mozzarella, and parmesan filling.

✔️ Why Choose Alfredo? It creates a smooth, velvety texture that melts in your mouth. It adds a buttery, garlicky flavor that complements the chicken beautifully. Perfect for those who prefer less acidity than marinara offers.

✔️ How to Make It Even Better: Add a sprinkle of nutmeg to enhance the depth of flavor. Mix in a little chicken broth or heavy cream to thin out the sauce if it’s too thick. For extra cheesiness, stir in shredded parmesan or a touch of cream cheese before baking.

✔️ Blended Sauce Idea: Can’t decide between marinara and Alfredo? Try a pink sauce by mixing them together! This creates a balanced, creamy, and slightly tangy flavor that’s truly irresistible.

2. Add Spinach for a Nutritious Boost

Adding spinach is a simple way to incorporate more nutrients, color, and flavor into your dish. It blends seamlessly into the filling and adds a slight earthiness that pairs well with the creamy cheeses.

✔️ How to Add Spinach: Use fresh spinach – chop and sauté it lightly in olive oil until wilted. Use frozen spinach – thaw, squeeze out excess water, and mix directly into the filling. If you love extra greens, try baby kale or arugula for a bolder flavor.

✔️ Why Add Spinach? It boosts the nutritional value with iron, fiber, and vitamins. It adds a subtle, fresh flavor without overpowering the dish. It makes the dish feel a little healthier while still being cheesy and comforting!

3. Add Mushrooms for a Savory, Meaty Texture

Mushrooms are a great addition to chicken stuffed shells because they add umami (savory depth), heartiness, and a meaty texture without extra meat.

✔️ Best Mushrooms to Use: Cremini mushrooms (baby bella) – Mild and slightly earthy, they blend well with the filling. Portobello mushrooms – Hearty and meaty, great if you want a richer flavor. White button mushrooms – Mild and easy to find, they work well in any dish.

✔️ How to Prepare Them: Chop the mushrooms into small pieces so they mix evenly into the filling. Sauté them with butter, garlic, and a pinch of salt until tender before adding to the mixture. If you love mushrooms, layer slices on top of the stuffed shells before baking for extra flavor.

✔️ Why Add Mushrooms? They absorb the garlic, butter, and cheese flavors beautifully. They create a meaty bite without adding more meat. They bring an extra layer of depth and richness to the dish.

Final Thoughts: Customize to Your Taste!

Whether you choose Alfredo sauce, spinach, mushrooms, or a mix of all three, these simple tweaks allow you to personalize your stuffed shells while keeping them just as delicious. Want to get even more creative? Try mixing in sun-dried tomatoes, caramelized onions, or crispy bacon for even more depth of flavor! Now that we’ve explored some fun variations, let’s move on to the next step—preparing the pasta shells for stuffing!

Quick Tip: Use Rotisserie Chicken to Save Time

When making chicken stuffed shells, using rotisserie chicken is one of the best ways to save time. Instead of cooking and shredding chicken from scratch, you can buy a fully cooked rotisserie chicken from the grocery store, shred the meat, and mix it into your filling. This simple shortcut cuts down on prep time while still giving you tender, flavorful chicken that blends perfectly with the creamy cheese mixture.

Why Use Rotisserie Chicken?

  • Saves Time: No need to cook raw chicken—just shred and mix.
  • Adds Extra Flavor: Rotisserie chicken is seasoned and slow-cooked, making it juicier and more flavorful than plain boiled chicken.
  • Reduces Cleanup: No extra pans or utensils needed for cooking—just shred and go.
  • Perfectly Tender: The slow-roasting process makes the chicken moist and easy to shred, blending seamlessly into the filling.

How to Use Rotisserie Chicken in Stuffed Shells

  1. Remove the Skin and Bones – While the crispy skin is delicious, it is not needed for the filling. Carefully remove the skin and separate the meat from the bones.
  2. Shred the Chicken – Use two forks to pull apart the meat into small shreds. For an even faster method, toss the chicken into a food processor and pulse a few times.
  3. Mix into the Filling – Combine the shredded rotisserie chicken with ricotta, mozzarella, parmesan, and seasonings for a rich, creamy texture.
  4. Stuff the Shells – Once mixed, fill each cooked jumbo shell with the chicken-cheese mixture and arrange them in a baking dish.
  5. Top and Bake – Pour marinara or Alfredo sauce over the shells, sprinkle with extra cheese, and bake until bubbly and golden.

Extra Tips for Using Rotisserie Chicken

  • Choose a Mild or Garlic-Seasoned Rotisserie Chicken – Some rotisserie chickens are heavily spiced with barbecue or lemon pepper seasoning. If possible, go for a classic or lightly seasoned variety so the flavors do not overpower the dish.
  • Use Both White and Dark Meat – Dark meat (thighs and legs) is juicier and richer, while white meat (breast) is leaner and firmer. Mixing both gives you the best balance of texture and flavor.
  • Store Extra Chicken for Other Meals – If you do not use the entire rotisserie chicken, save the leftovers for soups, salads, sandwiches, or wraps for easy meals throughout the week.

Cook and Prepare the Pasta Shells

How to Boil Jumbo Pasta Shells to the Perfect Texture

Boiling and Preparing Jumbo Pasta Shells for Stuffing

Boiling jumbo pasta shells to the right texture is essential to creating a successful chicken stuffed shells dish. Whether you’re stuffing them with a creamy chicken filling or layering them in a casserole, achieving that perfect al dente texture is key to a great result. If the shells are overcooked, they could become too soft, tear easily, or absorb too much sauce. If undercooked, they might be too firm, making them difficult to stuff. Here’s a step-by-step guide to ensure your pasta is perfectly cooked every time.

1. Choose the Right Pasta

To start, ensure you have high-quality jumbo pasta shells. Look for shells labeled “jumbo” or “large,” which are designed to hold substantial fillings. Checking the expiration date is also important, as fresh pasta will cook better and more evenly. A box of fresh, well-made pasta will also hold up better in the cooking process.

2. Boil a Large Pot of Water

For pasta to cook evenly, it needs plenty of space. Use a large pot and fill it with enough water to fully submerge the pasta. For every pound of pasta, use about 4 to 6 quarts of water. The more water you use, the less likely the pasta will stick together and cook unevenly.

Before adding the pasta, bring the water to a full, rolling boil over medium-high heat. A proper boil ensures that the pasta is submerged in boiling water, allowing it to cook thoroughly.

3. Salt the Water Generously

Once the water is boiling, add salt to the pot. This doesn’t just add flavor, but it also helps the pasta cook more evenly and prevents it from becoming mushy. 1 to 2 tablespoons of salt per 4 quarts of water is a good rule of thumb. Salting the water properly is one of the best ways to enhance the overall flavor of your dish.

4. Add the Jumbo Pasta Shells

Carefully add the jumbo pasta shells to the boiling water. Stir them gently with a wooden spoon or pasta fork to prevent the shells from sticking together. Be sure to add the pasta gradually and not all at once. Stirring ensures that the shells are evenly spaced and don’t clump together. It also helps to prevent any shells from sticking to the bottom of the pot.

5. Cook to Al Dente Texture

Jumbo pasta shells typically take 10 to 12 minutes to cook to an al dente texture. Al dente means that the pasta is fully cooked but still has a slight firmness when you bite into it. Be sure to follow the cooking time indicated on the package, but start checking a couple of minutes before the time is up to avoid overcooking. Test by removing one shell from the pot, allowing it to cool briefly, and then tasting it. The pasta should be tender but not mushy.

6. Stir Occasionally

Throughout the cooking process, stir the pasta every couple of minutes to prevent the shells from sticking together. The first few minutes are particularly important, as the pasta is more likely to stick to itself or the pot. Stirring will also help keep the shells from becoming unevenly cooked or clumping together.

7. Check for the Perfect Texture

You don’t want to overcook the pasta, so always check for al dente just before the time specified on the package. This ensures the shells have enough firmness to hold up while baking. When testing, make sure the shells are tender on the outside but still offer some resistance when bitten into. If the pasta is too soft, it may fall apart when stuffed or during baking.

8. Drain and Cool

Once the pasta is cooked to your liking, drain it immediately in a colander. Don’t let it sit in the hot water, as it will continue to cook and potentially become mushy. After draining, you can run cold water over the shells to stop the cooking process, especially if you plan to stuff them later. This step is particularly useful if you’re preparing the shells in advance or need to handle them right away.

9. Prevent Sticking After Draining

Once drained, gently toss the shells with a small amount of olive oil or butter to keep them from sticking together. This extra step creates a thin, protective layer around each shell, preventing them from clumping and making it easier to stuff them with your chicken filling later on.

10. Handling Soft Shells

If you find that some of your shells are too soft or have broken during cooking, don’t worry—this can happen if the shells were overcooked or handled roughly. Instead of discarding them, consider using them as a layer in a casserole dish or a mini-stuffed shell. You can also use them for a layered baked pasta dish, where they won’t need to maintain their shape as much.

Pro Tips for Perfect Jumbo Shells

  • Don’t overcrowd the pot—it’s better to cook the shells in batches if you’re preparing a large batch. Overcrowding can cause the shells to cook unevenly and stick together.
  • Keep a close eye on the cooking time—check the shells a couple of minutes before the recommended cooking time is up to avoid overcooking.
  • Stir frequently—this helps prevent sticking and ensures even cooking.
  • Use cold water to stop cooking—if you’re not stuffing the shells immediately, cool them down with cold water to halt the cooking process and maintain the al dente texture.

Preventing Shells from Sticking Together

When cooking jumbo pasta shells for a stuffed shell recipe, one of the most common problems is them sticking together. Once the shells are stuck, they can be difficult to handle, and it may cause them to break or tear when trying to stuff them with chicken or cheese. Fortunately, there are several easy and effective methods to prevent this from happening. Here’s how to ensure your shells stay separate and easy to work with.

1. Use Plenty of Water

The first key to preventing pasta shells from sticking is to use enough water while boiling them. A common mistake is using too little water, which increases the chance that the pasta will clump together. The general rule is to use 4 to 6 quarts of water per pound of pasta. This allows the shells to move freely in the pot, ensuring they cook evenly and don’t stick together. The more water you use, the better the shells will separate during cooking.

2. Bring the Water to a Full Boil

Before adding the pasta, make sure the water is at a full, rolling boil. If you add the shells before the water is boiling, the pasta will release more starch into the water, making it more likely that the shells will stick together. Wait until you see large, vigorous bubbles before adding the shells to the pot. This will help maintain the structure of the pasta and prevent them from clumping together.

3. Stir the Shells Occasionally

Once the shells are added to the boiling water, gently stir them with a wooden spoon or a pasta fork. Stirring helps keep the shells from sticking to each other or to the bottom of the pot, especially during the first few minutes of cooking. After the initial stir, continue to stir every couple of minutes to ensure the pasta is evenly cooked and separated.

4. Add Salt to the Water

Although salt doesn’t directly prevent pasta from sticking, adding it to the water helps the pasta cook more evenly and retain its flavor. Additionally, salting the water can also help prevent the pasta from becoming too mushy, which could increase the chances of sticking. 1 to 2 tablespoons of salt per 4 quarts of water is usually the ideal amount.

5. Use Olive Oil or Butter

One of the most effective methods to prevent pasta shells from sticking together after cooking is to coat them with a little olive oil or butter. Once you drain the shells, toss them gently in a bowl with a small amount of olive oil or melted butter to create a thin protective layer around each shell. This layer keeps the pasta from sticking to itself and makes it easier to handle when assembling your dish. Olive oil also adds a subtle flavor that pairs well with the chicken filling in your stuffed shells.

6. Don’t Overcrowd the Pot

If you’re making a large batch of stuffed shells, try not to overcrowd the pot. Adding too many shells at once can cause the pasta to stick together, as there won’t be enough room for them to move freely. If you’re making a bigger batch, cook the shells in two separate pots or in batches, so each shell has enough space to cook evenly and separately.

7. Drain Immediately and Cool

As soon as the shells are cooked to al dente, drain them right away in a colander. Don’t leave the shells in the hot water, as they will continue to cook and become softer, increasing the chance they’ll stick together. After draining, immediately run cold water over the shells to stop the cooking process and cool them down. This step is particularly helpful if you plan to store or assemble them later.

8. Keep Them in a Single Layer

After draining and cooling the shells, it’s important to store them correctly to prevent sticking. If you’re preparing the shells ahead of time, lay them in a single layer on a baking sheet or tray. If you need to stack them, place a layer of wax paper or parchment paper between the layers. This will prevent the shells from sticking together and make it easier to handle them later when stuffing them.

9. Consider Using Non-Stick Spray

If you don’t want to use oil or butter, another option is to lightly coat the shells with non-stick cooking spray after draining. This spray provides a thin, non-stick coating that prevents the shells from sticking together, and it’s a low-calorie alternative if you’re trying to reduce fat in the dish. Simply spray the shells lightly, ensuring they don’t get too greasy.

10. Layer the Shells When Storing

If you need to store the cooked shells before assembling the dish, make sure to layer them carefully. When stacking the shells, place a piece of parchment paper or plastic wrap between each layer to prevent the shells from sticking together. You can also drizzle a small amount of olive oil over the shells before layering them, especially if you’re planning to refrigerate or freeze them for later use.

Letting Them Cool Before Stuffing

Allowing jumbo pasta shells to cool before stuffing them is an important step in the preparation process, and it can make a big difference in how your chicken stuffed shells turn out. Here’s why it’s crucial to give them time to cool and how to do it properly:

1. Preventing Tear and Breakage

One of the primary reasons to let your cooked pasta shells cool is to prevent them from tearing or breaking when you stuff them. Hot pasta is delicate and can become soft, especially when handling the shells. Stuffing them while they are still warm or hot can cause the shells to bend, tear, or lose their shape. Allowing the shells to cool for a few minutes ensures they firm up a bit, making them much easier to handle and less likely to break during the stuffing process. The cooler texture gives you the control you need to stuff them properly without making a mess.

2. Ensuring a Better Texture for Stuffing

Cooling the shells also helps preserve their al dente texture. If the shells are too hot, they can become overly soft and absorb too much filling, making them soggy and difficult to work with. By cooling them down, you allow the pasta to maintain a firmer texture, which will hold up better when baking and prevent them from becoming too mushy once filled with your chicken mixture. The filling will stay in place without soaking into the pasta, ensuring that your chicken stuffed shells hold their shape when you bake them.

3. Easier Handling for Stuffing

Handling hot pasta can be challenging, especially when you’re trying to stuff each shell with the filling. If you try to stuff shells immediately after cooking, you risk burning your hands or having the filling slide off the shell as you try to fill it. Letting the shells cool for about 5-10 minutes makes them more comfortable to handle. You’ll have better control when spooning the filling into each shell, and the cool temperature will make them much easier to stuff without burning your fingers or creating a mess.

4. Better Flavor and Filling Retention

Cooling the shells gives the pasta time to rest, which can help prevent overcooking. This resting time helps the pasta absorb just the right amount of liquid without becoming too soggy. It also helps retain the flavor of the pasta itself, so you can enjoy the full taste of the shells along with your delicious chicken filling. If you stuff the shells while they are hot, the pasta may absorb the filling too quickly, which can result in the filling spilling out during baking. Cooling the shells first ensures that the filling stays in place and doesn’t get absorbed too quickly.

5. Preparing for Assembly and Baking

By letting the pasta shells cool down, you also give yourself a bit of breathing room to prepare other components of the dish. For example, you can use this time to assemble the marinara sauce, prepare the cheese topping, or preheat the oven while the shells are cooling. It’s a simple but effective way to maximize your time in the kitchen and streamline the process of putting everything together for baking.

6. Preventing Overcooking During Assembly

Another benefit of cooling the shells is that it prevents them from continuing to cook during the assembly process. If you stuff hot shells and then put them back into a hot oven, the pasta may cook too much and become overdone. Cooling the shells before stuffing them stops this from happening, ensuring that they will cook properly in the oven without getting too soft or mushy. It’s a good way to maintain control over both the pasta and the stuffing while ensuring a balanced texture in your final dish.

How to Cool the Shells Quickly

If you’re in a hurry and don’t want to wait too long for the shells to cool, there are a few quick methods you can try:

  • Run cold water over the shells: After draining the pasta, run cold water over the shells to cool them down faster. You can also use ice-cold water in a large bowl and submerge the shells for a minute or two. Just make sure to drain them thoroughly afterward to prevent excess water from affecting your stuffing.
  • Spread them out: Lay the pasta shells flat on a baking sheet or large tray in a single layer to help them cool more quickly. This allows air to circulate around the shells and speeds up the cooling process. Make sure they’re not stacked on top of each other, as this could cause them to stick together.

Make the Creamy Chicken and Cheese Filling

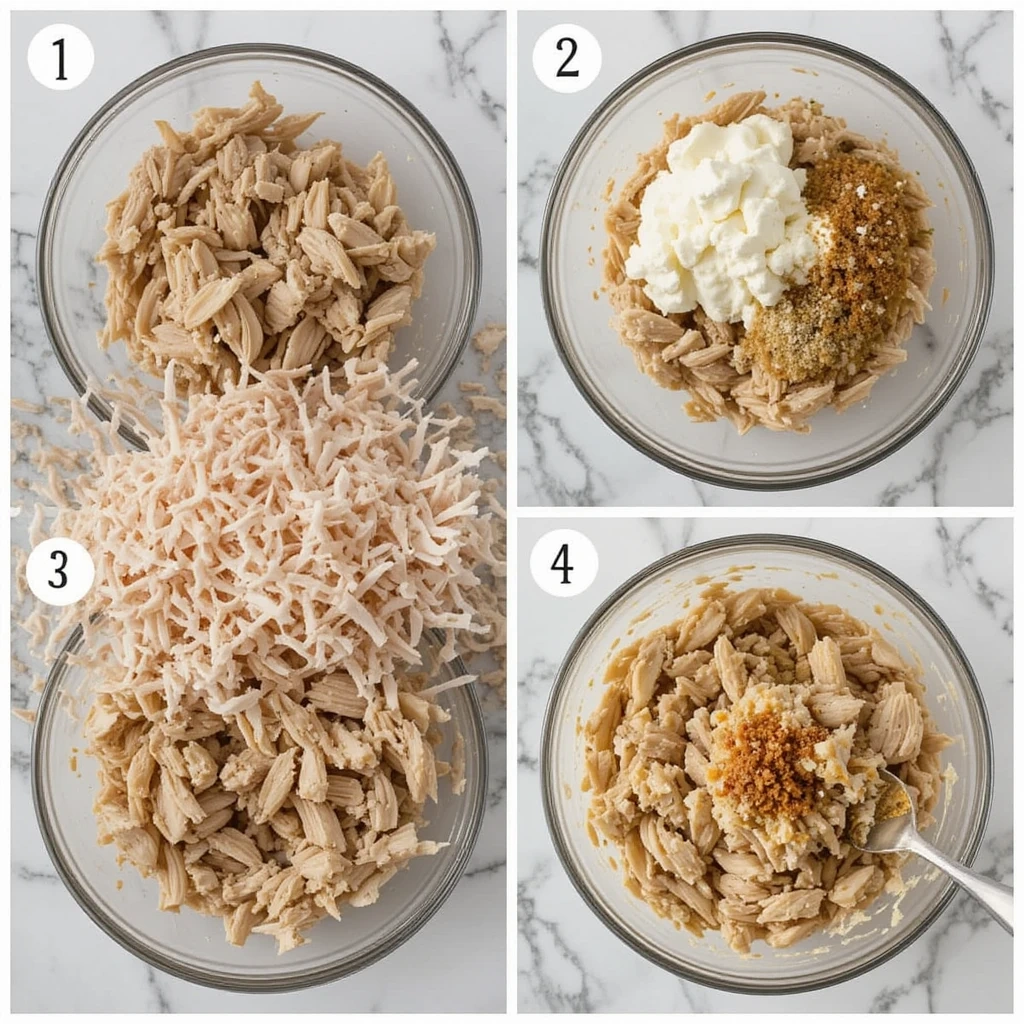
Mixing Shredded Chicken, Ricotta, Mozzarella, Parmesan, and Italian Seasoning

The filling for your chicken stuffed shells is the heart of the dish, and creating a flavorful, creamy mixture is key to making the recipe irresistible. Combining shredded chicken, ricotta, mozzarella, parmesan, and Italian seasoning results in a rich, savory, and perfectly balanced filling that complements the tender pasta shells. Here’s a deeper look at how to mix these ingredients and achieve the best texture and flavor.

1. Start with Shredded Chicken

The first ingredient in your filling is shredded chicken. For a perfectly moist and tender filling, it’s best to use cooked chicken, which can be prepared in a variety of ways. Rotisserie chicken is a great shortcut, as it’s pre-cooked and easy to shred. Alternatively, you can cook chicken breasts or thighs in the oven or on the stovetop, then shred them with two forks or chop them into small, bite-sized pieces.

Shredding the chicken helps to create a fine, tender texture that blends well with the other ingredients. Be sure to use dark meat for more flavor and moisture, though white meat works too if you prefer a lighter option. Once the chicken is shredded, place it in a large mixing bowl, ready to combine with the other ingredients.

2. Add Ricotta for Creaminess

Ricotta cheese is essential for creating a creamy and smooth filling. It serves as the base of the stuffing, binding the shredded chicken together while adding a mild, delicate flavor. Use whole-milk ricotta for a richer texture, but part-skim ricotta can work if you’re looking to reduce fat.

To ensure the filling is smooth, stir the ricotta until it’s fully blended and free of any lumps before adding it to the chicken. The ricotta helps prevent the filling from being too dry, making each bite of stuffed shell rich and creamy.

3. Mix in Mozzarella for Melty Goodness

Mozzarella is the cheese that adds that wonderful meltiness to the filling. It gives the chicken mixture a luscious, stretchy texture that pulls apart beautifully when you cut into the stuffed shells. For the best results, use whole-milk mozzarella or part-skim mozzarella for a more balanced flavor. Shred the mozzarella yourself for the best texture, as pre-shredded cheese often contains anti-caking agents that can affect how it melts.

When mixed with the ricotta, mozzarella helps create a filling that is gooey and smooth without being overly heavy. The mozzarella also adds a subtle flavor that complements the other cheeses and seasonings perfectly.

4. Incorporate Parmesan for a Savory Kick

Parmesan cheese brings an extra depth of flavor to the chicken mixture. Its salty, nutty taste enhances the overall profile of the stuffing. Use freshly grated Parmesan for the best flavor—pre-grated cheese often lacks the bold, sharp taste that freshly grated cheese provides.

Parmesan also adds a slightly granular texture that contrasts nicely with the creaminess of ricotta and mozzarella. When combined with the mozzarella and ricotta, the Parmesan helps create a well-rounded filling that’s savory and flavorful without being overwhelming.

5. Season with Italian Seasoning for Authentic Flavor

To give your filling that classic Italian flavor, don’t forget to add Italian seasoning. This blend of herbs typically includes oregano, basil, thyme, rosemary, and marjoram, all of which are staples in Italian cooking. The combination of these herbs brings a fragrant, earthy flavor to the filling, enhancing the richness of the cheeses and chicken.

Start by adding about 1-2 teaspoons of Italian seasoning to the mixture, then taste and adjust as needed. Feel free to experiment with additional seasonings like garlic powder, onion powder, or red pepper flakes for added complexity and heat. Fresh basil or parsley can also be chopped and added for a burst of freshness, especially if you want to give the filling an extra touch of flavor.

6. Combining Everything for the Perfect Texture

Once you’ve gathered all the ingredients—shredded chicken, ricotta, mozzarella, parmesan, and Italian seasoning—it’s time to mix everything together. The key here is to blend the ingredients gently to maintain the chicken’s texture while incorporating the cheeses evenly.

Using a spoon or a rubber spatula, fold the ingredients together in a large mixing bowl. Avoid overmixing, as you want to keep the chicken pieces intact while distributing the creamy cheeses and seasonings. The goal is a thick, cohesive mixture that holds together well but isn’t too dense. If the mixture seems too thick, you can add a small splash of milk or heavy cream to loosen it up to the right consistency.

7. Taste and Adjust Seasoning

Before you stuff the shells, it’s always a good idea to taste the filling and adjust the seasoning if necessary. If the mixture seems too bland, you can add more salt, pepper, or garlic powder to enhance the flavors. If you like a bit of spice, add a pinch of crushed red pepper flakes or a dash of hot sauce. The filling should be flavorful on its own since it will be baked with marinara sauce or other toppings, but a little extra seasoning can bring it to life.

Optional Ingredients: Garlic Powder, Spinach, or Red Pepper Flakes for Extra Flavor

While the base of the chicken stuffed shells filling—shredded chicken, ricotta, mozzarella, Parmesan, and Italian seasoning—creates a rich and flavorful dish on its own, adding a few optional ingredients can elevate the taste and introduce new textures. Whether you prefer a savory, fresh, or spicy twist, these ingredients can be mixed in to create a more dynamic and customized filling. Here’s how garlic powder, spinach, and red pepper flakes can boost your chicken stuffed shells.

1. Garlic Powder: For a Bold, Savory Kick

Garlic powder is a quick and easy way to infuse your filling with that signature savory, slightly pungent flavor that garlic lovers crave. It’s an essential addition to many Italian dishes, so adding it to your chicken stuffed shells filling brings a familiar depth of flavor without the hassle of peeling and mincing fresh garlic.

  • Flavor enhancement: Garlic powder imparts a mild, earthy taste that complements the richness of the cheeses and the savoriness of the chicken. It’s perfect for creating a more balanced and rounded flavor profile.
  • Versatility: If you enjoy the taste of garlic but don’t want the texture of fresh garlic, garlic powder is ideal. It evenly blends into the mixture, providing a smooth, consistent flavor without the chunks.
  • How much to add: Start with about ½ to 1 teaspoon of garlic powder, then adjust to taste. Garlic can be potent, so a little goes a long way. You can also add onion powder for an extra layer of savory goodness.

2. Spinach: For Freshness and a Boost of Nutrients

Adding spinach to your chicken stuffed shells is a fantastic way to introduce a touch of freshness and nutrition. Spinach brings a mild, slightly earthy flavor that complements the rich filling, while also adding color and texture. Plus, it’s packed with essential vitamins and minerals like iron, folate, and vitamin K.

  • Health benefits: Spinach is a low-calorie, nutrient-dense vegetable that provides a host of health benefits. Adding spinach to your chicken stuffed shells not only boosts the dish’s flavor but also gives it a nutritious edge.
  • How to prepare: Use fresh spinach or frozen spinach for this option. If you’re using fresh spinach, simply chop it finely and stir it into the filling. If using frozen spinach, be sure to thaw and squeeze out excess moisture before adding it to avoid making the filling too watery.
  • How much to add: About 1-2 cups of spinach (fresh or frozen) will work well for this recipe. You can increase the amount based on how much spinach you want in each bite. Be sure to mix it thoroughly to evenly distribute the spinach throughout the filling.

3. Red Pepper Flakes: For a Touch of Heat

If you enjoy a little spice in your meals, red pepper flakes are the perfect addition to give your chicken stuffed shells a kick of heat. They’re great for adding flavor complexity and heat without overwhelming the dish, allowing the other ingredients to shine.

  • Flavor profile: Red pepper flakes provide a mild to medium heat, depending on how much you add, and they pair beautifully with the rich cheeses and savory chicken. The slight spiciness enhances the flavors of the garlic and Italian seasoning, adding a warming sensation to the filling.
  • How to use: Sprinkle ¼ to ½ teaspoon of red pepper flakes into the mixture to start, then taste and adjust as needed. If you want more heat, gradually increase the amount.
  • Alternatives: If you prefer a different type of heat, you can use cayenne pepper or even finely chopped jalapeños for a different flavor and level of spice. For a subtler heat, paprika or chipotle powder can give a smokier flavor.

4. Customizing Your Stuffed Shells: Making It Your Own

These optional ingredients—garlic powder, spinach, and red pepper flakes—are simple ways to adjust the flavor profile of your chicken stuffed shells and make the dish more personal. They allow you to take a classic recipe and give it your own twist, whether you’re aiming for more savory depth, freshness, or spiciness. You can also experiment with different combinations of these ingredients. For instance, adding spinach and garlic powder together creates a savory, earthy filling, while garlic powder and red pepper flakes bring a warm, slightly spicy kick.

Remember, cooking is all about personal taste, and these optional ingredients provide the flexibility to make your stuffed shells exactly how you like them. Whether you prefer a comforting, mildly seasoned version or a flavor-packed, spicy one, these additions give you the freedom to create a dish that’s uniquely yours.

How to Achieve the Perfect Creamy Texture

The creamy texture of the chicken stuffed shells filling is what makes each bite indulgent and comforting. Achieving that perfect balance of creaminess—neither too thick nor too runny—requires careful selection and mixing of ingredients. Here’s how to make sure your filling turns out luxuriously smooth and velvety, creating the ideal texture for your stuffed shells.

1. Choose the Right Cheese for Creaminess

The foundation of a creamy filling lies in the cheese you use. While ricotta is the base cheese for the filling, it’s important to pair it with other creamy cheeses to achieve that perfect consistency. Here’s a breakdown of the cheeses to use:

  • Ricotta: This is the core cheese for the creamy filling, providing a soft, smooth texture. For the best results, use whole-milk ricotta instead of part-skim. The fat content in whole-milk ricotta adds richness and a smoother texture.
  • Mozzarella: Adding shredded mozzarella introduces a stretchiness and creaminess that melts beautifully with the other cheeses. Be sure to use fresh mozzarella for a more melt-in-your-mouth texture.
  • Cream Cheese: If you’re aiming for an ultra-creamy filling, cream cheese is a great addition. It melts seamlessly and offers a silky texture. A small amount (about 4 oz) can be added to the mixture for extra smoothness without overpowering the other flavors.

2. Incorporate a Creamy Liquid

To help the cheeses come together smoothly, adding a bit of a creamy liquid can enhance the filling’s texture. This can prevent it from being too dry or clumpy. Here are some options:

  • Heavy Cream or Half-and-Half: Adding a splash of heavy cream or half-and-half makes the filling extra smooth and rich. Start by adding a tablespoon or two, then mix to see if the consistency becomes silkier. Be careful not to add too much—just enough to help the filling blend together without becoming too soupy.
  • Milk: If you prefer a lighter option, you can use regular milk instead of heavy cream. It will still help thin the mixture, but it won’t create the same level of richness. Milk works well if you want a creamier filling without it being overly indulgent.

3. The Right Mixing Technique

Achieving a creamy texture is not only about the right ingredients—it’s also about how you mix them. The goal is to incorporate all the ingredients without overworking the mixture or introducing too much air. Here are some tips:

  • Fold, Don’t Stir: When mixing the shredded chicken with the ricotta and other cheeses, use a folding technique rather than stirring vigorously. Folding ensures that the cheeses blend smoothly without breaking up the chicken pieces too much. Stirring can lead to a denser, more compact filling, while folding keeps the texture light and creamy.
  • Use a Rubber Spatula: A rubber spatula is ideal for folding the mixture, as it allows you to gently incorporate the ingredients and scrape down the sides of the bowl to ensure everything is evenly combined. Avoid using a whisk, which can cause the cheese to separate or become too airy.

4. Balance the Seasonings and Cheese

Seasonings and herbs not only contribute flavor, but they also help in creating a creamy filling by enhancing the depth of the cheese mixture. Over-seasoning can cause the filling to feel uneven or too rich, so it’s essential to strike the right balance. Here are some tips:

  • Italian Seasoning: A blend of oregano, basil, and thyme enhances the creamy texture by adding flavor depth without disrupting the smoothness of the cheese.
  • Salt and Pepper: Season carefully with salt and pepper. Too much salt can affect the texture by making the filling watery, while too much pepper can add an uneven texture due to its graininess. Taste as you go and add small amounts at a time.

5. Avoid Overcooking the Filling

Overcooking the filling, especially after it’s been assembled in the shells, can cause it to dry out and lose its creamy texture. While it’s important to bake the shells until they’re hot and bubbly, you want to avoid leaving them in the oven for too long. Here’s how to maintain that creamy consistency:

  • Cover the dish with foil: When baking the stuffed shells, cover the dish with aluminum foil for the first 20 minutes. This helps the filling retain moisture and prevents it from drying out. You can uncover the dish in the last 10 minutes to allow the cheese to brown and become bubbly on top.
  • Check for doneness: When the shells are baked, the filling should be hot, gooey, and creamy. If you feel that the filling has hardened too much, add a little more cream or milk, and return it to the oven for a few minutes.

6. Let the Filling Rest Before Stuffing

Letting the filling rest for a few minutes before stuffing the pasta shells can help the cheeses settle and come together into a creamy consistency. This short resting time allows the cheeses to meld and smooth out, preventing them from being too runny when stuffed into the pasta shells.

Stuff the Shells and Assemble the Dish

How to Properly Fill the Pasta Shells with the Mixture

Stuffing jumbo pasta shells with a creamy filling might sound straightforward, but getting them just right requires a little care and attention to detail. The key to perfect stuffed shells is ensuring each shell is filled evenly without overstuffing, so it bakes well and doesn’t overflow. Here’s a step-by-step guide on how to properly fill the pasta shells with your creamy chicken mixture.

1. Choose the Right Shells

Before you start stuffing the shells, it’s important to use the right type of jumbo pasta shells. Make sure the shells are large enough to hold a generous amount of filling but not so big that they become unwieldy. Typically, jumbo pasta shells are about 2-3 inches long, which is ideal for stuffing with a hearty filling.

  • Cook the shells al dente: Overcooking pasta shells can make them too soft, which makes stuffing them a bit trickier. Aim to cook the shells until they’re just al dente, or slightly firm to the bite. This ensures the shells hold up well during stuffing and baking.

2. Prepare the Filling

Before you begin filling the shells, make sure your filling is properly prepared. You should have a creamy mixture of chicken, ricotta, mozzarella, Parmesan, and seasonings. The texture of the filling should be thick but spreadable, so it’s easy to stuff into the shells without it oozing out. If your filling is too thick, add a little cream or milk to loosen it up slightly. If it’s too runny, let it sit for a few minutes to thicken.

3. Use a Spoon or Piping Bag for Easy Stuffing

While you can technically use your hands to stuff the shells, a spoon or piping bag will make the process easier and cleaner. Here’s how you can choose the right tool for the job:

  • Spoon: A small spoon or cookie scoop works well for transferring the filling into the shells. The key is to use a spoon with a wide bowl to pick up enough filling at once and stuff it without making a mess.
    • Tip: If you’re using a spoon, try to stuff the shells from both ends, making sure the filling is evenly distributed along the entire length of the shell.
  • Piping bag: If you want to make stuffing the shells even easier, use a piping bag fitted with a large round tip. Transfer the filling into the piping bag, twist the top to seal it, and pipe the filling directly into each shell. This method ensures a uniform amount of filling in each shell, with minimal mess.

4. Stuffing the Shells

Here’s the step-by-step process to stuff your pasta shells properly:

  • Fill each shell generously but not excessively: Take the spoon or piping bag and stuff each shell with a heaping portion of the filling. Be sure to fill the shell all the way to the tips of both ends, but avoid overstuffing it, as this can lead to spilling during baking. You want each shell to be fully filled but still maintain its shape.
    • Tip: Slightly press down on the filling to ensure there are no air pockets, but don’t pack it too tightly, or it may be difficult to bake evenly.
  • Repeat until all shells are stuffed: Continue the process of filling the shells one by one until all of the shells have been stuffed with the chicken and cheese mixture. If you have any leftover filling, you can either stuff a few more shells or use it as a topping for your casserole before baking.

5. Arrange the Stuffed Shells in the Baking Dish

Once your shells are filled, it’s time to arrange them in the baking dish. Make sure your baking dish is large enough to accommodate the shells without overcrowding them. You want the shells to be in a single layer, not stacked on top of each other, so the heat can circulate evenly and cook them properly.

  • Spread a thin layer of sauce on the bottom: Before placing the stuffed shells in the dish, spread a thin layer of marinara or Alfredo sauce on the bottom of the baking dish. This ensures that the shells don’t stick to the dish and that the bottom is flavorful.
  • Place the shells gently in the dish: Arrange the stuffed shells in the baking dish so that they are neatly aligned, with the opening of each shell facing up. This allows the sauce to fill the gaps in the shells and helps them stay upright during baking.
    • Tip: If you’re using a lot of shells, you can layer them in a second row, but make sure they aren’t tightly packed. You want them to have enough room for the sauce to soak into the shells and for the cheese to melt properly.

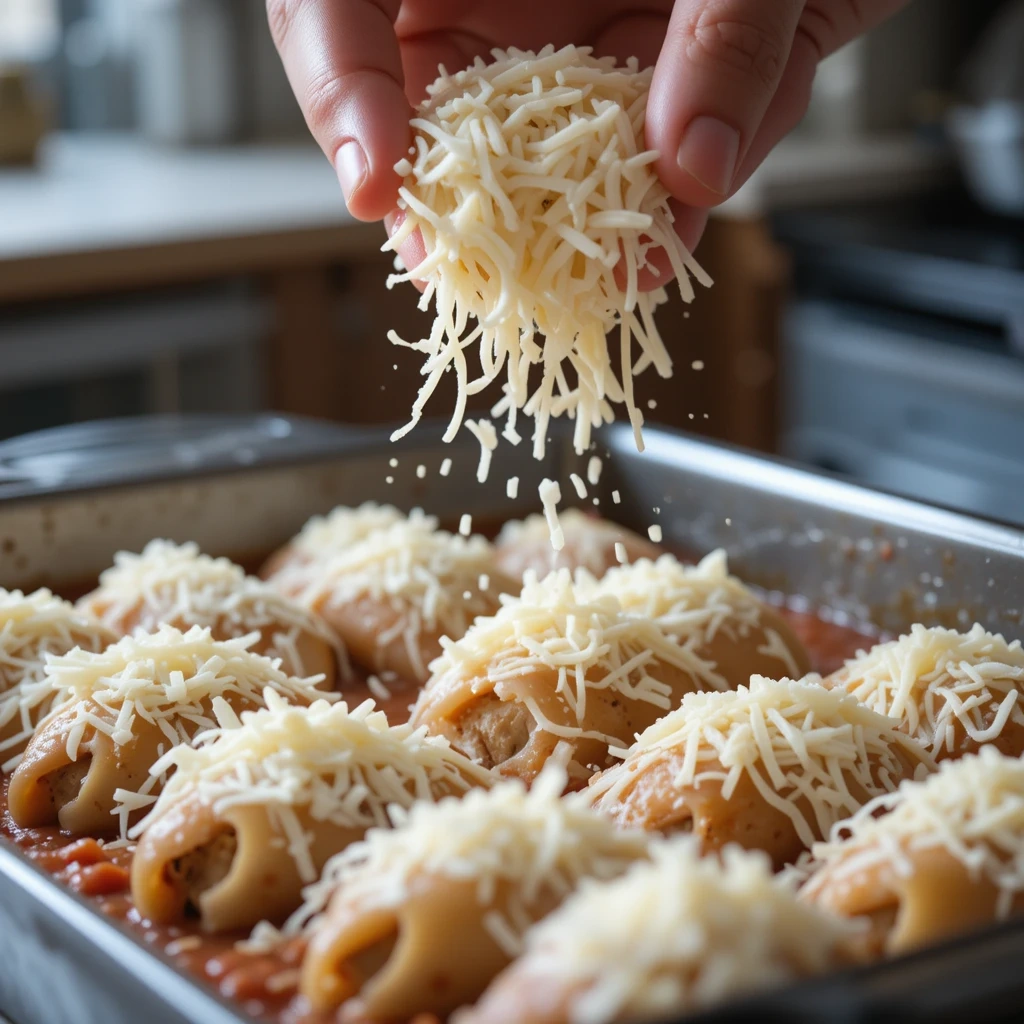
6. Top with Sauce and Cheese

Once all the shells are in the dish, it’s time to add the finishing touches:

  • Add the sauce: Pour the marinara or Alfredo sauce over the stuffed shells. Be sure to cover each shell generously so the sauce infuses into the filling during baking, but avoid drowning the shells in sauce. A few spoonfuls of sauce over each shell should be sufficient.
  • Sprinkle extra cheese: Top the stuffed shells with a generous amount of shredded mozzarella and Parmesan cheese. This will create a golden, bubbly crust on top once baked and add extra creaminess to each bite.

7. Bake and Enjoy

Once the shells are stuffed and topped with sauce and cheese, cover the baking dish with aluminum foil to trap the moisture and prevent the cheese from over-browning. Bake the shells at 375°F (190°C) for about 25 minutes. Then, uncover the dish and bake for an additional 10 minutes to allow the cheese to melt and bubble to perfection.

Arranging the Shells in a Baking Dish

Once you’ve perfectly stuffed your jumbo pasta shells, the next step is arranging them in the baking dish. How you arrange the shells can have a significant impact on how evenly they cook and the overall presentation of the dish. Here’s how to ensure your stuffed shells bake perfectly, with every bite filled with delicious flavor and the right amount of sauce and cheese.

1. Choose the Right Baking Dish

Before you even begin placing the shells, make sure you’ve selected an appropriately sized baking dish. The ideal dish should be large enough to fit all your stuffed shells in a single layer. If the shells are overcrowded, they won’t bake evenly, and the sauce may not seep through the shells properly.

  • Size considerations: For a standard recipe using about 20 to 25 stuffed shells, a 9×13-inch baking dish is usually ideal. If you’re doubling the recipe, you may need a larger dish or two separate dishes. The key is to make sure there’s enough room for the shells to lay flat and not get cramped.
  • Shape of the dish: Rectangular or square baking dishes work well for stuffed shells, but if you don’t have one, any oven-safe dish that allows for even heat distribution will suffice.

2. Start with a Layer of Sauce

Before placing the stuffed shells in the baking dish, start by spreading a thin layer of sauce (either marinara, Alfredo, or your preferred sauce) on the bottom of the dish. This serves a few purposes:

  • Prevents sticking: The sauce creates a non-stick layer that ensures the shells won’t stick to the bottom of the dish during baking. This is especially important with cheese-filled shells.
  • Flavor base: The sauce also helps infuse flavor into the shells as they bake, and it keeps the shells moist while they cook.
  • Tip: You don’t need to drown the bottom in sauce—just a light layer will do. It should be enough to cover the base without pooling.

3. Lay the Shells Flat, Opening Up

When arranging the stuffed shells in the dish, place each one with the open end facing up. This allows the sauce to seep into the pasta and the cheese to melt over the top. The shells will absorb some of the sauce, making each bite extra flavorful. Here’s how to ensure they cook perfectly:

  • Space the shells out: Lay the shells close together but make sure they aren’t too tightly packed. If they are too close, they won’t bake evenly, and the cheese might not melt properly. They should be touching, but there should still be space for heat to circulate between them.
  • Don’t overcrowd: If you’re making a large batch, avoid layering the shells in a stacked formation. Stacking can cause the shells on the bottom to become soggy while the ones on top remain undercooked. Single layers are key to even cooking.

4. Layering More Than One Row

If you need to add more than one row of shells to the baking dish (especially in a larger dish), here’s how to do it effectively:

  • Offset the rows: Place the second row of stuffed shells in the gaps between the shells in the first row. This will ensure that each shell stays upright and gets equal exposure to the sauce and heat. Think of it like fitting puzzle pieces together.
  • Avoid a tight squeeze: Don’t press down too hard on the shells. Let them stay slightly separated to allow for the heat and sauce to circulate around them. If the shells are too packed together, they may become soggy and not cook properly.

5. Add More Sauce and Cheese

After placing the shells in the dish, the next step is to add more sauce and cheese to create that rich, bubbly, golden top that everyone loves.

  • Pour sauce over the shells: Spoon or pour additional sauce over the stuffed shells, making sure each shell is coated with a generous amount. You don’t need to drown them, but the sauce should be visibly present in and around each shell. This will keep the shells moist and flavorful during baking.
  • Top with cheese: Sprinkle a generous amount of shredded mozzarella and Parmesan cheese over the top of the shells. The cheese will melt and create a gooey, irresistible layer on top of the pasta. You can also sprinkle some extra Italian seasoning or dried basil on top for added flavor.
  • Tip: If you like your cheese extra bubbly and golden, you can broil the dish for 1-2 minutes at the end of baking, keeping a close eye to prevent burning.

6. Cover with Foil and Bake

Before placing the baking dish in the oven, cover it with aluminum foil. This step is crucial for two reasons:

  • Prevents drying out: The foil helps lock in moisture, keeping the stuffed shells from drying out while baking. This ensures the filling stays creamy and the pasta retains its texture.
  • Encourages even cooking: By covering the dish, the steam created in the oven will help cook the shells and cheese more evenly, without over-drying or burning the top.

Bake your stuffed shells for about 25-30 minutes at 375°F (190°C). After this time, remove the foil and bake for an additional 10 minutes to allow the cheese to brown and become bubbly.

7. Let the Shells Rest Before Serving

After baking, let the stuffed shells sit for about 5-10 minutes before serving. This resting time allows the flavors to meld together, and it also helps the sauce and cheese set, so they won’t spill out when you serve them. It’s tempting, but resist the urge to dive in right away—trust us, they’ll taste even better once they’ve had a moment to cool down slightly.

Choosing Between Marinara Sauce, Alfredo Sauce, or a Mix of Both

When it comes to preparing your chicken stuffed shells, one of the key decisions is choosing the right sauce to complement the cheesy, savory filling. The sauce not only affects the flavor but also contributes to the overall texture and richness of the dish. Here’s a guide to help you decide between marinara sauce, Alfredo sauce, or a combination of both.

1. Marinara Sauce: A Classic Choice

Marinara sauce is the quintessential choice for many Italian pasta dishes, and it’s no different when it comes to stuffed shells. This tomato-based sauce offers a tangy, herb-infused flavor that perfectly balances the richness of the cheese and chicken filling.

  • Flavor profile: Marinara sauce is typically made with tomatoes, garlic, onions, and herbs like basil and oregano, which give it a fresh, savory taste. It’s light, making it a great option if you want the filling and pasta to shine without being overwhelmed by a heavy sauce.
  • When to choose marinara: If you’re aiming for a more traditional Italian-style stuffed shells recipe, marinara is the go-to choice. It pairs well with the chicken and adds a delicious acidity to balance out the richness of the cheese. Marinara is also perfect if you prefer a slightly lighter, fresher flavor profile in your dish.
  • Tip: For added depth, you can spice up the marinara by adding a pinch of red pepper flakes or some finely chopped fresh basil or parsley.

2. Alfredo Sauce: Creamy Comfort

Alfredo sauce is a rich, creamy white sauce made from butter, cream, and Parmesan cheese. If you’re craving a heavier, more indulgent dish, Alfredo sauce is an excellent choice. The creaminess of the sauce complements the cheesy filling inside the stuffed shells, resulting in a decadent and comforting meal.

  • Flavor profile: Alfredo sauce is buttery and silky smooth with a mild cheesy flavor. The creaminess pairs wonderfully with the chicken and provides a satisfying contrast to the al dente pasta.
  • When to choose Alfredo: If you’re in the mood for a richer, more decadent dish, Alfredo sauce is the way to go. It works well if you’re looking for a creamy texture throughout the dish. This option is especially popular when stuffed shells are served as a hearty dinner or for special occasions.
  • Tip: You can add a touch of garlic powder or freshly grated nutmeg to the Alfredo sauce for extra depth of flavor.

3. Mixing Marinara and Alfredo: The Best of Both Worlds

Can’t decide between the two? You don’t have to! Mixing both marinara and Alfredo sauce is a delicious way to combine the best of both worlds—tangy tomato goodness and rich, creamy texture. This combo provides a balanced sauce that’s flavorful, not too heavy, and just the right amount of richness.

  • Flavor profile: The acidity of the marinara balances out the creaminess of the Alfredo sauce, creating a harmonious blend of fresh and indulgent flavors. The result is a layered flavor experience with each bite offering a little something different.
  • When to choose a mix: If you’re looking for a well-rounded sauce that brings the best of both flavors, mixing marinara and Alfredo is the way to go. This option is perfect for those who love the classic flavors of marinara but want the comfort and richness of Alfredo sauce without it overpowering the dish.
  • Tip: For an even more complex sauce, you can experiment with adding a small amount of Parmesan cheese to the marinara sauce or a little Italian seasoning to the Alfredo for an extra layer of flavor.

4. Tips for Blending Sauces

If you choose to mix the two sauces, here are a few tips to ensure the best results:

  • Proportion: The key to a good blend is getting the right ratio of marinara to Alfredo. A 2:1 ratio (two parts marinara to one part Alfredo) works well for most stuffed shells recipes. This way, you get the brightness of the marinara but still the richness of the Alfredo without it being too heavy.
  • Layering the sauces: If you prefer, you can layer the sauces in your baking dish instead of blending them together. For example, you can spoon some marinara sauce over the stuffed shells, then add a layer of Alfredo sauce before baking. This allows you to have distinct layers of flavor in each bite.
  • Adjust the thickness: If the mix feels too thick, you can thin out the combined sauces with a small amount of milk or cream. On the other hand, if it’s too runny, let it cook a little longer to thicken up.

Bake to Perfection and Serve

Baking Time and Temperature for Perfectly Cheesy Chicken Stuffed Shells

Check out this High-Protein Mac and Cheese for Muscle Gains on Cheese & Chocolate! This creamy, cheesy dish is packed with protein to help fuel your workouts while satisfying your cravings. Made with high-protein ingredients, it’s the perfect balance of indulgence and nutrition.

👉 Get the full recipe here: High-Protein Mac and Cheese for Muscle Gains

Baking your chicken stuffed shells to perfection is key to ensuring they come out golden, bubbly, and delicious. The right baking time and temperature can make all the difference between a dish that’s just okay and one that’s absolutely irresistible. Here’s how to get the best results.

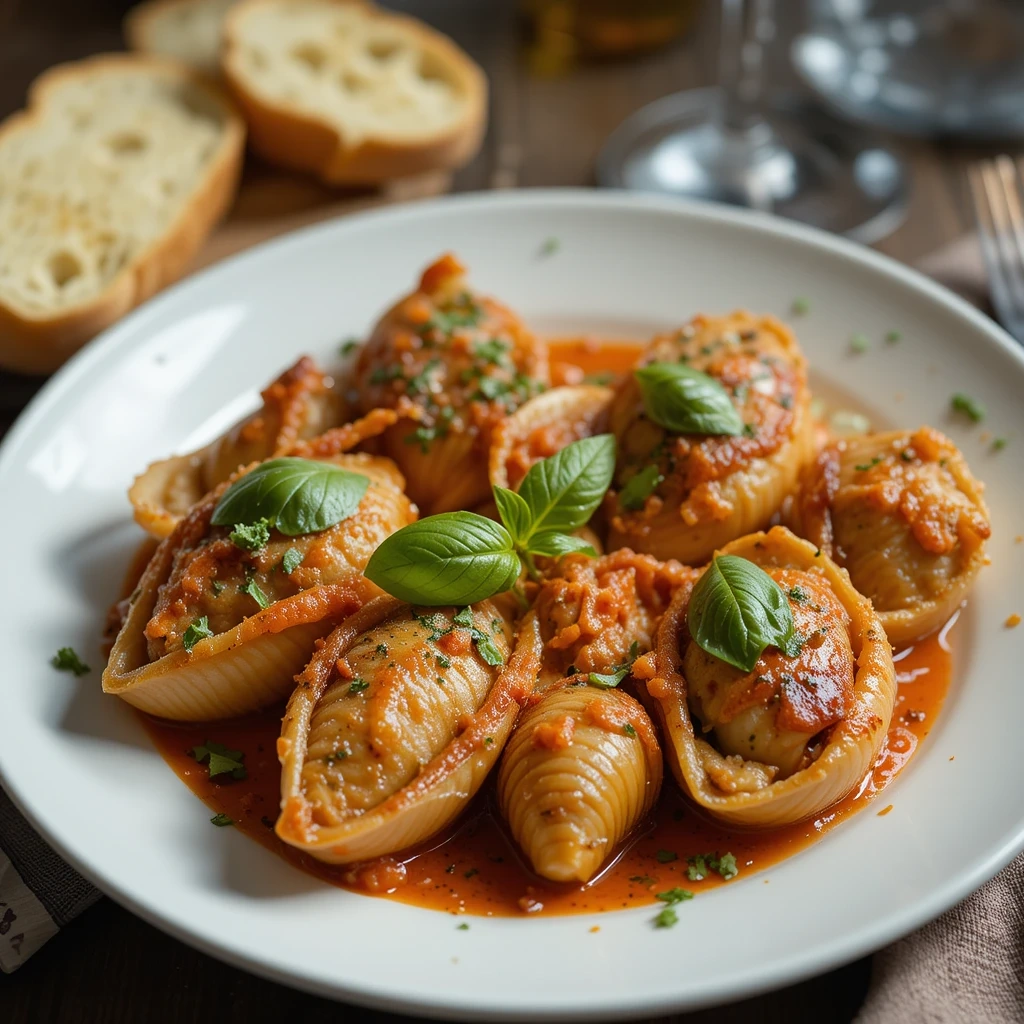
Golden Baked Chicken Stuffed Shells Ready to Serve

1. Preheat Your Oven to the Right Temperature

Start by preheating your oven to 350°F (175°C). This temperature is ideal for baking stuffed shells, as it allows the filling to cook through while also giving the pasta and sauce a chance to develop a beautiful, bubbly texture without overcooking.

  • Why 350°F? This moderate temperature ensures that the stuffed shells cook evenly, allowing the pasta to soften while keeping the sauce from burning. It also allows the cheese to melt into a creamy, gooey layer that will make each bite irresistible.

2. Baking Time: How Long Should You Bake Stuffed Shells?

The typical baking time for chicken stuffed shells is between 25 to 30 minutes, but there are a few things to keep in mind when determining the exact time:

  • Covered with foil: If you’ve covered your stuffed shells with foil to keep them moist during the baking process, you can bake them for 25 minutes. The foil helps to trap steam, ensuring that the shells stay soft and the filling stays moist.
  • Uncovered: After 25 minutes, remove the foil and let the shells bake for an additional 5 to 10 minutes without the foil. This allows the cheese on top to turn golden and bubbly, creating that irresistible crispy, cheesy topping.
  • Watch for bubbling: A good sign that your stuffed shells are perfectly baked is when the sauce starts bubbling around the edges of the baking dish. The cheese should be melted, slightly golden, and bubbly, creating a delicious crust on top.

3. Checking for Doneness: How to Know When the Stuffed Shells Are Ready

To ensure your chicken stuffed shells are perfectly cooked, here’s what to look for:

  • Cheese texture: The cheese should be melted and gooey with a golden-brown color. If it’s still too white or firm, they may need a few extra minutes in the oven.
  • Filling temperature: If you’re unsure whether the filling is fully cooked, you can use a kitchen thermometer to check the internal temperature. The filling should reach at least 165°F (74°C) to ensure the chicken is fully cooked.
  • Sauce bubbling: When the sauce around the shells is bubbling and the edges of the pasta are slightly crispy, you’ll know your stuffed shells are ready to come out.

4. Letting Your Stuffed Shells Rest After Baking

After removing the stuffed shells from the oven, it’s important to let them rest for about 5 minutes before serving. This allows the cheese to set, making it easier to cut and serve without the filling spilling out.

  • Why rest? Resting gives the cheese and sauce time to thicken slightly, making it easier to serve in perfect, neat portions. It also allows the heat to evenly distribute throughout the dish.

5. Optional Broiling for a Crispier Top

If you love a crispy, golden-brown top to your stuffed shells, you can use the broiler to finish them off after they’re fully baked.

  • How to broil: Place the baking dish under the broiler for about 2-3 minutes, keeping a close eye on them. The top will quickly crisp up, giving your stuffed shells a beautiful, slightly crunchy texture.
  • Tip: Be careful not to overdo it while broiling, as the cheese can burn quickly under high heat. Always keep the oven door slightly open and watch carefully for the desired golden color.

Letting It Rest Before Serving for the Best Flavor

One of the most important steps in preparing a delicious batch of chicken stuffed shells is the seemingly simple yet essential practice of letting the dish rest before serving. While it may seem tempting to dive right in as soon as the stuffed shells come out of the oven, this brief waiting period is key to achieving the best flavor, texture, and overall presentation.

1. Why Let Your Chicken Stuffed Shells Rest?

When you first pull the stuffed shells from the oven, the dish is hot, and the cheese is likely still melting, bubbling, and a bit loose. Allowing the stuffed shells to rest for 5-10 minutes gives several benefits:

  • Set the cheese: As the dish cools slightly, the melted cheese and sauces have time to firm up and set. This makes it easier to slice and serve without the filling spilling out. If you cut the stuffed shells too early, the cheese might ooze too much, creating a mess and making it harder to serve in neat portions.
  • Allow flavors to meld: Resting allows all the flavors to meld together, especially the herbs, cheeses, and marinara (or Alfredo sauce). The heat from baking can sometimes cause the ingredients to separate or be too intense. When you let the shells rest, the flavors come together more cohesively, allowing the dish to reach its full flavor potential.
  • Improved texture: Resting the stuffed shells helps improve the texture of the pasta and the filling. The pasta can absorb some of the sauce and filling, making it more tender. It also helps prevent the pasta from becoming overly soggy if there’s too much moisture.

2. How Long Should You Let It Rest?

While the exact amount of time may vary, 5 to 10 minutes is usually sufficient. During this time, the temperature of the dish will drop slightly, and the cheese will solidify, making it easier to cut and serve. This short resting period also ensures the stuffing has time to redistribute evenly within the shells, avoiding any filling that might be too loose or runny.

  • Tip: Use the resting time to prepare a side salad, set the table, or grab a drink—anything to allow your stuffed shells to rest and get ready for the best possible presentation.

3. How to Rest the Dish Properly

  • Leave it uncovered: While resting, don’t cover the baking dish with foil or a lid. You want to allow any steam to escape so the dish doesn’t get soggy. Covering it can trap too much moisture, which can negatively affect the texture and prevent the cheese from firming up.
  • Place it on a cooling rack: If possible, place the baking dish on a cooling rack to allow air to circulate underneath. This can help the dish rest more evenly and avoid a soggy bottom.

4. The Right Time for Serving

Once your stuffed shells have rested, they’ll be ready to serve with perfectly set cheese, a balanced, well-married flavor profile, and a more appealing presentation. By allowing the dish to rest, you’ll be able to slice neatly, and each serving will be a true delight.

5. Avoid Over-Resting

While resting your stuffed shells is important, you don’t want to wait too long. If the dish cools down too much, it can become difficult to serve, and the cheese might lose its desired texture. For the best results, serve the dish shortly after the resting period, while the flavors are still fresh and vibrant.

Serving Suggestions: Garlic Bread, Side Salad, or a Drizzle of Extra Cheese

The perfect serving companion can elevate your chicken stuffed shells from a delicious main course to a full, satisfying meal. By pairing your stuffed shells with the right sides or finishing touches, you can create a well-rounded and flavorful dining experience. Here are some ideas to complement your dish and take it to the next level.

1. Garlic Bread: The Ultimate Sidekick

Nothing pairs better with stuffed pasta than the irresistible crunch of garlic bread. The crispy, buttery texture and savory garlic flavor make it a perfect match for the cheesy, saucy stuffed shells. Here’s why:

  • The contrast in texture: The crunchy, golden garlic bread provides a nice contrast to the soft, cheesy filling of the shells. As you scoop up some of the marinara sauce with a piece of garlic bread, you get a perfect bite with both flavor and texture.
  • Complementing the flavors: Garlic bread has just the right amount of garlic, butter, and herbs to complement the rich flavors of the stuffed shells. It enhances the overall Italian theme and brings out the flavors of the marinara or Alfredo sauce.
  • Variety of options: You can make garlic bread in many forms, whether it’s a traditional loaf, breadsticks, or even cheesy garlic bread. Each option gives you a way to customize the meal, depending on the preferences of your guests.

2. Side Salad: Freshness to Balance the Richness

A fresh side salad is an ideal choice to balance the richness of chicken stuffed shells. The lightness of a salad contrasts beautifully with the hearty, cheesy pasta. Here are some salad ideas to consider:

  • Simple green salad: A classic green salad with lettuce, cucumbers, tomatoes, and a light vinaigrette can provide a refreshing contrast to the creamy, cheesy stuffed shells. The acidity from the vinaigrette helps cut through the richness of the dish.
  • Caesar salad: If you prefer something with a bit more flavor and texture, a Caesar salad with crisp romaine lettuce, crunchy croutons, and creamy Caesar dressing adds an extra layer of indulgence that pairs nicely with the stuffed shells. The tangy dressing complements the cheesy filling of the shells.
  • Spinach and arugula salad: For a more unique salad, you could opt for a spinach and arugula salad with a balsamic glaze. The peppery taste of the arugula and the slight bitterness of spinach provide a nice contrast to the sweetness of the marinara sauce.

3. A Drizzle of Extra Cheese: For Cheese Lovers

If you’re someone who can’t get enough cheese, then finishing your chicken stuffed shells with a drizzle of extra cheese is the way to go. Here’s how you can enhance the cheesy goodness of the dish:

  • Parmesan: A light drizzle of freshly grated Parmesan cheese over the top of the baked stuffed shells before serving can add a touch of salty, nutty flavor that beautifully complements the richness of the mozzarella and ricotta.
  • Mozzarella or provolone: For an even cheesier dish, you could top the shells with a little more mozzarella or provolone cheese and pop it back under the broiler for a minute to melt and crisp the cheese. This extra layer adds both texture and flavor.
  • Cheese sauce: For an indulgent twist, drizzle a bit of cheese sauce over the stuffed shells just before serving. It makes for a creamy, luxurious addition that cheese lovers will enjoy.

4. Optional Extras: Add Some Heat or Herbs

If you want to further personalize your dish, consider adding some extra seasonings or toppings that can elevate the flavor profile:

  • Red pepper flakes: A light sprinkle of red pepper flakes can add a bit of heat and spice that cuts through the richness of the stuffed shells. This is perfect for those who enjoy a little kick with their Italian meals.
  • Fresh basil or parsley: Top your stuffed shells with fresh basil or parsley for a burst of freshness and color. This adds a fragrant note and a pop of green to the dish, giving it a more vibrant appearance and enhancing its flavors.
  • Olives or capers: For a Mediterranean twist, you could also add some sliced olives or capers as a garnish. Their briny taste offers a nice balance to the creamy and cheesy filling of the shells.

5. Pairing with a Drink

To make the meal even more complete, consider pairing your stuffed shells with a drink that complements the rich flavors:

  • Wine: A medium-bodied red wine, such as Chianti or Sangiovese, pairs beautifully with the rich, savory flavors of the stuffed shells. The acidity in the wine cuts through the cheese and enhances the overall taste.
  • Non-alcoholic options: If you’re not drinking wine, a sparkling water with a wedge of lemon or a cold iced tea offers a refreshing and slightly tart complement to the creamy, cheesy dish.

Conclusion

Recap the 5 Easy Steps to Making the Best Chicken Stuffed Shells Recipe

If you’ve been following along, you now know the 5 simple steps to make delicious chicken stuffed shells that will impress your family or guests every time! Let’s quickly recap the process:

  1. Boil the pasta shells: First, cook the jumbo pasta shells in salted water until they are al dente, making sure not to overcook them so they don’t tear during the stuffing process.
  2. Prepare the filling: Mix shredded chicken with ricotta, mozzarella, Parmesan, and Italian seasoning to create a creamy, flavorful filling. Customize it with extra spices, herbs, or even vegetables to make it your own.
  3. Stuff the shells: Carefully fill each cooked pasta shell with your chicken and cheese mixture, making sure not to overstuff to avoid spills.
  4. Arrange in a baking dish and top: Place the stuffed shells in a baking dish, cover with your choice of sauce (like marinara or Alfredo), and sprinkle more cheese on top. The sauce and cheese will create a gooey, melty topping while baking.
  5. Bake and serve: Bake the stuffed shells at 375°F until the cheese is melted and golden brown. Let them rest for a few minutes before serving to allow the flavors to set.

Encourage Readers to Experiment with Different Sauces and Fillings

Now that you’ve got the basics down, don’t be afraid to get creative with your chicken stuffed shells recipe! There are so many delicious variations you can try, so feel free to experiment with different combinations of sauces and fillings to make the dish your own.

  • Sauce alternatives: If you love a richer flavor, swap out marinara for a creamy Alfredo sauce or a mix of both. A tangy pesto sauce can add an exciting twist, or even a white wine cream sauce for a more gourmet option.
  • Filling variations: While the classic chicken and cheese filling is unbeatable, try adding vegetables like spinach, mushrooms, or zucchini for added texture and flavor. For a heartier filling, you could add sausage or even ground beef to the chicken mixture. If you prefer a spicy kick, consider adding a bit of red pepper flakes or a layer of jalapeños.

Don’t hesitate to adjust ingredients based on what’s in your pantry or the preferences of your family. There’s no wrong way to make stuffed shells—just make sure to keep that cheesy, creamy goodness in the mix!

Call-to-Action: Try This Recipe and Let Us Know How It Turns Out in the Comments!

We’d love to hear how your chicken stuffed shells turn out! Whether you follow the recipe exactly or add your own special twist, we want to know what you think. Try this recipe today, and don’t forget to let us know how it turns out in the comments below. Your feedback helps others discover new ways to enjoy this comforting dish. Happy cooking!

1 thought on “5 Easy Steps to Make the Best Chicken Stuffed Shells Recipe”

Leave a Comment